31
Plane6 Screens -
Step 2:
Data Collection
In
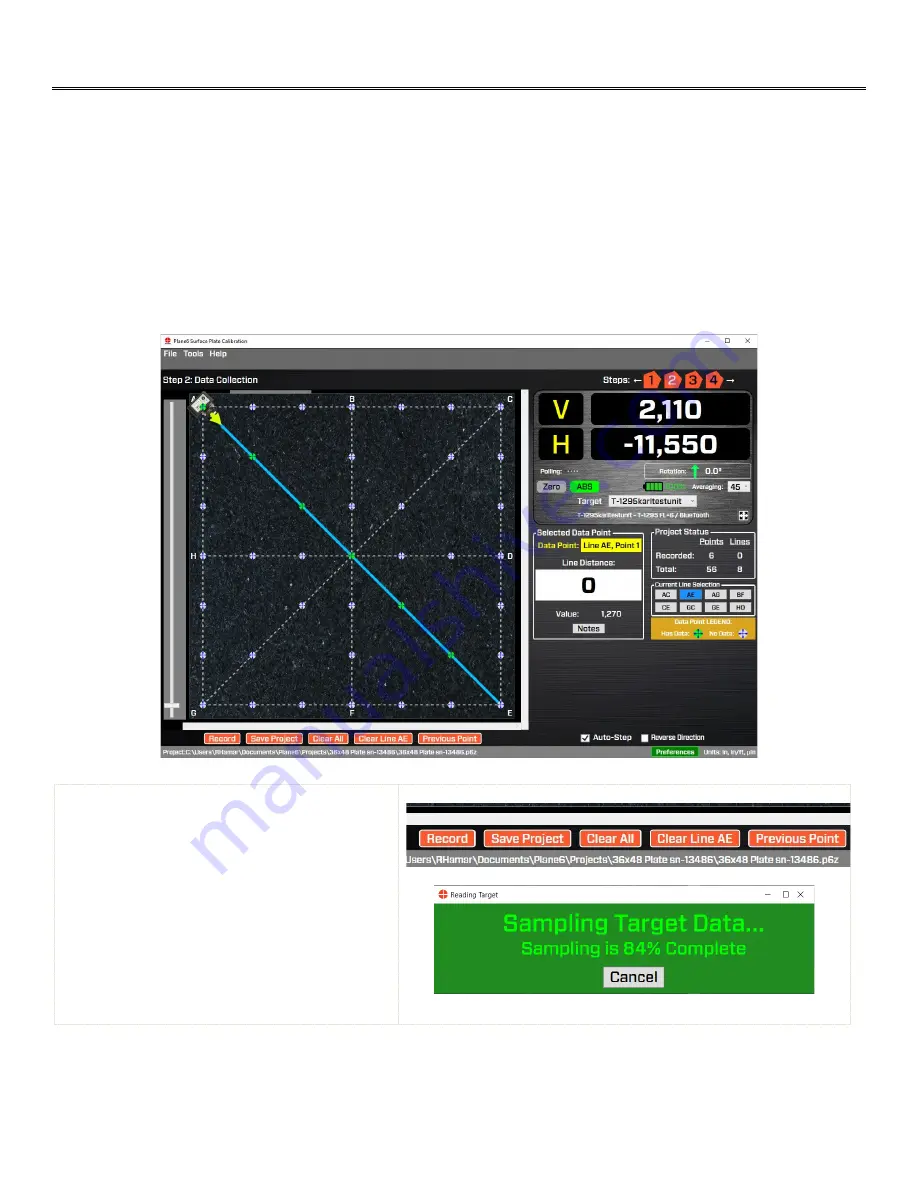
Step 2: Data Collection
, the flatness data is recorded. The screen uses a predetermined sequence of the recording of
each line segment. When setting up the laser, put should be placed at the point where the target icon is located and
pointed in the direction of the arrow (see more information below under L-703SP - How It Works
Page 37
).
Plane6 will show the dimension on the straight-edge ruler for the next point and will show the line segment and point
number that is going to be recorded. After a data point is recorded, the point-location icon will turn green indicating it has
recorded data.
After recording the last point for a given line segment, Plane6 will move the target icon to the next line segment which
takes the least amount of setup time.
What the Buttons Do
Record
– click
Record
or press the spacebar to
record the data point. After pressing
Record
, a
window will open and display how many
samples are being recorded and will close after
the sampling is done. The number of samples is
changed by changing the
Averaging
in the
display area – see below.
Note
: when first hitting record, Plane 6 pauses for 2
seconds to let the readings settle.
Also if the laser is
blocked during sampling, Plane6 will automatically
restart the data taking.
Содержание L-703SP
Страница 1: ......
Страница 54: ...50 An example on how to do the Math to get the exact flatness values...
Страница 55: ...51 Plane6 Sample Report...


