❏
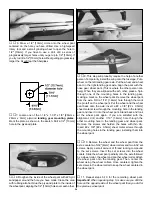
8. When you are satisfied with the placement of the cowl,
drill two 1/16" [1.6mm] holes in each side of the cowl, drilling
into the step area of the fuselage. Remove the cowl and drill
through the holes in the cowl with a 3/32" [2.4mm] drill bit.
Install one of the #2 x 3/8" [#2 x 9.5mm] sheet metal screws
into the four holes in the fuselage. Then, remove the screws.
Put a small drop of thin CA into the four holes. After the glue
has cured, install the cowl with four #2 x 3/8" [#2 x 9.5mm]
sheet metal screws and four #2 flat washers.
❏
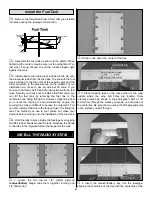
9. Cut holes in the cowl for the glow plug access, needle
valve and the exhaust outlet. For an exhaust extension to
get the exhaust out of the cowl, we used the top portion of
a Hobbico exhaust extension (HCAZ2180). Simply cut it to a
length just long enough to clear the cowl. Because the
extension is flexible, you will still be able to slide the cowl off
and on without interference from the extension.
❏
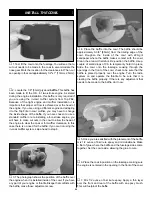
10. Install the appropriate propeller for your engine and
the spinner. That’s about it. Take some time to go through
the next few steps and the model is ready to fly!
❏
1. Turn on the transmitter and receiver and center the
trims. If necessary, remove the servo arms from the servos
and reposition them so they are centered. Re-install the
screws that hold on the servo arms.
❏
2. With the transmitter and receiver still on, check all the
control surfaces to see if they are centered. If necessary,
adjust the clevises on the pushrods to center the control
surfaces.
❏
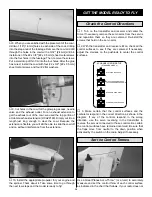
3. Make certain that the control surfaces and the
carburetor respond in the correct direction as shown in the
diagram. If any of the controls respond in the wrong
direction, use the servo reversing in the transmitter to
reverse the servos connected to those controls. Be certain
the control surfaces have remained centered. Be sure that
the flaps move from neutral to the down position when
activated by the switch on the radio. Adjust if necessary.
Use a Great Planes Accu-Throw
™
(or a ruler) to accurately
measure and set the control throw of each control surface
as indicated in the chart that follows. If your radio does not
Set the Control Throws
CARBURETOR WIDE OPEN
RUDDER MOVES RIGHT
LEFT AILERON MOVES DOWN
RIGHT AILERON MOVES UP
ELEVATOR MOVES UP
4-CHANNEL
TRANSMITTER
(STANDARD MODE 2)
4-CHANNEL RADIO SETUP
TRANSMITTER
4-CHANNEL
TRANSMITTER
4-CHANNEL
TRANSMITTER
4-CHANNEL
Check the Control Directions
GET THE MODEL READY TO FLY
30
Содержание Lancair ES
Страница 40: ......


