receiver and for the flaps to be plugged into another slot in
your receiver. You may have a computer radio that allows
you to plug the servos into separate slots and then mix them
together through the radio transmitter. If you choose to mix
them with the radio rather than Y-harnesses, refer to the
instructions for your particular brand of radio.
❏ ❏
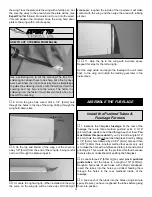
2. Attach the servo extensions to the aileron and flap
servos. Secure the connectors together using a large piece
of heat shrink tubing, tape or other suitable method. Lay the
servos, receiver and battery on your work bench, placing
the servos just as they will be when installed in the wing.
Remember that you are laying the servos on your bench just
as they will be placed into the bottom of the wing. (Note: You
will not need to install the rubber grommets and eyelets on
the servos for the aileron and flap installation). The servo
arms on the flap servos need to move the same direction.
The aileron servo arms must move opposite one another.
(Note the orientation in the above photograph; remember
you are looking at the bottom of the wing).
❏ ❏
3. Turn your radio system on, allowing the servos to
center. Be sure that all of the radio trims are centered on the
transmitter.
❏ ❏
4. Using the switch or rotary knob that you will be
using to activate the flaps, set the switch to the position that
will bring the flaps into the “up” position (normal flying
mode). Install the servo arms onto the servo with the arm
forward. This will allow the servo to push against the flap
control horn to keep the flap retracted. When the flap switch
is in the “flaps down” position (landing mode) the arm will
rotate in the opposite direction, pulling the flaps down.
Operate the servo using the flap switch to be sure they are
moving the correct way.
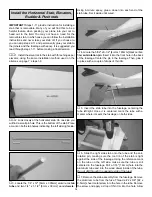
Hint: On many brands of servo
arms you will find that each arm has a small number on it.
Each arm has a slightly different position on the servo spline
once it is installed. You will find it helpful for setting up the
flaps if you use two arms with the same number on it (see
above sketch).
❏ ❏
5. Install the servo arms on the aileron servos, making
sure the arms are positioned as shown in the photograph in
step 2. Using your transmitter, operate the aileron servos
making sure that the arms are moving in directions opposite
of one another. When you are satisfied everything is working
properly, turn off the radio system. Unplug the aileron and
flap servos from the receiver.
❏ ❏
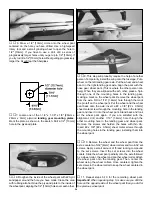
6. Locate the ABS aileron servo cover for the right
wing. Cut out the opening in the cover for the aileron servo
arm. The cut lines for the opening are on the inside of the
cover. Drill a 1/16" hole [1.6mm] in each corner of the
aileron cover.
❏ ❏
7. The side of the aileron servo case that will rest
against the top of the wing inside of the servo bays needs to
be cleaned with rubbing alcohol. Do Not Omit This Step!
This surface must be free of any fuel or oil residue in order
9
Содержание Lancair ES
Страница 40: ......


