105
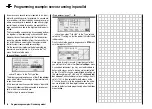
The mixer ratios and mixer directions for the swashpla-
te servos for collective pitch, roll and pitch-axis are set in
the menu ...
»Swashplate mixer«
(page 81)
You will fi nd that they are pre-set to +61% in each case.
If the swashplate does not respond correctly to the stick
movements, the fi rst step is to change the mixer direc-
tions from “+” to “-” if necessary. The second recourse is
to reverse the servo directions in the »
Servo settings
«
menu.
Note:
Please note one important difference in the mx-16s /
mc-19 / mc/mx-22 / mc-22s and mc-24 compared to pre-
vious GRAUPNER mc radio control systems: the fi rst
collective pitch servo and the throttle servo have been
interchanged.
Now move to the menu ...
»Servo settings«
(page 48)
… where you can set up the travels and directions of
rotation of the individual servos. The basic aim here
should be to keep servo travels at +/-100% wherever
possible, as this maintains best possible resolution and
accuracy. Use “Rev.” if necessary to reverse the direc-
tion of rotation of any servo; do check carefully that the
direction you set really is correct. The tail rotor servo, in
particular, must operate in such a way that the nose (!)
of the helicopter moves in the same direction as the mo-
vement of the tail rotor stick.
A glance at the menu ...
»Control settings«
(page 54)
… will show you that transmitter control “7”, i.e. the rota-
ry proportional control CTRL 7, is assigned to the “Lim”
input, whereas all other inputs are programmed to “free”
by default. The “Lim” input serves as
throttle limiter
. It
acts solely on output “6”, to which the throttle servo is
connected.
Just to remind you:
The throttle limiter does not control the throttle servo; it
just limits the travel of this servo in the forward direction,
according to the setting of the throttle limiter. The thrott-
le servo is usually controlled by the collective pitch stick
via the throttle curve or curves you have set. For more
details please see the sections on pages 54 and 79 of
the manual.
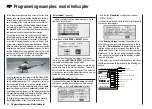
Now select the
ASY
fi eld in the “Travel” column, and in-
crease the value in the highlighted fi eld from 100% to
125%, with the throttle limiter at its forward end-stop.
This ensures that the throttle limiter cannot possibly re-
strict the full throttle travel dictated by the collective pitch
stick when the model is in fl ight.
An additional transmitter control needs to be activated in
the menu ...
»Base settings«
(page 42 ... 46)
Even if you are a beginner to fl ying and are not yet rea-
dy for this, it is advisable at least to defi ne the autorota-
tion switch, so that you have an “emergency cut” switch
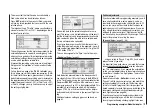
for the motor. This is carried out by selecting the “
Auto-
r
otation
” line: press
SELECT
and move one of the ON
/ OFF switches (SW 1 … 4) to the “ON” setting. On the
right the switch number (in our example “1”) appears.
The autorotation switch should be located at a positi-
on on the transmitter where you can easily reach it wit-
hout letting go of the stick, e.g. above the collective pitch
stick.
Note:
For more information on setting up this “emergency OFF
switch” please refer to the section towards the end of the
right-hand column on the following page.
Another tip:
Please get used to giving all the switches a common
“on” direction; then a quick glance at the transmitter be-
fore fl ying will soon reassure you that all switches are
Programming examples: Model helicopter
Содержание MX-16S
Страница 1: ...1...
Страница 17: ...17...
Страница 31: ...31 Fixed wing models Installation and connections...
Страница 35: ...35 Program description Reserving a new memory...
Страница 47: ...47 Base settings Model helicopter...
Страница 83: ...83 Fail safe...
Страница 89: ...89 Programming examples Fixed wing model...
Страница 109: ...109 Programming examples Model helicopter...
Страница 112: ...112 112...
Страница 116: ...116...


