21
Description of transmitter – Using the system for the fi rst time
21
Note:
You can switch directly to the channel with the lowest
number by pressing the
CLEAR
button.
Press
ENTER
or
ESC
to confi rm your choice, and the
screen changes back to the previous screen page:
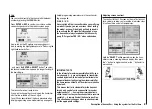
Now switch on the RF module as previously descri-
bed, by moving the highlighted square to “
Yes
” using the
right-hand rocker button …
... and press the
ENTER
or
SELECT
button. The selec-
ted channel number now appears (no longer fl ashing) in
the basic display:
The transmitter is now ready for use.
If you wish to change the channel again, the transmitter
must fi rst be switched off, then on again.
You will fi nd a description of the basic procedure when
initially programming a new model memory on page 34;
helpful programming examples are in the section star-
ting on page 86.
W A R N I N G
Never switch off the transmitter when you are fl ying
a model! If you do, you run a serious risk of losing
the model, as you will be highly unlikely to be able
to re-activate the RF signal quickly enough, since
the transmitter always responds with the security
query “RF signal on YES / NO” when switched on.
Adjusting screen contrast
The contrast of the LCD screen on the mx-16s transmit-
ter is variable, to allow you to read the information clear-
ly in all weathers and at all temperatures.
Hold the “
SELECT
” button pressed in when the trans-
mitter screen is showing the basic display, then press
the “+” button for higher contrast, or the “-” button for lo-
wer contrast:
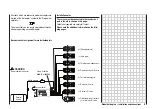
IMPORTANT NOTE
In the interest of maximum possible fl exibility, con-
trol channels 5 … 8 are not assigned to transmitter
controls by default; this also helps to eliminate the
danger of inadvertently using them incorrectly. For
the same reason virtually all the mixers are inactive
by default.
This means that in its standard form the transmit-
ter can only control servos connected to receiver
output sockets 1 … 4 using the primary dual-axis
sticks. In contrast, any servos connected to receiver
sockets 5 … 8 remain fi xed at their centre position.
This situation only changes when you have carried
out the appropriate settings.
Содержание MX-16S
Страница 1: ...1...
Страница 17: ...17...
Страница 31: ...31 Fixed wing models Installation and connections...
Страница 35: ...35 Program description Reserving a new memory...
Страница 47: ...47 Base settings Model helicopter...
Страница 83: ...83 Fail safe...
Страница 89: ...89 Programming examples Fixed wing model...
Страница 109: ...109 Programming examples Model helicopter...
Страница 112: ...112 112...
Страница 116: ...116...


