GRAUPNER GmbH & Co. KG D-73230 KIRCHHEIM/TECK GERMANY
Keine Haftung für Druckfehler. Technische Änderungen vorbehalten! Liability for printing errors excluded. We reserve the right to introduce modifications. Sous réserve de
modifications! Nous ne sommes pas responsables d’éventuelles erreurs d’impression! #0058129
08/2007
17
•
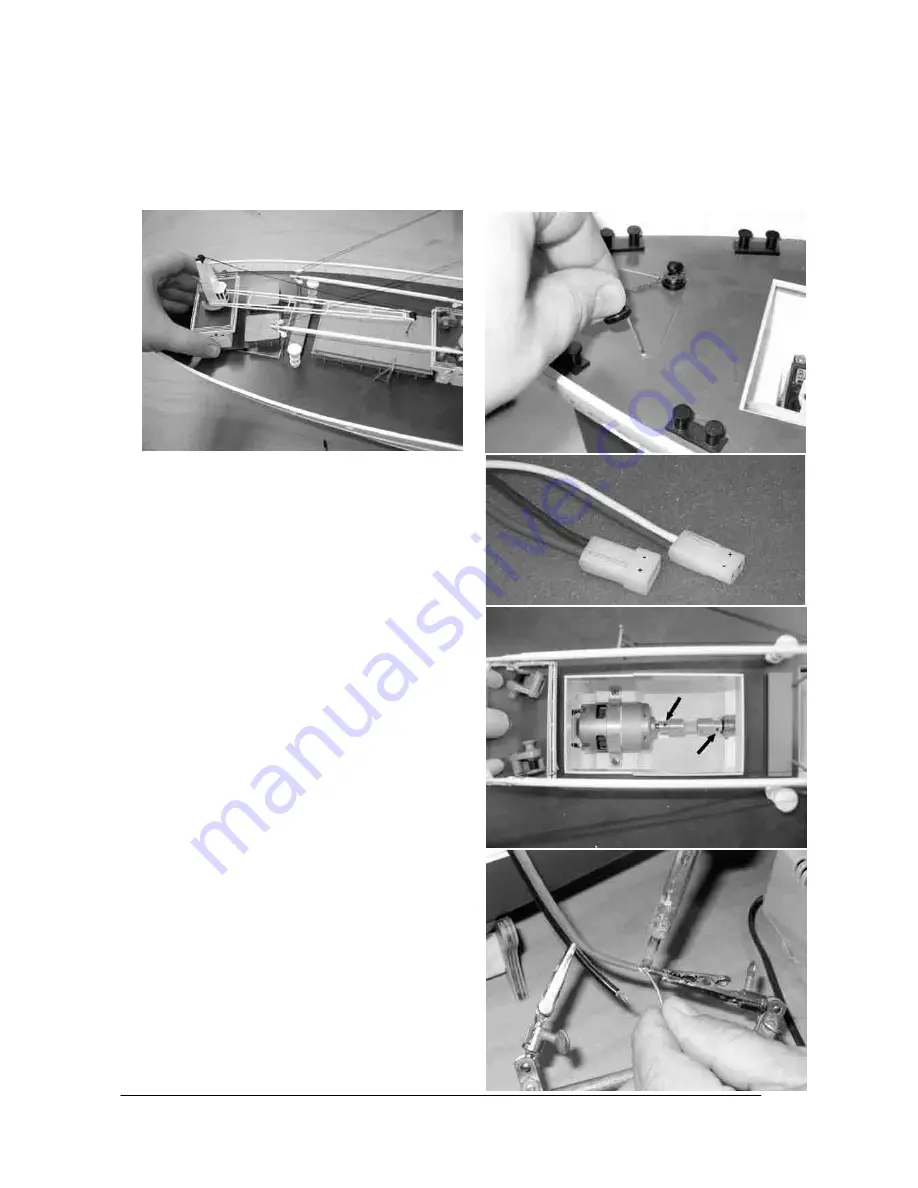
The loading hatches on the ship’s centreline can also be removed, although these are primarily required
only for checking the position of the batteries and maintaining the power system. The long loading hatch
at the stern is also removable, but only after dismantling the derricks located above it. However, this
hatch is not generally required for assembling and operating the model. The rear superstructure
(supporting the small crane) provides access to the rudder servo, and this can also be lifted off. The
hatch above the rudder shaft can be removed after withdrawing the two winches; this gives access to
the rudder system for maintenance.
•
Solder G2 plugs to the wires attached to the motor,
referring to the wiring diagram on page 10 (+ is red,
- is black). Ensure that the motor spins in the
correct direction: when the batteries are connected,
the propeller should rotate in such a way that the
model would be propelled forward.
NOTE
: the
raised lug on the plastic housing of all G2
connectors should always be the positive terminal
(red wire). If you keep consistently to this principle,
your batteries and speed controllers will be
interchangeable, and the system will be protected
against accidental reversed polarity. To make it
easier to solder the plug, it is advisable to use one
of the following methods, as this will reduce the
likelihood of damaging the model with the soldering
iron.
METHOD 1:
remove the motor from the model
by first undoing the grubscrew in the propeller and
withdrawing it. Undo the motor screws in the
retaining bar (don’t remove them completely!) and
withdraw the motor complete with the propeller
shaft. The motor can later be re-installed simply by
reversing the above sequence of operations. Check
that the grubscrews in the shaft coupling are tight
when you do this.
METHOD 2:
use a “third hand” (a
special positionable part-holding tool) to hold the
plug, and use the soldering iron directly inside the
hull (see photo).


