Options: FC5100 Auto Registration Mark Sensor
191
• Load pre-printed media into the plotter. Make sure that the pinch roller is set
outside of the registration mark. If you wish to use the auto-scanning mode, set
the pinch roller to just outside of the registration mark.
• The following menu appears:
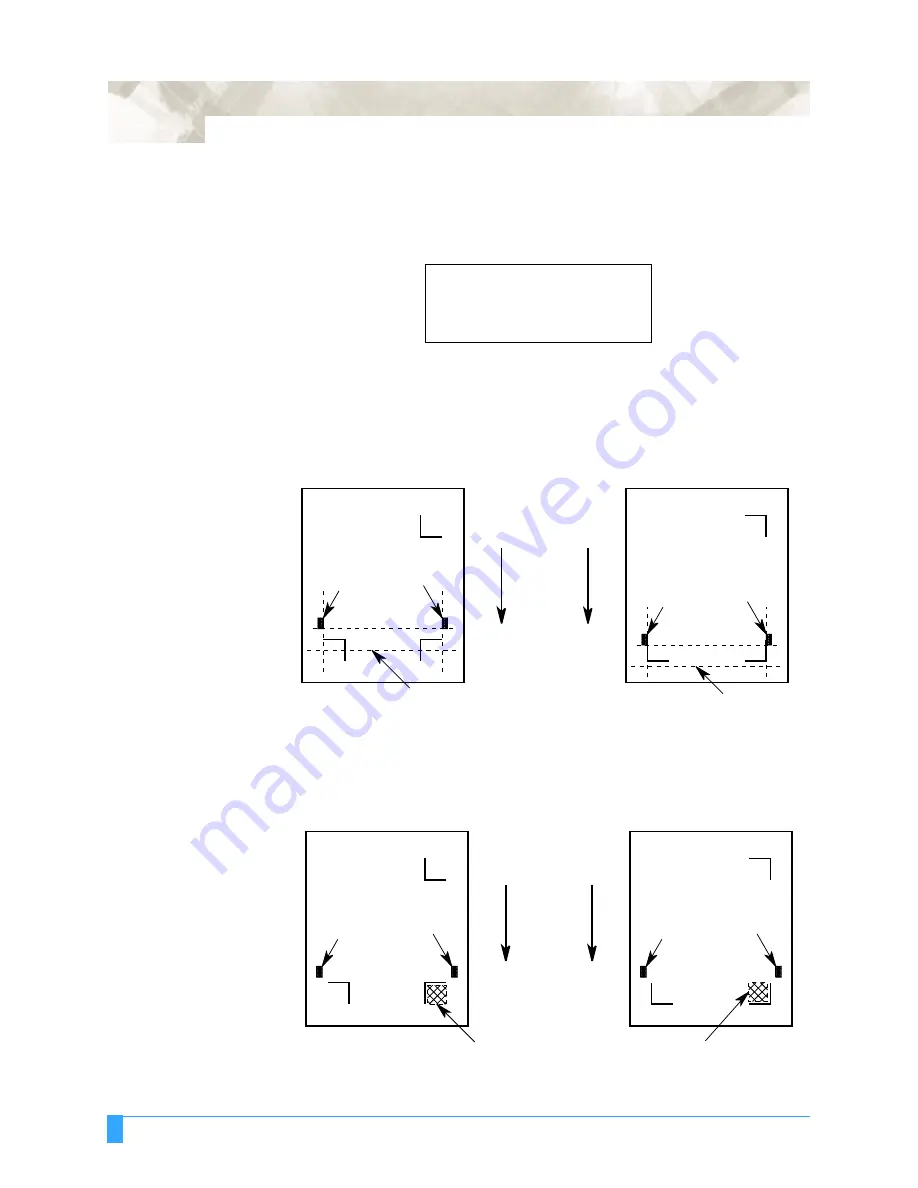
Press the POSITION key to move the pen and media to the area necessary for
scanning the first registration mark. When using AUTO scan mode, move the
media to the first registration mark that is located between the pinch roller and the
pen.
When using MANUAL scan mode, move the pen and the media to the square
area that is created by the first registration mark.
AUTO REG. MARK
*
AUTO>
*
MANUAL>
*
Left pinch
roller
Right pinch
roller
Mark 1
Mark 3
Mark 2
Mark 3
Mark 1
The pen moves
on this line.
Media feed
direction
The pen moves
on this line.
Left pinch
roller
Right pinch
roller
Mark 2
Pattern 1
Pattern 2
Mark 2
Left pinch
roller
Right pinch
roller
Media feed
direction
Move the pen
into this area.
Pattern 1
Mark 1
Mark 3
Move the pen
into this area.
Pattern 2
Mark 1
Mark 3
Mark 2
Right pinch
roller
Left pinch
roller
Содержание FC5100-100
Страница 3: ......
Страница 19: ...Special Precautions Storing the Plotter 18 ...
Страница 27: ...Out of the Box Connecting the Plotter 26 ...
Страница 33: ...Cutters and Holders Blade Length 32 ...
Страница 65: ...Preparing to Cut Returning the Pen Carriage to Origin 64 ...
Страница 107: ...Advanced Functions and Settings RS 232C Serial Interface 106 ...
Страница 125: ...Background Settings Background Settings for HP GL 124 ...


