background image

15-27

 5 

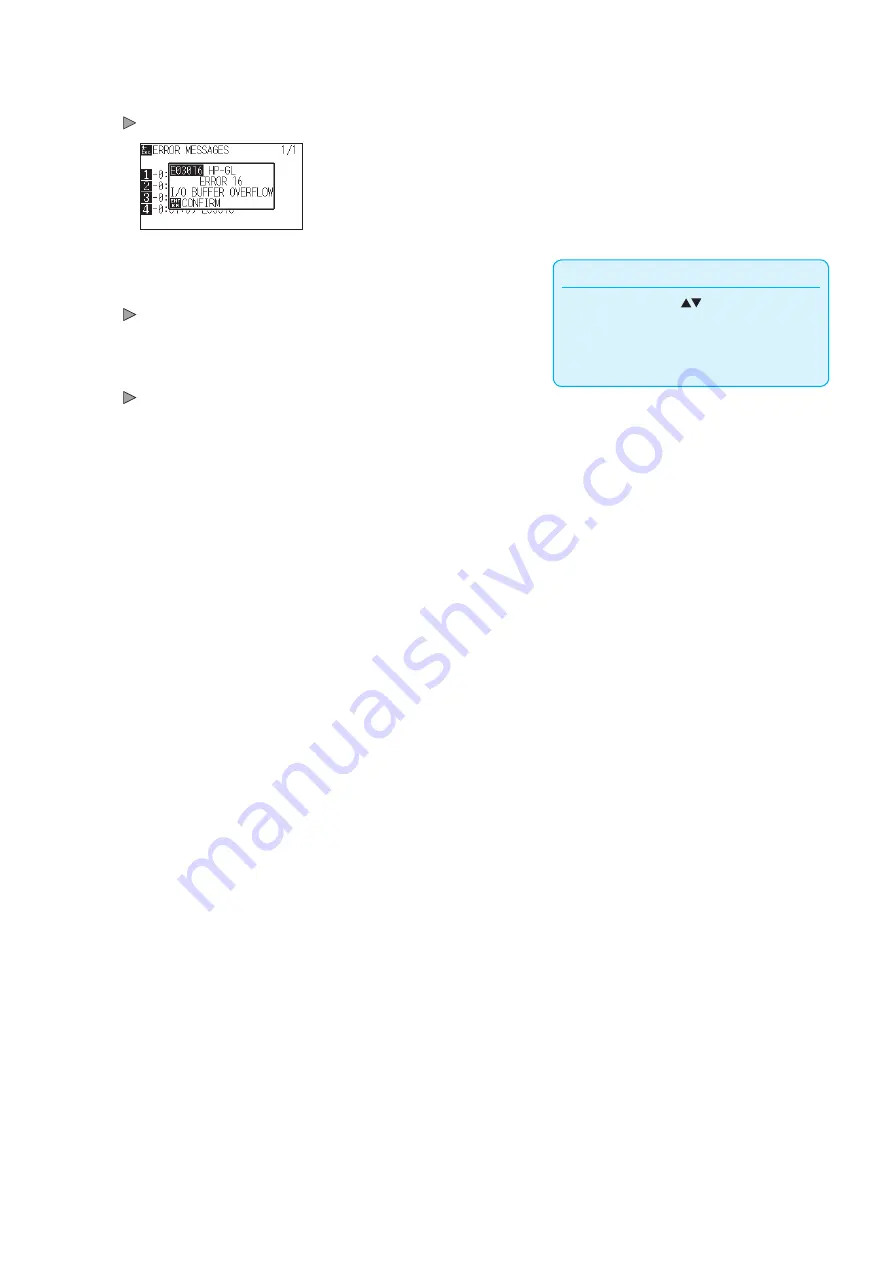
Press the [1] to [4] keys to see the contents of the error.

 Error message corresponding to the pressed key is displayed.

Supplement

Press the POSITION (

) key in the screen of 

step 4 as necessary and repeat steps 5 and 6 
if there are multiple error messages you would 
like to see

 6 

Press the [ENTER] key (CONFIRM) when the error message 
is confirmed.

 It will return to ERROR MESSAGES screen.

 7 

Press the [PAUSE/MENU] key.

 It will return to default screen.

Содержание CE7000 Series

Страница 1: ...CE7000 SERIES CUTTING PLOTTER USER S MANUAL MANUAL NO CE7000 UM 151 ...

Страница 2: ......

Страница 3: ... Corporation 2 The product specifications and other information in this manual are subject to change without notice 3 While every effort has been made to provide complete and accurate information please contact your sales representative or nearest Graphtec vendor if you find any unclear or erroneous information or wish to make other comments or suggestions 4 Not with standing the stipulations in t...

Страница 4: ...the machine and using either the plotting pen or the cutter pen to cut In this instruction manual the word media refers to paper roll media sheet media or marking film Prior to use Be sure to read the attached TO ENSURE SAFE AND CORRECT USE prior to use Otherwise it may cause an unexpected accident or fire ...

Страница 5: ... body Promptly return used blades to the cutter case provided Blade tip For the used blade put it in the supplied cutter blade case and discard them in accordance with the local regulations Cutter plungers The tip consists of a sharp blade Be sure not to extend it too far Moreover when you are not using the cutter plungers make sure that the blade is fully retracted Cutter blade After Mounting the...

Страница 6: ...results be careful not to allow hands hair clothing or other foreign objects to become entangled with the tool carriage or loaded media while theplotter is operating Machine Caution Label The Caution Label is located on the machine Be sure to observe all the cautions on the label Notes on the Stand Be sure to use only the stand designed for the CE7000 Series with your CE7000 Series plotter The use...

Страница 7: ...or plotting may differ depending on how the roll media ended or how the paper roll was stopped About the paper roll This machine uses rolls with an internal diameter of 3 inches or 76 2 mm Mis cuts or plotting deviations may occur if the paper roll is warped or has a larger internal diameter About the use of thin media 70 g m2 or less If the cutting speed is fast there may be paper skewing In that...

Страница 8: ... in accordance with the instruction manual may cause harmful interference to radio communications Operation of this equipment in a residential area is likely to cause harmful interference in which case the user will be required to correct the interference at his own expense USE SHIELDED CABLES To comply with FCC Class A requirements all external data interface cables and connectors must be properl...

Страница 9: ...ion as according to the below illustration CAUTION Frontward and backward the machine please take enough space for operation 500 mm 500 mm 600 mm 600 mm Frontward Seen from above CE7000 40 500 mm 500 mm 600 mm 600 mm Frontward Seen from above CE7000 60 130 160 ...

Страница 10: ... 10 A Table 2 200 V to 240 V Power Supply Voltage Range Plug Configuration Plug Type Supply Voltage Selector Settings Reference Standards Power Cable Europe 250 V 10 A 200 V CEE 7 VII IEC320 CEE13 TYPE H05VV F 3 1 0 mm2 UK 250 V 5 A 200 V BS1363 BS4491 BS6500 TYPE H05VV F 3 1 0 mm2 Australia 250 V 10 A 200 V AS3112 AS3109 AS3191 TYPE OD3CFC 3 1 0 mm2 North America 250 V 15 A 200 V ANSI C73 20 NEMA...

Страница 11: ...accessories V WARNING VI FEDERAL COMMUNICATIONS COMMISSION RADIO FREQUENCY INTERFERENCE STATEMENT VI USE SHIELDED CABLES VI Installation space VII Selecting a power cable VIII Chapter 1 Product Summary 1 1 Checking the Accessories 1 2 Accessories 1 2 Dedicated accessories 1 3 1 2 Nomenclature 1 4 Front view CE7000 40 1 4 Rear view CE7000 40 1 5 Front view CE7000 60 1 6 Rear view CE7000 60 1 7 Fron...

Страница 12: ...2 meters or more 2 25 When feeding long media 2 meters or less 2 26 When narrow media 160 mm or less is used 2 26 Changing the hold down force 2 27 Switching 2 27 Assignmnent 2 28 2 5 About the Default Screen 2 29 2 6 Connecting to the Power 2 30 2 7 How to Use Control Panel 2 31 Indicator lamp 2 31 Operation key 2 31 Reading the screen LCD 2 32 Contents of Operation from MENU Screen 2 34 Simple m...

Страница 13: ...c Operations 3 1 Raise or Lower the Tool 3 2 3 2 Move the Tool Carriage and Media 3 3 Move in steps manually 3 3 Continuously move manually 3 3 Setting step movement distance 3 4 Move away the tool carriage 3 5 Change the cutting condition Condition No 3 6 Reset Revert to the initial state when the power was turned on 3 6 3 3 Setting the Origin Point 3 7 When coordinate axes rotation are set 3 8 W...

Страница 14: ...t the registration mark for adjustment on the media and enter the value 5 20 Setting the registration mark automatic detection 5 23 Setting speed of the registration mark scan 5 25 Chapter 6 Manual Position Adjust 6 1 Outline of Manual Position Adjust 6 2 Setting mark scan mode and number of adjustment marks 6 2 Adjust with 2POINTS 6 2 Adjust with 3POINTS 6 3 Adjust with 4POINTS 6 3 6 2 Manual Pos...

Страница 15: ...tting LANGUAGE SELECTION 10 2 Display Length Unit Setting LENGTH UNIT 10 3 Related to sensor 10 4 Enabling Disabling the media sensors MEDIA SENSOR 10 4 Enabling Disabling the push roller sensors PUSH ROLLER SENSOR 10 5 Related to plotter environment 10 7 Fan suction setting FAN POWER 10 7 Enabling Disabling the beep setting BEEP FOR KEY OPERATION 10 8 Pause key select setting Selecting PAUSE key ...

Страница 16: ...ly Maintenance 14 2 Daily maintenance 14 2 Storing the plotter 14 2 14 2 Replacing Cutter Blade 14 3 14 3 Cleaning the Cutter Pen 14 5 14 4 Cutter Plunger Exchange 14 6 14 5 Setting the Alarm for Degree of Wear BLADE WEAR ALARM 14 7 Chapter 15 Troubleshooting 15 1 Troubleshooting 15 2 When the plotter does not operate after turning the power on 15 2 When it does not work right 15 3 When the Cuttin...

Страница 17: ...2 Options and Supplies A 3 Supplies A 3 Options A 3 A 3 External Dimensions A 4 CE7000 40 A 4 CE7000 60 A 5 CE7000 130 160 A 6 A 4 Menu Tree A 7 Simple mode A 7 Normal mode A 8 A 5 Initial Setting A 17 Simple mode A 17 Normal mode A 18 INDEX I 1 ...

Страница 18: ......

Страница 19: ... 1 Chapter 1 Product Summary This chapter explains how to connect this machine to your computer PRODUCT SUMMARY 1 1 Checking the Accessories 1 2 Nomenclature 1 3 Assembling 1 4 Connecting to the Computer ...

Страница 20: ...tter plunger PHP33 CB09N HS 1 pc Cutter blade CB09UB 1P 1 pc Water based fiber pen adapter PHP31 FIBER Plunger Height adjustment tool 1 set Water based fiber pen KF700 BK 1P 1 pc Cutter blade adjustment magnifier PM CT 001 1 pc Software Activation Code 1 sht In addition various information may be attached Accessories may vary depending on the sales area For details please contact the distributor w...

Страница 21: ...3 Dedicated accessories CE7000 40 CE7000 60 CE7000 130 160 Item Q ty Item Q ty Item Q ty Roll medium tray 1 set Stand 1 set Stand 1 set It depends on the sales area For details please contact your dealer ...

Страница 22: ...lder Holds the cutter pen or plotting pen and moves it up or down Grit roller position guide A roller position guide is affixed to the front side of the rail which shows the position of each grit roller Use these alignment marks as an aid in locating the Push rollers Cutting mat The cutter blade moves on this cutting mat Cutting groove Use this groove to cut out die cut or cross cut Media set leve...

Страница 23: ... sensors Roll medium tray A tray to set media in Roll medium tray guide rail A rail to set the roll media tray in Power switch Used to turn the plotter on and off AC line inlet Inlet where the power cable is connected Accessory case Space for temporary storage of accessories such as cutter blades and cutter plungers ...

Страница 24: ... pen or plotting pen across the media during cutting or plotting Tool holder Holds the cutter pen or plotting pen and moves it up or down Grit roller position guide A roller position guide is affixed to the front side of the rail which shows the position of each grit roller Use these alignment marks as an aid in locating the Push rollers Cutting mat The cutter blade moves on this cutting mat Cutti...

Страница 25: ... view CE7000 60 Power switch AC line inlet Accessory case Media stocker Stopper Stopper Stock shaft Stand Media sensors Power switch Used to turn the plotter on and off AC line inlet Inlet where the power cable is connected Media stocker A stock to set roll media in Stock shaft A roller that takes in roll media Stopper Keeps set roll media in place Stand A stand to put the machine on Accessory cas...

Страница 26: ...l carriage Moves the cutter pen or plotting pen across the media during cutting or plotting Tool holder Holds the cutter pen or plotting pen and moves it up or down Grit roller position guide A roller position guide is affixed to the front side of the rail which shows the position of each grit roller Use these alignment marks as an aid in locating the Push rollers Cutting mat The cutter blade move...

Страница 27: ...eak Media stocker A stock to set roll media in Stock shaft A roller that takes in roll media Stopper Keeps set roll media in place Stand A stand to put the machine on USB interface connector Used to connect the plotter to the computer with a USB interface cable RS 232C interface connector Used to connect the plotter to the computer with a RS 232C interface cable It depends on the sales area For de...

Страница 28: ...nting CE7000 40 1 Insert the roll paper tray into the roll paper tray guide rail according to the media width you want to use Make sure the rollers on the roll media tray are on the outside on both sides Roll medium tray guide rail Roll medium tray Roller ...

Страница 29: ...on the left side of the machine looking from the back and then slide the stock shaft into the media stocker Slide the media stocker in so that it is bookended by the gear and the fixed stopper Make sure the stock shaft touches the roller Change the insertion position of the rear stock shaft according to the roll diameter of the media you want to use Gear Fixed stopper Roller ...

Страница 30: ...et one stopper in the stock shaft Keep the stopper screws slightly loose Stock shaft Stoppers 2 Slide the stock shaft into the media stocker Change the insertion position of the rear stock shaft according to the roll diameter of the media you want to use Roller Stock shaft ...

Страница 31: ...accessories the network LAN cable commercially available product or the RS 232C cable commercially available product to connect Use the cables specified by Graphtec matching the computer that is to be connected RS 232C interface depends on the sales area For details please contact the distributor where you purchased Connection 1 Check that the power switch is turned off the side is pressed down CE...

Страница 32: ...able commercially available product Computer Connection via network LAN interface Computer RS 232C cable commercially available product 9 pin female 9 pin female straight connected cable Connection via RS 232C interface ...

Страница 33: ...g to the Power 2 7 How to Use Control Panel 2 8 Setting Feeding Method 2 9 Pre Feed of Media Paper or Marking Film 2 10 Selecting Tool Condition 2 11 Running Cutting Tests 2 12 About Simple mode 2 12 1 Setting Page Length Simple mode 2 12 2 Origin Point Settings When configuring HP GL Simple mode 2 12 3 GP GL Step Size Simple mode 2 12 4 Display Language Settings Language Simple mode 2 12 5 Displa...

Страница 34: ...ifferent plungers to suit the diameter of the cutter blade to be mounted the φ0 9 mm cutter plunger is provided as a standard accessory Be sure to mount the cutter blade in the corresponding cutter plunger CAUTION To avoid bodily injury handle cutter blades with care PHP33 CB09N HS PHP33 CB15N HS Cutter blade Plunger Blade length adjustment knob Plunger cap Blue For φ0 9 mm diameter blades Red For...

Страница 35: ... PHP33 CB09N HS PHP33 CB15N HS Please fully insert the cutter blade straight into the plunger cap If the cutter blade cannot be inserted straight please insert the cutter blade after pressing the insertion port of the cutter blade several times Insertion port of the cutter blade If not installed correctly it may result in damage to the cutter blade or the plotter itself ...

Страница 36: ...g tests If a thin media such as a film is used use the supplied magnifier to adjust it Adjust the blade length by turning the blade length adjustment knob Turn the knob in direction A to extend the blade or in direction B to retract the blade When the knob is turned by one scale unit the blade moves approximately 0 1 mm One full turn of the knob moves the blade approximately 0 5 mm Cutter blade mo...

Страница 37: ...ained here using cutter plunger as an example CAUTION When pushing the tool holder with your fingers the blade tip may be protruding Take care not to cut your fingers Supplement When using with half cutting and plotter pen set the seal in Tool Holder backward and when using cutting out perforated cut set the seal in Tool Holder forward Half cutting means that only the marking film is cut out leavi...

Страница 38: ...r push until its flange completely touches the upper part of the holder Flange Bracket to hold tool Tool holder Backward Half cutting Plotting Pen Tool holder Forward Using cutting Tool holder Seen from above 3 Make sure that the bracket is engaged on the tool s flange and then tighten the screw Flange Bracket to hold tool Removing the tool When removing the tool turn it counterclockwise to remove...

Страница 39: ...the media sensor Afterwards adjust the push roller so that it s lined up with the side of the media Loading Roll Media Loading Sheet Media Loading roll media CE7000 40 Operation 1 Lower the media set lever to raise the push rollers Media set lever Push roller Media sensor 2 Put the roll media on the roll media tray and then push the tip of the roll media forward from the back of the machine Make s...

Страница 40: ...4 Position the media and the push rollers to correspond with the width of the media The push rollers push down on either side of the media Use the grit roller position guide to make sure the push rollers are set on top of the grit rollers You can adjust the center push roller s hold down force Push roller Push roller Grit roller Media Media sensor Grit roller position guide When feeding long media...

Страница 41: ...s of the media Push roller Media 5 mm 5 mm 5 Pull the media taut to make sure that there is no slack in the conveyance path and then raise the media set lever to lower the push rollers Media set lever Create the same amount of slack in the media as will be used for the back of the machine Create slack ...

Страница 42: ...ains in the CE7000 130 Operation 1 Lower the media set lever to raise the push rollers Push roller Media set lever Media sensor 2 Set the roll media on top of the stock shaft and then clip the roll paper with a stopper Once it s set tighten the stopper s screws ...

Страница 43: ...route Supplement When actually cutting please release the lock from the media stopper While pulling the media stopper to the exterior slide it forward 4 Lock the media stopper Slide it backward and pull it out evenly so that the roll paper is straight Please load so that the roll paper always rests on the media sensor Media sensors Lock Media stopper ...

Страница 44: ...ys be positioned over the media sensor See Aligning the Push Rollers for the position of the push rollers The push rollers push down on either side of the media Use the grit roller position guide to make sure the push rollers are set on top of the grit rollers Push roller Push roller Grit roller Media Media sensor Grit roller position guide ...

Страница 45: ...sition guide and make sure the push rollers are on top of the grit rollers You can adjust the push roller s hold down force Grit roller position guide Push roller Media sensor Grit roller Push roller The center push roller is not on top of the grit roller The center push roller is near the edge The center push roller is on top of the grit roller The center push roller is on top of the grit roller ...

Страница 46: ...ia Push roller Media 5 mm 5 mm 6 Pull the media taut to make sure that there is no slack in the conveyance path and then raise the media set lever to lower the push rollers Media set lever 7 Release the lock from the media stopper while pulling to the exterior slide it forward Media stopper Slide the media stopper ...

Страница 47: ... with roll media do not make a media slack at the rear of the cutting plotter 8 When the set lever is up and the media is held down by the push rollers and the media stopper is unlocked pull out the roll media and give it slack Create the same amount of slack in the media as will be used for the back of the machine Give it slack ...

Страница 48: ... 1 Lower the media set lever to raise the push rollers Media sensor Push roller Media set lever 2 Set the sheet media so that the paper s edges line up with the guideline on the front side Make sure that the sheet media completely covers the media sensor Line up Guideline Media sensor ...

Страница 49: ...ollers push down on either side of the media Use the grit roller position guide to make sure the push rollers are set on top of the grit rollers You can adjust the center push roller s hold down force Push roller Push roller Grit roller Media Media sensor Grit roller position guide 4 Pull the media taut to make sure that there is no slack in the conveyance path and then raise the media set lever t...

Страница 50: ...ill be explained in CE7000 130 Operation 1 Lower the media set lever to raise the push rollers Push roller Media set lever Media sensor 2 Make sure that the sheet media completely covers the media sensor Media sensor Media Set parallel to this hole ...

Страница 51: ...sh down the sides and center of the media Use the grit roller position guide and make sure the push rollers are on top of the grit rollers Use the grit roller position guide and make sure the push rollers are on top of the grit rollers You can adjust the center push roller s hold down force Grit roller position guide Push roller Media sensor Grit roller Push roller The center push roller is not on...

Страница 52: ...2 20 4 Set straight parallel to the hole of the guide Raise the set lever to fix the position of the push roller and the sheet media Media set lever Media Set parallel to this hole ...

Страница 53: ...gistration mark reading errors to occur and it may get caught up in the pen carriage Affix only Graphtec specified media to the carrier sheet If using commercially available inkjet media please note that media that is coated on both sides cannot be used If the media is coated on one side only affix the non coated side to the carrier sheet If the coated side is affixed the carrier sheet s adhesive ...

Страница 54: ...ier sheet Carrier sheet Medium Adhesive surface Effective Cutting Area Supplement Do not use media that is smaller than postcard size The cutting plotter recognizes the width of the carrier sheet as the cutting area Be sure to load a medium that is the same size as the media setting that was made in the application software Be sure to use the ORIGIN key to specify the start position of the cutting...

Страница 55: ... figure below is the CE7000 40 Carrier Sheet Table Carrier Sheet Table Setting method of carrier sheet Carrier Sheet Table Option 1 When setting the carrier sheet insert it so that the narrowest margin transparent part of the carrier sheet is at the top and make sure that the carrier sheet is in front of the cutting plotter as shown in the figure Make sure that the carrier sheet does not come out ...

Страница 56: ...dge of the carrier sheet aligns with the guidelines on the front guide Guideline Line up The edge of the carrier sheet is aligned with the guideline 2 When the set lever is raised the push roller lowers and the carrier sheet is fixed ...

Страница 57: ...oller Grit roller Grit roller position guide It isn t on the grit roller It isn t on the grit roller CAUTION To move the push rollers the media set lever must be in the lowered position Supplement If a confirming push roller point message appears after setting the media and raising the media set lever it means the right push roller is not on the right grit roller or that the left or center push ro...

Страница 58: ...o NARROW 160MM OR LESS in ADVANCE MEDIA WIDTH Please use only 2 push rollers on the right side The hold down force switching of the third and subsequent push rollers should be set to be Low OFF and not on the grit roller The push roller position is not detected Please set the same hold down force of the push roller to be used Move the third and subsequent push rollers away from the media position ...

Страница 59: ...ller hold down force switching lever is lower it is in Strong mode When it is upper it s in Low OFF mode Hold down force Low OFF Hold down force Medium Hold down force Strong Lever Lever Lever CAUTION Please switch the hold down force of the push rollers at both ends to Strong or Medium and keep the same hold down force If the hold down force is changed with the media set lever lowered the lever o...

Страница 60: ... of the push rollers inside both ends to lower than both ends When using two push rollers GOOD NG When right and left hold down forces are different Strong Strong Strong Strong Medium Medium Medium Low Low Low Low Medium When using four push rollers GOOD NG When three hold down forces are different All other than above Strong Strong Medium Medium Medium Medium Medium Medium Medium Medium Low Low ...

Страница 61: ...o the Power for turning on the power Operation 1 Once the machine is powered on with the switch a message will be displayed after the version is displayed Here LANGUAGE setting screen is displayed 2 Use the POSITION keys to select the language This manual assumes you chose the English language setting 3 Press the ENTER key After the DISPLAY LANGUAGE is selected the LENGTH UNIT screen will appear 4...

Страница 62: ...ain otherwise problems may occur with the display 3 Turn on the CE7000 by pressing the side of the switch LCD on the control panel is lit CE7000 130 160 CE7000 40 60 Supplement The Default Screen will appear after purchasing the machine See About the Default Screen for more information This screen is described as default screen in this document Settings such as initial media feed speed and communi...

Страница 63: ...SE MENU key is pressed during the operation the cutting plotting operation stops ORIGIN It will set the current position as an origin point On the READY screen pressing the ENTER and ORIGIN keys at the same time will allow you to reset the machine Only in Normal mode COPY Copy of data in the buffer memory is output ESC Cancels the setting change and then returns to the previous screen Returns to t...

Страница 64: ... function is allocated to the button on the control panel Button name will be displayed in reverse when the button is enabled READY screen READY MENU screen PAUSE MENU CONDITION setting screen COND TEST Media set lever raised Media set lever lowered Set condition of media READY status It will display READY when the media is loaded Display of setting condition Corresponding button name of control p...

Страница 65: ...g CONDITION setting screen It will return to default screen when PAUSE MENU key is pressed while displaying MENU screen It will return to default screen when COND TEST key is pressed while displaying CONDITION setting screen It will return to default screen when PAUSE MENU key is pressed while displaying MENU screen PAUSE MENU COND TEST PAUSE MENU COND TEST CONDITION screen Simple mode Menu screen...

Страница 66: ...t from one another The settings of the mode you re currently in will take precedence Simple mode Menu screen Simple mode Contents of the operation and settings that is displayed in MENU screen with PAUSE MENU key are as following 1 MEDIA Set the setting of the condition for the media 2 I F Set the settings of the condition for the interfacing with the computer 3 ADV Set the conditions for the basi...

Страница 67: ...ion for the media I F Set the settings of the condition for the interfacing with the computer ADV Set the conditions for the basic operation of the cutting plotter such as display language unit of the measurements and sensor TEST Does the operation necessary for maintenance such as self diagnostic test or printout of the condition settings list LINK Performs operations necessary for output such as...

Страница 68: ...NDITION screen and return to default screen See Selecting Tool Condition for the detailed tool condition Normal mode CONDITION screen 1 3 Normal mode The COND TEST key brings up the SETTING screens where you can change the media type and tool conditions Up to 8 CONDITION settings can be saved with different settings in numbers 1 through 8 COND TEST This will clear the CONDITION setting screen and ...

Страница 69: ...the media s edges 1 If you have already loaded the media the MEDIA TYPE menu appears Select the media type to suit the loaded media Check that the media stopper is unlocked CE7000 60 CE7000 130 CE7000 160 and then select a media type on the MEDIA SELECT screen The figure below is CE7000 130 Release the media stopper Media stopper When selecting ROLL 1 FRONT EDGE pressing the 1 key Select this when...

Страница 70: ...is finished the tool carriage s location will become the initial point If the interface or command settings have not been made make these settings before sending the data If the settings have been made tool adjustment is performed When the pen adjustments have been made the plotter is ready to start cutting Send the cutting or plotting data from the application software Dfault screen is displayed ...

Страница 71: ...layed 2 Press the 4 key MEDIA MEDIA SETING screen 1 2 is displayed Supplement It will return to MEDIA SETTING screen 1 2 without changing the settings when you press the ESC key CANCEL Press the SLOW key to select the setting digits You can set the range between 0 5 m and 50 m When you select SHEET for paper feeding pre feed will be not performed 3 Press the 1 key PRE FEED FEED LENGTH setting scre...

Страница 72: ...nd Normal mode When switching the mode this cutting plotter will be reset Selecting the TOOL CONDITION number Conditon No Simple mode Operation Supplement Use Normal mode for changing the type of blade offset and acceleration Pushing the 4 key RETURN allows you to return to the conditions screen without changing the settings 1 Press the COND TEST key in the READY status CONDITION setting screen 1 ...

Страница 73: ...nging the settings when you press the ESC key before pressing the ENTER 4 Confirm the setting and press the ENTER key Setting will be confirmed and it will return to CONDITION setting screen 1 3 5 Press the COND TEST key It will return to default screen Operation Operation with the ENTER key 1 Press the ENTER key in the READY status CONDITION No selection screen is displayed 2 Press the 1 to 4 key...

Страница 74: ... specified FORCE SPEED ACCELERATION OFFSET CAUTION It may result to damaging the cutter blade or the cutting mat if the blade is extended too much Make sure the blade length is set less than the thickness of the media Tool Conditions Cutter Blade for Each Media Type See the Cutter Blade Manual Blade Part Nos Displayed Blade Types and CUTTER OFFSET Values See the Cutter Blade Manual ...

Страница 75: ... a FORCE value that is as low as possible but that still leaves faint traces on the backing sheet Set the SPEED and ACCELERATION values as low as possible Weed the cut results right after cutting has been completed If time is allowed to elapse adhesive along the cut edges will cause the edges to stick together Select media with good weedability Recommended film types 3M Scotchcal Series 7725 Weedi...

Страница 76: ...displayed 2 Press the POSITION key and select the setting Select the preset Media Type Tool Conditions 3 Press the 2 key SPEED to change the speed The screen below will appear Supplement Press the ENTER key SET confirm the settings and then return to the READY screen Press the 4 key RETURN to return to the READY screen without changing any settings 4 Press the POSITION key and increase or decrease...

Страница 77: ... The 0 value allows you to use the standard force setting If adjustment is necessary you can enter the adjusted value 6 Press the POSITION key and increase or decrease the adjustment value from the current number The force setting can be modified with the adjusted value When confirming the setting press the ENTER key SET Setting will be set and it will return to default screen ...

Страница 78: ...ION keys and set the tool Supplement What is Offset It will adjust the difference between the tip of the blade in the plunger and the center of the plunger There are standard adjustment values for each cutter blades Fine adjustment will be made to that standard values here Adjustment will be made with standard value as 0 It is not necessary to set the offset if PEN was selected in the tool setting...

Страница 79: ...s and increase or decrease the setting value 6 Confirm the setting and press the ENTER key SET Setting will be confirmed and it will return to CONDITION setting screen 1 3 7 Press the COND TEST key It will return to default screen ...

Страница 80: ...es In the CE7000 130 160 if acceleration is se to 2 the speed cannot be set to 65 or more 65 70 or 71 In this case the will be displayed in the acceleration and both values of the speed and acceleration will be automatically calculated and the cutting plotter works with the values Operation Supplement Perform the settings in Normal mode 1 Press the COND TEST key in the default screen CONDITION set...

Страница 81: ...n to CONDITION setting screen 1 3 Supplement Depending on media width speed and acceleration settings the acceleration of the default screen is displayed as In this case it operates with the value of the calculated acceleration automatically 6 Press the COND TEST key It will return to default screen ...

Страница 82: ...e settings when you press the ESC key CANCEL 2 Press the 4 key FORCE FORCE setting screen is displayed Display may vary depending on the selected condition number 3 Press the POSITION keys and select the condition number CONDITION No Supplement You can set the range between 1 and 38 4 Press the POSITION keys and increase or decrease the setting value 5 Confirm the setting and press the ENTER key S...

Страница 83: ...ITION setting screen 1 3 is displayed 2 Press the POSITION key CONDITION setting screen 2 3 is displayed Supplement It will return to CONDITION setting screen 2 3 without changing the settings when you press the ESC key CANCEL 3 Press the 1 key ACCELERATION ACCELERATION setting screen is displayed Display may vary depending on the selected tool condition number 4 Press the POSITION keys and select...

Страница 84: ...n to CONDITION setting screen 2 3 Supplement Depending on media width speed and acceleration settings the acceleration of the default screen is displayed as In this case It operates with the value of the calculated acceleration automatically 7 Press the COND TEST key It will return to default screen ...

Страница 85: ...ed 2 Press the POSITION key CONDITION setting screen 2 3 is displayed Supplement It will return to CONDITION setting screen 2 3 without changing the settings when you press the ESC key CANCEL 3 Press the 2 key ASSIGN TOOL ASSIGN TOOL setting screen is displayed Display may vary depending on the selected tool condition number 4 Press the POSITION keys and select the tool condition number CONDITION ...

Страница 86: ...nd the tool holder Tool 3 When using a tool attached in front of the tool holder For information on how to install the tool see Attaching a Tool 5 Press the 1 key 1 or the 3 key 3 6 Confirm the setting and press the ENTER key SET Setting will be confirmed and it will return to CONDITION setting screen 2 3 7 Press the COND TEST key It will return to default screen ...

Страница 87: ...media Media Blade Supplement Blade length can be changed by spinning the adjustor on the blade Spinning it in the A direction pushes it out while spinning it in the B direction pulls it in One scale unit is equal to 0 1 mm Cutter blade moves approximately 0 1 mm turning one scale unit Scale Scale Guideline to Set the Blade Length See Setting the Tool Condition for the thickness of the media 2 Exte...

Страница 88: ... test cutting in the plotter 2 Press the COND TEST key in the default screen CONDITION setting screen 1 3 is displayed CONDITION screen Simple mode CONDITION screen Normal mode Supplement It will return to CONDITION setting screen when you press the ESC key CANCEL 3 Press the POSITION key CUT TEST Supplement Pressing the POSITION and SLOW keys at the same time will move the tool carriage slower 4 ...

Страница 89: ...rmal mode Supplement Pressing the POSITION and SLOW keys at the same time will move the tool carriage slower 4 Press the POSITION keys to move the tool carriage to the location you wish to perform the test cutting CAUTION When the 1 key FORCE is pressed the tool carriage will start moving so take care not to get injured by the cutter blade Supplement Test cut patterns can have their cut order and ...

Страница 90: ...key CUTTER OFFSET 3 cutting test patterns are cut with current CUTTER OFFSET in the center and 1 each of CUTTER OFFSET increased and decreased for 1 8 Press the ENTER key after completion It will return to CUT TEST menu screen 9 Press the ESC key CANCEL It will return to CONDITION setting screen 10 Press the COND TEST key It will return to default screen ...

Страница 91: ...orce and adjust the settings Peel off the triangle area and adjust so it cuts slightly into the backing sheet If the backing sheet has been cut through either the FORCE setting is too high or the cutter blade tip is extended too far If the backing sheet shows only a few traces of the cutter blade either the FORCE setting is too low or the cutter blade tip is not sufficiently extended Adjustment fo...

Страница 92: ...ne only After attempting to cut the actual media please adjust blade length accurately Operation Supplement Perform the settings in Normal mode 1 Load the media for test cutting in the plotter 2 Press the POSITION keys to move the tool carriage to the location you wish to perform the blade length adjustment 3 Press the COND TEST key in the default screen CONDITION setting screen 1 3 is displayed 4...

Страница 93: ... a Tool for instructions on setting 7 Set the cutter plunger in Tool Holder Backward 8 Press the ENTER key The height is calculated by moving the tool up and down TO ACHIEVE THE TARFET LENGTH screen is displayed 9 Press the 1 key BLADE LENGTH TARGET BLADE LENGTH TARGET screen TARGET is displayed 10 Press the POSITION keys and increase or decrease the setting value 11 Confirm the settings and press...

Страница 94: ... CAUTION Depending on the loaded media the blade might sink in to the media making accurate measurement impossible 13 Turn the blade length adjustment knob and adjust the cutter blade length Current blade length is displayed by pressing the 2 key CHECK so adjust the blade length until it matches the thickness of the media 14 Press the ESC key END Adjustment is completed and it will return to CONDI...

Страница 95: ...terface are not available In Simple mode ARMS settings cannot be used Even in Simple Mode performing operations commands for specifying the registration marks can be used For items with no specified commands the specified ARMS settings in Normal mode will be used You can choose the following settings on Simple mode s default screen See How to Use Control Panel for detailed information READY screen...

Страница 96: ...the 3 key ADV ADVANCE screen is displayed Simple mode Normal mode 3 Press the 2 key SIMPLE MODE in the Normal mode or press the 3 key NORMAL MODE in the Simple mode USER switch selecting screen is displayed 4 The 1 key Yes allows you to change the mode after resetting the CE7000 The ESC key No allows you to return to the previous screen without changing the mode 5 When the user is switched the cut...

Страница 97: ...he amount to be used before cutting Leave the media in environment to use for adequate time if the deviation of temperature and humidity is big Set the both push rollers at least 15mm inside the edge of media Set the sideway tension of the media uniform when setting the media when cutting long length Media might come off the rollers while cutting if it is not uniform Pull out the amount to use bef...

Страница 98: ...0 0cm and 5000 0cm 4 Press the POSITION keys to change the current setting Supplement It will return to MEDIA SETTING screen without changing the settings when you press the ESC key CANCEL 5 Confirm the setting and press the ENTER key SET Setting will be set and it will return to MEDIA SETTING screen 6 Press PAUSE MENU key It will return to default screen ...

Страница 99: ...ettings of Controls from Computer for more information Operation 1 Press PAUSE MENU key MENU screen is displayed 2 Press 2 key I F INTERFACE screen is displayed 3 Press 1 key HP GL ORIGIN POINT HP GL ORIGIN POINT setting screen is displayed 4 Press 1 key LOWER LEFT or 2 CENTER Supplement It will return to INTERFACE screen without changing the settings when you press the ESC key CANCEL 5 Confirm th...

Страница 100: ... key I F INTERFACE screen is displayed 3 Press 2 key GP GL STEP SIZE STEP SIZE setting screen is displayed 4 Press 1 key 0 100 mm 2 key 0 050 mm 3 key 0 025 mm or 4 key 0 010 mm Supplement It will return to INTERFACE screen without changing the settings when you press the ESC key CANCEL 5 Confirm the setting and press the ENTER key SET Setting will be set and it will return to INTERFACE screen 6 P...

Страница 101: ...SE MENU key MENU screen is displayed 2 Press 3 key ADV ADVANCE setting screen is displayed 3 Press 1 key LANGUAGE SELECTION LANGUAGE SELECTION screen is displayed 4 Pressing POSITION keys select the desired language Supplement It will return to ADVANCE screen without changing the settings when you press the ESC key CANCEL 5 Confirm the setting and press the ENTER key SET Setting will be set and it...

Страница 102: ...isplayed 2 Press 3 key ADV ADVANCE setting screen is displayed 3 Press 2 key LENGTH UNIT LENGTH UNIT setting screen is displayed 4 Press 1 key METRIC or 2 key INCH Supplement It will return to ADVANCE screen without changing the settings when you press the ESC key CANCEL 5 Confirm the setting and press the ENTER key SET Setting will be set and it will return to ADVANCE setting screen 6 Press PAUSE...

Страница 103: ...tting Area Check the width of cutting area Operation 1 Press the SLOW key in the default screen The cutting area is displayed When a rewinding device is not installed 2 Release the SLOW key I will be return to default screen ...

Страница 104: ......

Страница 105: ... is to start from the READY status media is set as a general condition Perform the operation described in this chapter after making the plotter in READY status referring to previous chapter PRODUCT SUMMARY 3 1 Raise or Lower the Tool 3 2 Move the Tool Carriage and Media 3 3 Setting the Origin Point 3 4 Setting the Cutting Direction 3 5 Stop Cutting ...

Страница 106: ... Supplement Perform the settings in Normal mode 1 Press the PAUSE MENU key MENU screen is displayed 2 Press the 1 key TOOL TOOLS SETTING 1 4 screen is displayed 3 Tool is raised or lowered every time the 1 key TOOL UP DOWN is pressed 4 Press the PAUSE MENU key It will return to default screen ...

Страница 107: ...tep Movement Distance 1 Press the POSITION key once to move in the desired direction Tool carriage or the media will move toward the direction of the pressed POSITION key for 1 step Continuously move manually It can manually move continuously when the screen is displaying READY or when the POSITION keys are displayed Operation Supplement Pressing the POSITION and SLOW keys at the same time will mo...

Страница 108: ... 4 is displayed 3 Press the 1 key MOVE STEP MOVE STEP screen is displayed Supplement Value chosen here will be the movement distance for the step movement 4 Press the 1 key 1 0mm or the 2 key 0 1mm Supplement It will return to ADVANCE screen 1 4 without changing the settings when you press the ESC key CANCEL 5 Confirm the setting and press the ENTER key SET Setting will be confirmed and it will re...

Страница 109: ... point Standby position of the pen carriage 100 mm When using Sheet Media Seen from above To the top of the maximum cutting area Bottom of the operation area machine origin point Operation Supplement When the tool number setting is set to 1 press the TOOL 1 MOVE AWAY and when set to 3 press the TOOL 3 MOVE AWAY 1 Press the 1 key TOOL1 VIEW in READY status Tool carriage will move away To move the t...

Страница 110: ... 2 Press the 1 key No 1 the 2 key No 2 the 3 key No 3 the 4 key No 4 the key No 5 the key No 6 the key No 7 or the key No 8 while simultaneously pressing the ENTER key Setting will be confirmed and it will return to default screen Reset Revert to the initial state when the power was turned on To revert to the initial state when the power was turned on do following Operation 1 Press the ENTER key i...

Страница 111: ...location New origin point Original origin point How to set the current position to the new origin point 1 Move the tool to the new origin point by pressing the POSITION keys when it is in READY status 2 Press the ORIGIN key New origin point is confirmed and NEW ORIGIN POINT IS SET is displayed for few seconds in the screen ...

Страница 112: ...he origin point will be initialized as shown below if the coordinate is rotated after moving the origin point Distance a will be maintained but distance b will be initialized New origin point Original origin point Original origin point Before setting After setting a a b New origin point Supplement To use the origin point movement and coordinate axes rotation together always rotate the coordinate a...

Страница 113: ...I F in Normal mode or press the 2 key I F in Simple mode INTERFACE screen is displayed INTERFACE screen Normal mode INTERFACE screen Simple mode 3 Press the 3 key HP GL ORIGIN POINT in Normal mode or press the 1 key HP GL ORIGIN POINT in Simple mode HP GL ORIGIN POINT setting screen is displayed 4 Press the 1 key LOWER LEFT or the 2 key CENTER Supplement It will return to INTERFACE screen without ...

Страница 114: ...be saved even if the power is shut off Coordinate axes rotation settings ON Coordinate axes rotation settings OFF Operation Supplement Perform the settings in Normal mode 1 Press the PAUSE MENU key MENU screen is displayed 2 Press the 3 key AREA AREA PARAMETERS screen 1 2 is displayed 3 Press the 2 key ROTATE ROTATE screen is displayed ...

Страница 115: ...hout changing the settings when you press the ESC key CANCEL 5 Confirm the setting and press the ENTER key SET Setting will be confirmed and it will return to AREA PARAMETERS screen 1 2 6 Press the PAUSE MENU key The tool carriage moves to the coordinate position you set It will return to default screen ...

Страница 116: ... Pause and resume cutting Operation 1 Press the PAUSE MENU key Cutting will stop and following screen is displayed Supplement There is no effect on the selection of media type when the media set lever is moved up and down while pausing the cutting It is also possible to exchange or reset the media 2 Perform necessary operation such as exchanging the media Supplement It will stop cutting by pressin...

Страница 117: ...o operation stop screen without clearing buffer memory when ESC key CANCEL is pressed In the case that the operation is interrupted and the buffer is cleared make sure that the data transfer is stopped If the data transfer continues abnormal operations where data is processed from the middle may occur 3 Confirm if the data transfer from the computer is stopped and press the 1 key YES CLEAR Followi...

Страница 118: ......

Страница 119: ...4 1 Chapter 4 Convenient Functions This chapter describes about the convenient functions of the plotter PRODUCT SUMMARY 4 1 Settings for Cutting 4 2 Copy Duplicate Cutting 4 3 Panel Cutting ...

Страница 120: ... HPGL command Origin point will be set at lower left of the AREA once the AREA is set It is possible to set the origin point at the center when the HP GL is selected Move the origin point to change the cutting position Upper right set position Image already cut Origin point It will only cut within this range Operation Supplement Perform the settings in Normal mode 1 Press the PAUSE MENU key in REA...

Страница 121: ...s displayed Supplement Please set the X and Y cut range for the areas on the upper right and lower left points to at least 10 mm An error message will appear for areas that are too small You will need to reset the settings for the upper right and lower left points 7 Press the POSITION keys and move the tool carriage to the upper right position of the AREA Supplement It will return to AREA PARAMETE...

Страница 122: ...TROL POSITION of the tool setting to OUTSIDE when the setting value is set to more than 8 mm The blade might be damaged by moving the carriage outside the media under this condition Supplement If the value is set to positive it is able to cut over where the push rollers are but the push rollers passes where it is cut creating a chance of bad feeding depending on the media Set the width of cutting ...

Страница 123: ... Page ejection quality assurance goes up to 2 m for the CE7000 40 and up to 5m for the CE7000 60 130 160 It depends on the media specified by Graphtec and setting conditions Use the basket option Use 3M Scotchcal Series 7725 Set the speed below 30 and the acceleration below 2 In Simple mode there is no need to set anything so it is not available Perform pre feed for the amount to be used before cu...

Страница 124: ...e SLOW key to select the setting digits You can set the range between 20 0 and 5000 0 cm 4 Press the POSITION keys and increase or decrease the setting value Supplement It will return to MEDIA SETTING screen 1 2 without changing the settings when you press the ESC key CANCEL 5 Confirm the setting and press the ENTER key SET Setting will be confirmed and it will return to MEDIA SETTING screen 1 2 6...

Страница 125: ...N to do mirroring Reference This setting will be saved even if the power is shut off MIRROR mode OFF MIRROR mode ON Operation Supplement Perform the settings in Normal mode 1 Press the PAUSE MENU key MENU screen is displayed 2 Press the 3 key AREA AREA PARAMETERS screen 1 2 is displayed 3 Press the 3 key MIRROR MIRROR screen is displayed ...

Страница 126: ...USE MENU key The tool carriage moves to the coordinate position you set It will return to default screen Set the enlarge shrink scale Scale It can enlarge or shrink cutting The rate of enlargement or shrinkage of the cutting data can be changed by settings Reference This setting will be saved even if the power is shut off Operation Supplement Perform the settings in Normal mode 1 Press the PAUSE M...

Страница 127: ... decrease the setting value Supplement It will return to AREA PARAMETERS screen 1 2 without changing the settings when you press the ESC key CANCEL 5 Confirm the setting and press the ENTER key SET Setting will be confirmed and it will return to AREA PARAMETERS screen 1 2 6 Press the PAUSE MENU key It will return to default screen ...

Страница 128: ...the data sort when you need to copy cutting with large data See Sorting the Cutting Data for data sort Watch out that it does not fall out of media when cutting with copy function If the original cutting data to be copied starts away from the origin point copied cutting will also start away from the origin point Toavoid wasted space create the cutting data close to the origin point When copying us...

Страница 129: ...nt When setting the copy interval set MEDIA CHANGE MODE to OFF NO DATA FOR COPY IN BUFFER is displayed if there is no data in the buffer memory Send the cutting data If too much data is sent from the buffer memory 1 copy in the Copy mode buffer will be displayed If the data to be copied is larger than the cutting area Cannot copy the valid area is too small will be displayed 3 Press the COPY key C...

Страница 130: ...turn to COPY MODE screen Supplement Copy interval can be set when MEDIA CHANGE MODE is turned OFF Copy space can be set from 1 0 mm to 10 0 mm This setting is maintained even if the power is turned off 9 Press the 3 key COPY SPACE COPY SPACE screen is displayed 10 PPress the POSITION keys and increase or decrease the setting value Supplement Cutting data is stored even if the media is exchanged It...

Страница 131: ...he media selection will be chosen from what was selected before copying If there is no data in the buffer memory There is no data for copying in the buffer will be displayed Please send cutting data If too much data is sent from the buffer memory 1 copy in the Copy mode buffer will be displayed 2 Press the COPY key COPY MODE screen is displayed 3 Press the 1 key MEDIA CHANGE MODE MEDIA CHANGE MODE...

Страница 132: ...ss the ENTER key SET The plotter starts a copy immediately Supplement Cutting data is stored even if the media is exchanged It can be copied as many times until the buffer memory is cleared It can be copied again after exchanging the media by pressing COPY key 9 Replace the media When the number of copies is 2 or more COPY MODY CHANGE MEDIA will be displayed on the screen 10 The plotter starts a c...

Страница 133: ...f data when a data break is caused by a command even if multiple pieces of data are sent in before the cutting finishes even when numerous pieces of Panel Cutting data are in the plotter buffer When Panel Cutting and auto media transfer are both turned on the machine will ignore automatic media transfer length settings and continue working with priority of partition length plus something minutes a...

Страница 134: ...LOW key to select the setting digits The partition length can be set from 1 0 to 2000 0 cm 7 Press the 2 key DIVIDE LENGHT DIVIDE LENGHT screen is displayed 8 Press the POSITION keys and increase or decrease the setting value Supplement It will return to MEDIA SETTING screen 2 2 without changing the settings when you press the ESC key PREVIOUS 9 Confirm the setting and press the ENTER key SET Sett...

Страница 135: ...nd when re cutting media using ARMS to adjust for printing position discrepancies high precision cutting can be done It is possible to perform a multiple registration mark adjustment or segment area adjustment by linking with the application software on the computer See the operation guides of the application software about the registration mark adjustment function linked with the application soft...

Страница 136: ...ng scanned by this machine is within 0 3 mm Please take note of the following when scanning a registration mark Shape Pattern of the Registration Mark and Origin Point Cutting Point Scan Range Necessary to Detect the Registration Mark Positioning of the Media and the Registration Mark Cutting area when adjusting the registration mark Automatic detection of registration mark position Media That Reg...

Страница 137: ... as a plotting data with the application software Registration mark pattern 3 and 4 should be created using Adobe Illustrator Create the registration mark in accordance with following conditions Thickness of the line is between 0 3 to 1 0 mm Size of the registration mark is between 5 to 20 mm see Setting Registration Mark Size Use pattern 1 pattern 2 pattern 3 or pattern 4 for the shape of the reg...

Страница 138: ...scan the registration mark is as following Do not print in the shaded area shown in the Figure below a a a a a a a a a a For 3POINTS MARK TYPE 1 MARK TYPE 3 MARK TYPE 2 MARK TYPE 4 Registration mark scanning area a 6mm Feed direction of media Feed direction of media Feed direction of media Feed direction of media ...

Страница 139: ...a Feed direction of media Feed direction of media Feed direction of media Feed direction of media Feed direction of media Supplement Clean any dirt or foreign objects from the media Any dirt or foreign object might be scanned mistakenly as registration mark Plot the registration mark in contrast easy to scan such as black lines on white background Adjust the scanning level of the sensor if you nee...

Страница 140: ...a same as the area after scanning the registration mark 15 15 15 15 Feed direction of media Feed direction of media Cutting area when adjusting the regisitaration mark Supplement If the distortion due to the adjustment is large there is a possibility that the cutting area is reduced Even when the registration marks are being adjusted you can cut the outside of the registration mark cutting area Me...

Страница 141: ...dia that registration mark cannot be detected It may be hard to scan the registration mark as following depending on the media conditions Transparent media Lines of registration marks are blurred Media that does not become an expected color due to the color of the background after printing Folded media Surface is dirty Laminated media Depending on the type and condition of the laminate If you use ...

Страница 142: ...ion Mode 1 Select when using a general medium of white background Mode 2 Select when using colored media or glossy media Mode 3 Select when the plotter cannot scan in Mode 1 or Mode 2 with a special material Use the RECOMMENDED SETTINGS function to checkthe guideline for selecting a SCAN Mode In addition set the registration mark adjustment value as necessary Set the registration mark adjustment v...

Страница 143: ...00 and the adjustment range of SCAN Mode 3 is 50 to 50 6 Press the 2 key ADJUST LEVEL ADJUST LEVEL screen is displayed Supplement Press the SLOW key to select the setting digits 7 Press the POSITION keys and increase or decrease the setting value Press the ESC key PREVIOUS Supplement It will return to ARMS SETTING screen 1 3 without changing the settings when you press the ESC key CANCEL 8 Confirm...

Страница 144: ...3 is displayed 3 Press the 2 key RECOMMENDED SETTINGS The following message is displayed 4 Press the POSITION keys to move the tool to the scanning start position any position Feed direction of media Registration mark scanning start position 50mm 50mm 5 Confirm the position of the tool and press the ENTER key SET Supplement Do not move the tool carriage to the printed area 6 The tool carriage move...

Страница 145: ... W white R red G green or B blue SCAN MODE Recommended scanning mode 1 2 3 is displayed ADJUST LEVEL Recommended registration mark adjustment value is displayed MARK LINE COLOR Recommended color is displayed BASE PAINT COLOR Recommended color is displayed 8 Confirm the setting and press the ESC key CANCEL It will return to ARMS SETTING screen 1 3 9 Press the PAUSE MENU key It will return to defaul...

Страница 146: ...the 3 key MARK LINE CHECK MARK LINE CHECK screen is displayed 4 Press the 1 key TYPE1 or the 2 key TYPE2 The following message is displayed Supplement When checking the lines of registration mark using the mask registration mark set the mask width to 20 mm on the application software If it is 20 mm or less the registration mark lines cannot be checked properly a a a a a a a a a 20mm 5 Press the PO...

Страница 147: ...tion mark line thicker Check the above mentioned Media That Registration Mark Cannot be Detected Even if the above is done if it is not good the registration mark cannot be used 7 The scanning result is displayed on the screen SCAN MODE The currently set scanning mode is displayed RESULT The scanning result Good Bad is displayed 8 Confirm the setting and press the ESC key CANCEL It will return to ...

Страница 148: ... to test MARK TYPE 1 and Test Pattern 2 to test MARK TYPE 2 Standard registration mark is inside the ARMS Test Files folder of the supplied DVD Registration Mark Patern File Format File Name MARK TYPE 1 pdf ARMStest_type1 pdf eps ARMStest_type1 eps MARK TYPE 2 pdf ARMStest_type2 pdf eps ARMStest_type2 eps 1 Print the standard registration mark in the supplied DVD MARK TYPE 1 MARK TYPE 2 Supplement...

Страница 149: ... to start scanning of the registration mark by pressing the POSITION key Registration mark scan area Feed direction of media MARK TYPE 1 MARK TYPE 2 Feed direction of media Move the tool inside this area Move the tool inside this area Supplement Following error is displayed when the registration mark was not scanned properly Press the 1 key RETRY to scan again or the ESC key CANCEL to exit 9 Confi...

Страница 150: ...erence There is a restriction on the shape style of the registration marks that can be scanned See Shape Pattern of Registration Mark Adjust after plotting the adjustment registration mark This section describes the steps to plot the registration mark Registration mark is to be plotted if there is no registration mark on the media to adjust the registration mark scan position Subsequently it conti...

Страница 151: ... SENSOR OFFSET ADJ SENSOR OFFSET ADJ screen is displayed 7 Press the 1 key TEST PATTERN Following message is displayed 8 Press the POSITION keys and move the tool carriage to the position to plot the registration mark position nothing is printed Reference It will return to SENSOR OFFSET ADJ screen without plotting by pressing the ESC key CANCEL 9 Press the ENTER key A adjustment registration mark ...

Страница 152: ...t Position of the registration mark is measured at the center of the line 12 Using the registration mark plotted in step 9 measure the distance of how much the adjustment registration mark needs to be moved so both will overlap and record the value As an example in the figure above it needs to move in negative directions for both X and Y directions so both of the adjustment values will be negative...

Страница 153: ...Confirm the setting and press the ESC key PREVIOUS SENSOR OFFSET will be conformed and it will return to SENSOR OFFSET ADJ screen Supplement It will return to ARMS SETTING screen 2 3 without changing the setting when you press the ESC key CANCEL 19 Confirm the setting and press the ENTER key SET Setting will be confirmed and it will return to ARMS SETTING screen 2 3 20 Press the PAUSE MENU key It ...

Страница 154: ...gistration Mark to plot registration marks Operation Supplement See Loading Media Paper or Marking Film for loading the media 1 Load the media with adjustment registration mark in the plotter Supplement Perform the settings in Normal mode 2 Press the PAUSE MENU key MENU screen is displayed 3 Press the 2 key ARMS ARMS SETTING screen 1 3 is displayed 4 Press the POSITION key ARMS SETTING screen 2 3 ...

Страница 155: ...e below It will return to SENSOR OFFSET ADJ screen once the plotting is completed Feed direction of media Distance adjustment value Y Distance adjustment value X Registration mark for adjustment Registration mark for comparison Supplement Position of the registration mark is measured at the center of the line 9 Using the scanned registration mark for adjusting measure the distance of how much the ...

Страница 156: ...an set the range between 3 0mm and 3 0mm 14 Press the POSITION keys and increase or decrease the setting value Set the Y value measured in step 9 15 Confirm the setting and press the ESC key PREVIOUS SENSOR OFFSET is selected and it will return to SENSOR OFFSET ADJ screen Supplement It will return to ARMS SETTING screen 2 3 without changing the setting when you press the ESC key CANCEL 16 Confirm ...

Страница 157: ... position of tool Supplement If the current position of the tool is distanced from the first registration mark detection may take a long time and errors due to not finding anything may occur When setting to OFF the operation above is not performed Operation Supplement Perform the settings in Normal mode 1 Press the PAUSE MENU key MENU screen is displayed 2 Press the 2 key ARMS ARMS SETTING setting...

Страница 158: ... 2 3 without changing the settings when you press the ESC key CANCEL 6 Confirm the setting and press the ENTER key SET Setting will be confirmed and it will return to ARMS SETTING screen 2 3 7 Press the PAUSE MENU key It will return to the default screen ...

Страница 159: ... large setting a low slower value may improve the scanning Operation Supplement Perform the settings in Normal mode 1 Press the PAUSE MENU key MENU screen is displayed 2 Press the 2 key ARMS ARMS SETTING screen 1 3 is displayed 3 Press the POSITION key ARMS SETTING screen 2 3 is displayed Supplement It will return to ARMS SETTING screen 2 3 without changing the settings when you press the ESC key ...

Страница 160: ...en 2 3 without changing the settings when you press the ESC key CANCEL 6 Confirm the setting and press the ENTER key SET Setting will be confirmed and it will return to ARMS SETTING screen 2 3 7 Press the PAUSE MENU key It will return to default screen ...

Страница 161: ...xplain how to match up points while manually confirming the media and tool cutter pen or plotting pen points The ARMS function can be used for accurately matching up points PRODUCT SUMMARY 6 1 Outline of Manual Position Adjust 6 2 Manual Position Adjust ...

Страница 162: ...gistration marks adjustment marks from 2POINTS 3POINTS or 4POINTS when the MARK SCAN MODE is set to AXIS ALIGNMENT Position of each adjustment marks are as following Adjust with 2POINTS 2POINTS adjustment will scan 2 registration marks aligned in the media transportation direction where the adjustment is done measuring the tilting of the axis and the distance between the registration marks This ad...

Страница 163: ...ed direction of media Second registration mark Tilt Original registration mark position Difference in X First registration mark Difference in Y Third registration mark Tilt Difference in Y Original registration mark position Difference in X Adjust with 4POINTS 4POINTS adjustment will scan 4 registration marks in the corners where the adjustment is done measuring the tilting of the X and Y axes and...

Страница 164: ...please reset will be displayed After setting the media so as to make the inclination small please perform adjustment operations Axis adjustment will be cleared when point 1 and point 2 is set to same point Operation Supplement Confirm that the push roller is steadily on the media within the range of media movement This adjustment is based on assumption that media is slightly tilted Media might fal...

Страница 165: ...s Adjustment Mode will be activated and it will return to the MARK SCAN MODE setting screen 9 Press the 2 key NUMBER OF POINTS NUMBER OF POINTS screen is displayed Supplement It will return to MARK SCAN MODE screen without changing the setting when you press the ESC key PREVIOUS 10 Press the 1 key 2POINTS the 2 key 3POINTS or the 3 key 4POINTS The number of registration marks will be selected and ...

Страница 166: ...number of the registration mark positions Follow the message that is displayed It will return to default screen without scanning the settings when you press the ESC key CANCEL 14 Confirm the position of the tool and if it is OK press the ENTER key SET Once all the adjustment marks are specified DISTANCE screen is displayed Supplement Measured distance is displayed in the top line in the DISTANCE i...

Страница 167: ...ps 14 to 16 to set Supplement Please refer to the following for adjustments when matching the manual position 2 point matching Point 1 settings Point 2 settings Origin point of the axis adjustment settings Finish 3 point matching Point 1 settings Point 2 settings Point 3 settings Distance between Point 1 2 settings Distance between Point 1 3 settings Origin point of the axis adjustment settings Fi...

Страница 168: ......

Страница 169: ...al cutting is done Adjust the moving speed and force of the tool and the control method to prevent these problems This chapter describes the setting regarding the quality of the cutting PRODUCT SUMMARY 7 1 Cutting the Corner of Thick Media Sharp 7 2 Setting the Step Pass 7 3 Setting the Offset Angle 7 4 Setting the Distance Adjust 7 5 Setting Cut Line Pattern 7 6 Setting Initial Blade Control Posi...

Страница 170: ...ate smoothly Tangential mode is a control method to precisely cut corners where two straight lines meet See below With the tangential mode the blade is advanced so it will overcut at the corners before raising the tool Then it will be lowered at the position slightly before the next line and start to cut with slight overcut Tool down 2 Tool movement Tool up 3 Direction of the tool Original cut lin...

Страница 171: ...played 3 Press the 3 key TANGENTIAL MODE TANGENTIAL MODE screen is displayed 4 Press the POSITION keys and select the tool condition number CONDITION No 5 Press the 1 key MODE1 the 2 key MODE2 or the 3 key OFF to select the mode Supplement It will return to CONDITION setting screen 2 3 without changing the settings when you press the ESC key CANCEL 6 Confirm the setting and press the ENTER key SET...

Страница 172: ...ITION setting screen 2 3 is displayed Supplement It is enabled when Tangential Mode is set When it is set to OFF the screen below will be displayed 3 Press the 4 key OVERCUT OVERCUT screen is display 4 Press the 1 key Condition No CONDITION No screen is displayed 5 Press the POSITION keys and select the CONDITION No 6 Confirm the setting and press the ESC key PREVIOUS Condition No will be selected...

Страница 173: ...ange between 0 0 mm and 0 9 mm 11 Press the POSITION keys and increase or decrease the setting value 12 Confirm the setting and press the ESC key PREVIOUS Length for overcut END will be selected and it will return to OVERCUT screen 13 Repeat steps 3 to 12 as necessary to set multiple tool CONDITION No Supplement It will return to CONDITION setting screen 2 3 without changing the settings when you ...

Страница 174: ...owering of the tool when tangential mode is selected enabling the cutter blade to penetrate the media rapidly As an example if the cutting force is 25 and the initial down force is 4 for example the cutting force applied immediately after the pen is lowered will be 29 The upper limit for added value is 38 Operation Supplement Perform the settings in Normal mode 1 Press the COND TEST key CONDITION ...

Страница 175: ...en 3 3 without changing the settings when you press the ESC key CANCEL 6 Confirm the setting and press the ENTER key SET Setting will be confirmed and it will return to CONDITION setting screen 3 3 7 Press the COND TEST key It will return to default screen ...

Страница 176: ...e of the STEP PASS multiplied by the distance set in the STEP SIZE Supplement This setting will be saved even if the power is shut off The cut image may not be what you intended if the set value is too large It is recommended to set to 1 for normal use Operation Supplement Perform the settings in Normal mode 1 Press the PAUSE MENU key MENU screen is displayed 2 Press the 1 key TOOL TOOLS SETTING s...

Страница 177: ...en 1 4 without changing the settings when you press the ESC key CANCEL 5 Confirm the setting and press the ENTER key SET Setting will be confirmed and it will return to TOOLS SETTING screen 1 4 6 Press the PAUSE MENU key It will return to default screen ...

Страница 178: ...with large angle change hence reducing the time to make the blade control But if it is set too large there will be not enough angle control of the blade and the cut result may differ from what was expected Set the reference angle in good balance Supplement The setting will be saved even if the power is shut off Operation Supplement Perform the settings in Normal mode 1 Press the PAUSE MENU key MEN...

Страница 179: ...etting value Supplement It will return to TOOLS SETTING screen 1 4 without changing the settings when you press the ESC key CANCEL 6 Confirm the setting and press the ENTER key SET Setting will be confirmed and it will return to TOOLS SETTING screen 1 4 7 Press the PAUSE MENU key It will return to default screen ...

Страница 180: ...djusts a distance of 2 m 2 000 mm by 2 000 x 0 05 1 mm making 2 001 mm DISTANCE ADJUST can be specified for each CONDITION No Supplement This setting will be saved even if the power is shut off Operation Supplement Perform the settings in Normal mode 1 Press the COND TEST key CONDITION setting screen 1 3 is displayed 2 Press the POSITION key CONDITION setting screen 3 3 is displayed 3 Press the 1 ...

Страница 181: ...ease the setting value 8 Confirm the setting and press the ESC key PREVIOUS X DISTANCE ADJUST will be confirmed and it will return to D ADJ screen 9 Press the 4 key Y Y DISTANCE ADJUST screen is displayed Supplement You can set the range between 2 00 and 2 00 Press the SLOW key to select the setting digits 10 Press the POSITION keys and increase or decrease the setting value 11 Confirm the setting...

Страница 182: ...n 3 3 without changing the settings when you press the ESC key CANCEL 12 Confirm the setting and press the ENTER key SET Setting will be confirmed and it will return to CONDITION setting screen 3 3 13 Press the PAUSE MENU key It will return to default screen ...

Страница 183: ...in UP mode The perforation patter can be set for each condition number Supplement Normally use it with default value OFF It will cut with solid line Use Tool Holder forward when cutting with any perforation pattern aside from turning it off Flange Bracket to hold tool Tool holder Backward Half cutting Plotting Pen Tool holder Forward Using cutting Tool holder Seen from above Doing a cut out cuttin...

Страница 184: ...ou press the CONDITION key 2 Press the POSITION key CONDITION setting screen 3 3 is displayed 3 Press the 3 key CUT LINE PATTERN CUT LINE PATTERN screen is displayed 4 Press the 1 key Condition No CONDITION No screen is displayed 5 Press the POSITION key and select the CONDITION No 6 Confirm the setting and press the ESC key PREVIOUS CONDITION No will be selected and it will return to CUT LINE PAT...

Страница 185: ... the ESC key PREVIOUS TYPE No will be selected and it will return to CUT LINE PATTERN screen Supplement You can set the range between 1 and 38 and UP 10 Press the POSITION key UP MODE UP MODE screen is displayed Supplement Value set here will be the cut force for the uncut part of the perforated lines Tool will be raised when set to UP Normally input the smaller value than the FORCE for cutting to...

Страница 186: ...its 13 If the USER is chosen in step 8 press the 3 key CUT L and the 4 key UP L to set the cut length and tool up length Follow steps 10 to 12 for this operation Supplement It will return to CONDITION setting screen 3 3 without changing the settings when you press the ESC key CANCEL 14 Confirm the setting and press the ENTER key SET in the CUT LINE PATTERN screen Setting will be confirmed and it w...

Страница 187: ...etting outside the cutting area Selecting SPECIFIED POSITION will initialize Initial Blade Direction Setting at the Y direction fixed position that has been set When media narrower than the set Y position is set it will be the Y maximum value Feed direction of media Feed direction of media 2mm Push roller Initial Blade Control Position Setting Point Set as OUTSIDE Cut Start Point Cutting Origin Po...

Страница 188: ... POSITION keys to move the tool position and then press the ENTER key to make the setting 5 Press the 1 key 2 mm BELOW the 2 key Y OUTSIDE or the 3 key SPECIFIED Y POSITION Supplement It will return to TOOLS SETTING screen 4 4 without changing the settings when you press the ESC key CANCEL 6 Confirm the setting and press the ENTER key SET Setting will be confirmed and it will return to TOOLS SETTI...

Страница 189: ... Normal mode 1 Press the PAUSE MENU key MENU screen is displayed 2 Press the 1 key TOOL TOOLS SETTING screen 1 4 is displayed 3 Press the 4 key OFFSET FORCE OFFSET FORCE screen is displayed 4 Press the POSITION keys to select the Condition No Supplement You can set the range between 1 and 38 5 Press the POSITION keys and increase or decrease the setting value Supplement It will return to TOOLS SET...

Страница 190: ...orward of the tool holder you can correct it by entering the adjustment value Supplement Set TOOL NO SETTING of tool condition 1 to 1 and set TOOL to Pen Set TOOL NO SETTING of tool condition 2 to 3 and set TOOL to Cutter Operation Supplement Perform the settings in Normal mode 1 Press the PAUSE MENU key MENU screen is displayed 2 Press the 1 key TOOL TOOL SETTING 1 4 screen is displayed 3 Press t...

Страница 191: ...irm the tool position and press the ENTER key Using the pen plunger Tool 1 plot a mark Next using the pen plunger Tool 3 plot a mark When plotting is completed TOOL OFFSET ADJ screen is displayed 7 Using plotted with the pen plunger Tool 1 as a reference measure how much the cut by the cutter plunger Tool 3 deviates For example in the case shown in the figure it is deviated in the X direction Y di...

Страница 192: ...m and 3 0 mm 12 Press the POSITION keys and increase or decrease the setting value 13 Confirm the setting and press the ESC key PREVIOUS TOOL OFFSET ADJ screen is displayed 14 Repeat steps 4 to 13 until the misalignment between the two tools is corrected Supplement It will return to TOOLS SETTING screen 1 4 without changing the settings when you press the ESC key CANCEL 15 Confirm the interval and...

Страница 193: ...the characteristics of the media and tools and the contents of the cutting data This chapter describes the settings affecting the cutting time In addition to this chapter there are settings affecting the cutting times in following places PRODUCT SUMMARY 8 1 Sorting the Cutting Data 8 2 Perform Automatic Pre Feed When Cut Data is Received 8 3 Perform Automatic Pre Feed When Media is Set Initial Fee...

Страница 194: ...t forces tools to jump from point to point Supplement Sorting will start the process after all the data are stored in the buffer memory so it takes time to start the cutting Sorting might not be effective for the data that is created efficiently Process may be faster to turn off the sorting on the plotter if the data is already sorted using the software on the PC Operation Supplement Perform the s...

Страница 195: ...return to TOOLS SETTING screen 2 4 without changing the settings when you press the ESC key CANCEL 7 Confirm the setting and press the ENTER key SET Setting will be confirmed and it will return to TOOLS SETTING screen 2 4 Supplement mark is displayed at the right of the screen when SORT MODE is set See How to Use Control Panel 8 Press the PAUSE MENU key It will return to default screen ...

Страница 196: ...nt The setting for AUTO PRE FEED when cutting data is received is maintained even if the power is turned off Setting of the AUTO PRE FEED length is not linked to the setting of the page length Change the setting for the page length if the cutting area is to be long If data is received and auto media transfer is performed once even if cut in the same area data is received again auto media transfer ...

Страница 197: ...nd 50 0 m Press the SLOW key to select the setting digits 7 Press the POSITION keys and increase or decrease the setting value 8 Confirm the setting and press the ESC key PREVIOUS FEED LENGTH is selected and return to AUTO PRE FEED screen Supplement It will return to MEDIA SETTING screen 1 2 without changing the settings when you press the ESC key CANCEL 9 Confirm the setting and press the ENTER k...

Страница 198: ...s setting will be saved even if the power is shut off Operation Supplement Perform the settings in Normal mode 1 Press the PAUSE MENU key MENU screen is displayed 2 Press the 4 key MEDIA MEDIA SETTING screen 1 2 is displayed 3 Press the 4 key INITIAL FEED INITIAL FEED screen is displayed 4 Set the 1 key ON or the 2 key OFF Supplement It will return to MEDIA SETTING screen 1 2 without changing the ...

Страница 199: ...e Feed of Media Paper or Marking Film Perform Automatic Pre Feed When Media is Set Initial Feed Perform Automatic Pre Feed When Cut Data is Received Supplement This setting will be saved even if the power is shut off Operation Supplement Perform the settings in Normal mode 1 Press the PAUSE MENU key MENU screen is displayed 2 Press the 4 key MEDIA MEDIA SETTING screen 1 2 is displayed 3 Press the ...

Страница 200: ...to MEDIA SETTING screen 2 2 without changing the settings when you press the ESC key CANCEL 6 Confirm the setting and press the ENTER key SET Setting will be confirmed and it will return to MEDIA setting screen 2 2 7 Press the PAUSE MENU key It will return to default screen ...

Страница 201: ... lowered is set to slow speed for the hard to cut media hard or sticky Supplement This setting will be saved even if the power is shut off Operation Supplement Perform the settings in Normal mode 1 Press the PAUSE MENU key MENU screen is displayed 2 Press the 1 key TOOL TOOLS SETTING screen 1 4 is displayed 3 Press the POSITION key twice TOOLS SETTING screen 3 4 is displayed 4 Press the 2 key MOVI...

Страница 202: ...keys and increase or decrease the setting value Supplement It will return to TOOLS SETTING screen 3 4 without changing the settings when you press the ESC key CANCEL 6 Confirm the setting and press the ENTER key SET Setting will be confirmed and it will return to TOOLS SETTING screen 3 4 7 Press the PAUSE MENU key It will return to default screen ...

Страница 203: ...ABLED If several coordinates are received continuously it will directly move to the last coordinate received Cutting time can be reduced if it is set to DISABLED if the time to move the tool in raised status is wasteful Supplement This setting will be saved even if the power is shut off Operation Supplement Perform the settings in Normal mode 1 Press the PAUSE MENU key MENU screen is displayed 2 P...

Страница 204: ...rn to TOOLS SETTING screen 3 4 without changing the settings when you press the ESC key CANCEL 6 Confirm the setting and press the ENTER key SET Setting will be confirmed and it will return to TOOLS SETTING screen 3 4 7 Press the PAUSE MENU key It will return to default screen ...

Страница 205: ...AL POSITION Supplement This setting will be saved even if the power is shut off Operation Supplement Perform the settings in Normal mode 1 Press the PAUSE MENU key MENU screen is displayed 2 Press the 1 key TOOL TOOLS SETTING screen 1 4 is displayed 3 Press the POSITION key twice TOOLS SETTING screen 3 4 is displayed 4 Press the 3 key TOOL UP HIGHT TOOL UP HIGHT screen is displayed ...

Страница 206: ...ill return to TOOLS SETTING screen 3 4 without changing the settings when you press the ESC key CANCEL 6 Confirm the setting and press the ENTER key SET Setting will be confirmed and it will return to TOOLS SETTING screen 3 4 7 Press the PAUSE MENU key It will return to default screen ...

Страница 207: ...9 1 Chapter 9 Setting Regarding Interface This chapter describes setting regarding interface PRODUCT SUMMARY 9 1 Setting Interface 9 2 Clearing the Buffer Memory 9 3 I F LAN 9 4 Connecting with RS 232C ...

Страница 208: ...in Simple mode There is no setting in Simple mode CAUTION Operation cannot be guaranteed in the following cases When the plotter is connected to a USB hub or extension port When the plotter is connected to a hand built or modified computer When a driver other than the one provided as a standard accessory is used Notes when using the USB 3 0 interface Because that some computer equipped with a USB ...

Страница 209: ...set the command settings step size settings when using GP GL commands origin point settings for HP GL when using HP GL commands and transfer conditions for the RS 232C interface The transfer conditions for the RS 232C interface can be set from the operations panel The transfer condition should be set to the same in the software used and in the CE7000 If there is a mistake in the settings an error ...

Страница 210: ...Supplement Perform the settings in Normal mode 1 Press the PAUSE MENU key MENU screen is displayed 2 Press the POSITION key I F INTERFACE screen 1 3 is displayed 3 Press the 1 key BUFFER CLEAR BUFFER CLEAR screen is displayed Supplement It will return to INTERFACE screen 1 3 without changing the settings when you press the ESC key CANCEL 4 Press the 1 key YES CLEAR Buffer will be cleared and it wi...

Страница 211: ...t mask Set the gateway Display the MAC address Setting the DHCP HCP settings depend on the configuration of network equipment and the customer s environment For details please see the equipment manual or consult the network administrator The default setting of DHCP is OFF Operation Supplement Perform the settings in Normal mode 1 Press the PAUSE MENU key MENU screen is displayed 2 Press the POSITI...

Страница 212: ...P screen is displayed 6 Press the 1 key ON or the 2 key OFF Supplement It will return to INTERFACE screen 2 3 without changing the settings when you press the ESC key CANCEL 7 Confirm the setting and press the ENTER key SET Setting will be confirmed and it will return to INTERFACE screen 2 3 8 Press the PAUSE MENU key It will return to default screen ...

Страница 213: ... from the DHCP server are displayed Operation Supplement Perform the settings in Normal mode 1 Press the PAUSE MENU key MENU screen is displayed 2 Press the POSITION key I F INTERFACE screen 1 3 is displayed 3 Press the POSITION key INTERFACE screen 2 3 is displayed 4 Press the 3 key LAN NETWORK LAN setting screen is displayed 5 Press the 2 key IP IP setting screen is displayed ...

Страница 214: ... SUBNET MASK SUBNET MASK setting screen is displayed Supplement Press the SLOW key to select the setting digits 9 Press the POSITION keys to set the subnet mask 10 Confirm the setting and press the ESC key PREVIOUS It will return to NETWORK LAN setting screen 11 Press the 4 key GATEWAY GATEWAY setting screen is displayed Supplement Press the SLOW key to select the setting digits 12 Press the POSIT...

Страница 215: ... press the ESC key PREVIOUS It will return to NETWORK LAN setting screen Supplement It will return to INTERFACE screen 2 3 without changing the settings when you press the ESC key CANCEL 14 Confirm the setting and press the ENTER key SET When the setting is changed the plotter will be reset and default screen will be displayed ...

Страница 216: ...contact the distributor where you purchased When the RS 232C interface is not equipped the menu will not be displayed Switching the setting number you want to use Operation Supplement Perform the settings in Normal mode 1 Press the PAUSE MENU key MENU screen is displayed 2 Press the POSITION key I F INTERFACE screen 1 3 is displayed 3 Press the POSITION key INTERFACE screen 2 3 is displayed Supple...

Страница 217: ...S It will return to RS 232C setting screen 8 Confirm the setting and press the ENTER key SET Setting will be confirmed and it will return to INTERFACE screen 2 3 9 Press the PAUSE MENU key It will return to default screen Changing storing the RS 232C setting Operation Supplement Perform the settings in Normal mode 1 Press the PAUSE MENU key MENU screen is displayed 2 Press the POSITION key I F INT...

Страница 218: ...ed Supplement Match it to the software you are using 6 Press the POSITION keys and increase or decrease the setting value 7 Confirm the setting and press the ESC key PREVIOUS The baud rate is selected and it will return to RS 232C setting screen 8 Press the 2 key DATA DATA BIT screen is displayed Supplement Match it to the software you are using It will return to RS 232C setting screen 2 3 without...

Страница 219: ...layed Supplement Match it to the software you are using It will return to RS 232C setting screen 2 3 without changing the settings when you press the ESC key PREVIOUS Enq Ack setting is available only for HP GL Even if you set to Enq Ack during GP GL It is set to HARD WIRE 13 Press the 1 key HARDWIRE the 2 key Xon off or the 3 key Enq Ack The handshake will be selected and it will return to RS 232...

Страница 220: ......

Страница 221: ...10 1 Chapter 10 Settings Regarding Operation Environment This chapter describes setting regarding the operation environment ...

Страница 222: ... ADV in Simple mode ADVANCE screen is displayed ADVANCE screen Normal mode ADVANCE screen Simple mode 3 Press the 2 key LANGUAGE SELECTION in Normal mode or press the 1 key LANGUAGE SELECTION in Simple mode LANGUAGE SELECTION screen is displayed 4 Press the POSITION keys and select the language In these instructions it s explained for when it s set to English Supplement It will return to ADVANCE s...

Страница 223: ...r press the 3 key ADV in Simple mode ADVANCE screen is displayed ADVANCE screen Normal mode ADVANCE screen Simple mode 3 Press the 3 key LENGTH UNIT in Normal mode or press the 2 key LENGTH UNIT in Simple mode LENGTH UNIT screen is displayed 4 Press the 1 key METRIC or the 2 key INCH Supplement It will return to ADVANCE screen without changing the settings when you press the ESC key CANCEL 5 Confi...

Страница 224: ...en setting undetectable media with high transmittance When set to DISABLED the cutting mat may be damaged Please be sure to configure the area Operation Supplement Perform the settings in Normal mode 1 Press the PAUSE MENU key in the default screen MENU screen is displayed 2 Press the POSITION key ADV ADVANCE screen 1 4 is displayed 3 Press the POSITION key ADVANCE screen 4 4 is displayed 4 Press ...

Страница 225: ... Enabling Disabling the push roller sensors PUSH ROLLER SENSOR This function enables or disables the push roller sensors that detect the width of the media CAUTION Usually please use it while set to Enabled When set to Disabled the cutting mat may be damaged Please always set the Cutting Area Operation Supplement Perform the settings in Normal mode 1 Press the PAUSE MENU key in the default screen ...

Страница 226: ...Press the 1 key ENABLED the 2 key INSIDE DISABLED or the 3 key DISABLED Supplement When DISABLE has been set the home sensor position is not detected so depending on the data a position error could occur It will return to ADVANCE screen 4 4 without changing the settings when you press the ESC key CANCEL 6 Confirm the setting and press the ENTER key SET Setting will be confirmed and it will return ...

Страница 227: ...s displayed 2 Press the POSITION key ADV ADVANCE screen 1 4 is displayed 3 Press the POSITION key ADVANCE screen 4 4 is displayed 4 Press the 4 key FAN POWER FAN POWER screen is displayed 5 Press the 1 key NORMAL or the 2 key WEAK Supplement It will return to ADVANCE screen 4 4 without changing the settings when you press the ESC key CANCEL 6 Confirm the setting and press the ENTER key SET Setting...

Страница 228: ...NU screen is displayed 2 Press the POSITION key ADV ADVANCE screen 1 4 is displayed 3 Press the 4 key BEEP FOR KEY OPE BEEP FOR KEY OPE setting screen is displayed 4 Press the 1 key ON or the 2 key OFF Supplement It will return to ADVANCE screen 1 4 without changing the settings when you press the ESC key CANCEL 5 Confirm the setting and press the ENTER key SET Setting will be confirmed and it wil...

Страница 229: ...CE screen 1 4 is displayed 3 Press the POSITION key twice ADVANCE screen 3 4 is displayed 4 Press the 1 key PAUSE MENU KEY SETTING PAUSE MENU KEY SETTING screen is displayed 5 Press the 1 key MENU or the 2 key PAUSE Supplement It will return to ADVANCE screen 3 4 without changing the settings when you press the ESC key CANCEL 6 Confirm the setting and press the ENTER key SET Setting will be confir...

Страница 230: ...ode and press the POSITION key twice on the ADVANCE ADV screen Press the 3 key ADV in Simple mode ADVANCE screen is displayed ADVANCE screen Normal mode ADVANCE screen Simple mode 3 Press the 2 key SIMPLE MODE in Normal mode or press the 3 key NORMAL MODE in Simple mode USER CHANGING screen is displayed 4 Press the 1 key Yes or the ESC key No 5 When the 1 key Yes is pressed the user setting will b...

Страница 231: ...ey twice ADVANCE screen 3 4 is displayed 4 Press the 4 key LCD CONTRAST LCD CONTRAST screen is displayed Supplement You can set the range between 30 and 30 5 step 5 Press the POSITION keys and increase or decrease the setting value Supplement It will return to ADVANCE screen 3 4 without changing the settings when you press the ESC key CANCEL 6 Confirm the setting and press the ENTER key SET Settin...

Страница 232: ......

Страница 233: ...11 1 Chapter 11 Settings of Controls from Computer This chapter describes setting regarding the controls from the computer ...

Страница 234: ...conds after completing the cutting Send next data after 10 seconds has past after previous cutting when sending data with different command Operation Supplement Set in the Normal mode There is no setting in Simple mode It is in the state of automatic operation If an incorrect judgment is made in the Simple mode set the command in the Normal mode and then operate it in the Normal mode 1 Press the P...

Страница 235: ...ware when PROGRAM is selected The values set from the control panel are maintained and the values set from the software are erased when the power is turned off Operation Supplement Perform the settings in Normal mode 1 Press the PAUSE MENU key in the default screen MENU screen is displayed 2 Press the 1 key TOOL TOOLS SETTING screen 1 4 is displayed 3 Press the POSITION key TOOLS SETTING screen 2 ...

Страница 236: ... in Normal mode and press the POSITION key in the INTERFACE I F screen Press the 2 key I F in Simple mode INTERFACE screen is displayed INTERFACE screen Normal mode INTERFACE screen Simple mode 3 Press the 1 key GP GL STEP SIZE in Normal mode or press the 2 key GP GL STEP SIZE in Simple mode GP GL STEP SIZE screen is displayed 4 Press the 1 key 0 100 mm the 2 key 0 050 mm the 3 key 0 025 mm or the...

Страница 237: ...ess the PAUSE MENU key in the default screen MENU screen is displayed 2 Press the POSITION key I F INTERFACE screen 1 3 is displayed 3 Press the POSITION key INTERFACE screen 2 3 is displayed 4 Press the 4 key COMMAND COMMAND screen is displayed 5 Press the 1 key ENABLED or the 2 key DISABLED 6 Confirm the setting and press the ENTER key SET Setting will be confirmed and it will return to INTERFAC...

Страница 238: ...owered status when it is set to TOOL DOWN Supplement This has an effect on the tool cutter only For the pen setting always the pen is raised PEN UP Operation Supplement Perform the settings in Normal mode 1 Press the PAUSE MENU key in the default screen MENU screen is displayed 2 Press the POSITION key I F INTERFACE screen 1 3 is displayed 3 Press the POSITION key INTERFACE screen 3 3 is displayed...

Страница 239: ...ation Supplement Perform the settings in Normal mode 1 Press the PAUSE MENU key in the default screen MENU screen is displayed 2 Press the POSITION key I F INTERFACE screen 1 3 is displayed 3 Press the 4 key HP GL MODEL EMULATED HP GL MODEL EMULATED screen is displayed 4 Press the 1 key 7550 or the 2 key 7586 5 Confirm the setting and press the ENTER key SET Setting will be confirmed and it will r...

Страница 240: ...s the PAUSE MENU key in the default screen MENU screen is displayed 2 Press the POSITION key I F INTERFACE screen 1 3 is displayed 3 Press the POSITION key INTERFACE screen 3 3 is displayed 4 Press the 2 key CIRCLE RESOLUTION CIRCLE RESOLUTION screen is displayed 5 Press the 1 key DEFAULT or the 2 key AUTO 6 Confirm the setting and press the ENTER key SET Setting will be confirmed and it will retu...

Страница 241: ... chapter describes setting regarding the data link PRODUCT SUMMARY 12 1 Select Connection Destination 12 2 Data Link with USB Memory 12 3 Output with a Bar Code 12 4 Start Mark Auto Scan 12 5 Communication Timeout 12 6 Skew Scanning ...

Страница 242: ...peration Supplement Perform the settings in Normal mode 1 Press the PAUSE MENU key MENU screen is displayed 2 Press the POSITION key LINK DATA LINK screen 1 2 is displayed 3 Press the 1 key DESTINATION DESTINATION screen is displayed 4 Press the 1 key USB MEMORY the 2 key SERVER USB or the 3 key SERVER LAN 5 Confirm the setting and press the ENTER key SET Setting will be confirmed and it will retu...

Страница 243: ...aracters More characters than 25 can be displayed by scrolling Extension is xpf and plt Scroll is displayed after a few moments after selecting the item The folder is surrounded by and Name is sorted in ascending order Files and folders can be obtained up to 64 Files in the second level folder is not available Operation 1 Insert the USB memory that saved the dedicated data to the plotter Supplemen...

Страница 244: ...e following is displayed If there is no data in the USB memory the following screen is displayed 7 Press the 2 key SELECTS DATA FILE SELECTS DATA FILE screen is displayed Supplement Press the POSITION keys to change the folder 8 Press the POSITION keys to select the file 9 Press the ENTER key START Cutting starts with the selected file 10 When the cutting is finished it will become READY status ...

Страница 245: ... plotter the bar code is scanned and the cut data XPF that has been saved to a USB memory that matches the bar code is detected Bar code Start mark Start mark Bar code Standard bar code Roll paper bar code Operation 1 Insert the USB memory that saved the dedicated data to the plotter Supplement Perform the settings in Normal mode 2 Press the PAUSE MENU key MENU screen is displayed 3 Press the POSI...

Страница 246: ... subsequent sheets 4 Press the 3 key BARCODE CUT The following message is displayed 5 Press the 1 key STANDARD BARCODE or the 2 key ROLL MEDIA BARCODE The following display is displayed Standard bar code Roll media bar code 6 Press the POSITION key to move the tool to the start mark position Supplement If the start mark is not scanned the following display is displayed Check the print result of st...

Страница 247: ...he appropriate files are found select the desired file If the appropriate files is not found the following screen is displayed 8 Find the file and then start cutting 9 When cutting is completed it will become READY status ...

Страница 248: ...ot available If a mask registration mark is being plotted there is a possibility to recognize the mask registration mark as a start mark If a mask registration mark is being plotted set the start mark auto scan to OFF Operation Supplement Perform the settings in Normal mode 1 Press the PAUSE MENU key MENU screen is displayed 2 Press the POSITION key LINK DATA LINK screen 1 2 is displayed 3 Press t...

Страница 249: ...screen 2 2 without changing the settings when you press the ESC key CANCEL 6 Confirm the setting and press the ENTER key SET Setting will be confirmed and it will return to DATA LINK screen 2 2 7 Press the PAUSE MENU key It will return to default screen ...

Страница 250: ...ion Supplement Perform the settings in Normal mode 1 Press the PAUSE MENU key MENU screen is displayed 2 Press the POSITION key LINK DATA LINK screen 1 2 is displayed 3 Press the POSITION key DATA LINK screen 2 2 is displayed 4 Press the 2 key COMMUNICATION TIME OUT COMMUNICATION TIME OUT screen is displayed Supplement You can set the range between 5 and 15 sec 5 Press the POSITION key and increas...

Страница 251: ... screen 2 2 without changing the settings when you press the ESC key CANCEL 6 Confirm the setting and press the ENTER key SET Setting will be confirmed and it will return to DATA LINK screen 2 2 7 Press the PAUSE MENU key It will return to default screen ...

Страница 252: ...ation Operation Supplement Perform the settings in Normal mode 1 Press the PAUSE MENU key MENU screen is displayed 2 Press the POSITION key LINK DATA LINK screen 1 2 is displayed 3 Press the POSITION key DATA LINK screen 2 2 is displayed 4 Press the 3 key AUTOMATIC SKEW DETECTION AUTOMATIC SKEW DETECTION screen is displayed Supplement During continuous operation you can select from 5 mm 10 mm or 1...

Страница 253: ...een 2 2 without changing the settings when you press the ESC key CANCEL 6 Confirm the setting and press the ENTER key SET Setting will be confirmed and it will return to DATA LINK screen 2 2 7 Press the PAUSE MENU key It will return to default screen ...

Страница 254: ......

Страница 255: ...application software This chapter describes how to cut with supplied application software PRODUCT SUMMARY 13 1 Basic operation of printing and cutting 13 2 Basic operation of bar code 13 3 Application of barcode cutting continuous operation ...

Страница 256: ... is necessary to attach registration marks alignment marks in order to know exactly the printing position Margin is necessary around the registration marks When printing on sheet media the following margins are required Leading edge Trailing edge Right and left edges MARK TYPE 1 15 mm or more 35mm or more 15mm or more MARK TYPE 2 17mm or more 37mm or more 15mm or more When printing on roll media i...

Страница 257: ... DesignCentral screen 4 Press the Options Specify the length and thickness of the registration mark on the displayed Graphtec Mark Options screen Press the OK 5 Press the on the DesignCentral screen Registration marks are created on the design screen Feed direction of media Feed direction of media MARK TYPE 1 MARK TYPE 2 ...

Страница 258: ...ct Start Registration Marks CM4 from the tool bar If selecting from the application launcher in CorelDRAW version X7 or earlier and the Registration Marks screen will be displayed Set type thickness and length of registration mark Check the Convert rectangle Press the OK Registration marks are created on the design screen The following screen is the screen when starting from Adobe Illustrator Feed...

Страница 259: ... design for printing and cutting When using Graphtec Pro Studio Supplement If this setting is not performed Step 4 Cut the printed media Contour Cut Mark icoin in Step 4 2 is not enabled 1 Select the print data and select Effects Contour Cut Mark Select the offset value of contour on the DesignCentral screen 2 Press the on the DesignCentral screen Cutting data is created on the design screen Feed ...

Страница 260: ...egistration mark scan from failing when cutting Set the enlarge shrink scale to 100 Set the printing position center lower left etc so that the positional relationship between the created document and the printed result is the same Operation 3 1 Print design data for printing and cutting When using Graphtec Pro Studio 1 Select the printer to use from the Print menu of Graphtec Pro Studio and print...

Страница 261: ...en using Graphtec Pro Studio 1 Click on the Cut Contour icon Supplement The ROTATE can be set only when using 4POINTS For other registration marks load the media according to the orientation of the preview 2 The Cut Contour screen is displayed Set the ROTATE to to match the setting direction of the media Press the Send Supplement When the Cut Contour screen is displayed for the first time the Add ...

Страница 262: ...red rectangle Press OK on the confirmation screen of Graphtec Pro Studio Supplement If a registration mark scanning error occurs check the registration marks etc See ARMS Registration marks are scanned Cutting starts when all registration marks are detected Feed direction of media Feed direction of media MARK TYPE 1 MARK TYPE 2 Move here Move here ...

Страница 263: ...an be set only when using 4POINTS For other registration marks load the media according to the orientation of the preview 2 Cut Plot screen is displayed Set the ROTATE to to match the set direction of the media Press the Send Supplement When the Cut Contour screen is displayed for the first time the Add Device screen is displayed Follow the instructions on the screen to select the model name to us...

Страница 264: ...e red rectangle Press OK on the confirmation screen of Cutting Master 4 Supplement If a registration mark scanning error occurs check the registration marks etc See ARMS Registration marks are scanned Cutting starts when all registration marks are detected Feed direction of media Feed direction of media MARK TYPE 1 MARK TYPE 2 Move here Move here ...

Страница 265: ...n printing on roll media it is necessary to provide a margin of 6 mm or more between the registration mark of the first sheet and the registration mark of the second sheet In addition margins of 15 mm or more must be provided at the left and right edges The printing position may be different depending on the printer you want to use therefor It s recommended to take a margin as long as several mm F...

Страница 266: ...It is recommended that cutting data be created by specifying a color that is not used in print data Feed direction of media Feed direction of media MARK TYPE 1 MARK TYPE 2 Cutting data Step 3 Print design data After creating the design print it on the media Supplement Pay attention to the following when printing to prevent registration mark scan from failing when cutting Set the enlarge shrink sca...

Страница 267: ...er Feed direction of media Feed direction of media MARK TYPE 1 MARK TYPE 2 4 2 Open the Configure Cut Job screenl Select the By Color from the Apply Conditions and select the color to cut Supplement The ROTATE can be set only when using 4POINTS For other registration marks load the media according to the orientation of the preview 4 3 Open the Page screen Set the ROTATE to 0 to match the setting d...

Страница 268: ...hin the red rectangle Feed direction of media Feed direction of media MARK TYPE 1 MARK TYPE 2 Move here Move here Supplement If a registration mark scanning error occurs check the registration marks etc See ARMS 4 6 Press the Send to cutter When registration mark scanning starts and all registration marks is completed to scan cutting starts ...

Страница 269: ... printing and cutting Step 2 Add bar code data Step 3 Print design data Step 4 Save cutting data in USB memory Step 5 Cut the printed media Supplement Graphtec Studio does not have a bar code function Graphtec Pro Studio Cutting Master 4 Step 1 Create registration mark alignment mark data and design data for printing and cutting See 13 1 Basic operation of printing and cutting to create design wit...

Страница 270: ...egistration mark 2 Press the Options on the DesignCentral screen 3 The Graphtec Mark Options screen is displayed Check the Use Barcode and select the Standard from the Barcode Type Press the OK 4 Press the on the DesignCentral screen Bar code is created on the design screen G0100SYAA G0100SYAC Feed direction of media Feed direction of media MARK TYPE 1 MARK TYPE 2 Bar code Bar code ...

Страница 271: ...her in CorelDRAW version X7 or earlierand the Registration Marks screen will be displayed 2 Check the Use Barcode Select the Standard from the Barcode Type 3 Check the Keep Registration Marks Press the OK The fololowing screen is the screen when starting from Adobe Illustrator 4 A bar code is created on the design screen G0100SYAA G0100SYAC Feed direction of media Feed direction of media MARK TYPE...

Страница 272: ... Save cutting data in USB memory Create an XPF file file dedicated to saving USB memory and save it to USB memory When you save cutting data and bar code information in this XPF file the cutting plotter will be able to find the correct cutting data Operation 4 1 Insert a USB memory into the computer When using Graphtec Pro Studio 1 Click on the Cut Contour icon Supplement When the Cut Contour scre...

Страница 273: ...on launcher Before selecting the Cut Plot set the layer of printing data to Hide Supplement When the Cut Contour screen is displayed for the first time the Add Device screen is displayed Follow the instructions on the screen to select the model name to use For USB connection select the Graphtec USB For network connection select the TCP IP and then enter the IP address of the cutting plotter 2 The ...

Страница 274: ... on the cutting plotter G0100SYAA G0100SYAC Feed direction of media Feed direction of media MARK TYPE 1 MARK TYPE 2 5 2 Insert the USB memory that saved the file into the USB memory slot of the cutting plotter 5 3 Set the menu of cutting plotter Supplement Perform the settings in Normal mode 5 4 Press the PAUSE MENU key MENU screen is displayed Supplement Confirm that the Destination is USB memory...

Страница 275: ...o ON the following screen is displayed When the MIRROR is set to ON the following screen is displayed When the PANEL CUTTING is set to ON the following screen is displayed 5 6 Press the 3 key BARCODE CUT The following message is displayed 5 7 Press the 1 key STANDARD BARCODE The following message is displayed ...

Страница 276: ...k see figure under the bar code and press the ENTER key The bar code is scanned the corresponding data is read out from the USB memory and cutting starts when the registration mark is completed to scan Feed direction of media MARK TYPE 1 MARK TYPE 2 G0100SYAA G0100SYAC Feed direction of media Move the center of the tool here Move the center of the tool here Feed direction of media G0100SYAC Start ...

Страница 277: ...d command is included in the data it becomes invalid When using a basket please do not let the media protrude from the basket If you do not use a basket please make sure that media does not accumulate on the floor If you do not take action the media may skew When doing continuous operation load the roll media without making slack of the medium at the back of the machine It cannot be used when conn...

Страница 278: ... is necessary to attach a special bar code called Roll media bar code Operation 2 1 Create registration marks and a bar code for data link continuous operation When using Graphtec Pro Studio 1 Select Effects Page Contour Cut Mark 2 Select a type of registration mark on the DesignCentral screen ...

Страница 279: ...e initialized in Printer Margin When changing the printer acquire margin information by pressing the Get Printer Margins Press the OK Supplement Registration marks are placed automatically The position cannot be changed 4 Press the on the DesignCentral screen Registration mark and bar code are created on the design screen G1100JMAA R G1100JMAA F G1100JMAA R G1100JMAA F Feed direction of media Feed...

Страница 280: ... Margin When changing the printer acquire margin information from the Get Printer Margin Press the OK If selecting from the application launcher in CorelDRAW version X7 or earlier and the Registration Marks screen will be displayed The following screen is the screen when starting from Adobe Illustrator Supplement Registration marks are placed automatically The position cannot be changed 2 Registra...

Страница 281: ...data in advance and print them collectively Print using the printer selected in 1 Prepare the design for data link continuous operation Operation 3 1 See 13 1 Basic operation of printing and cutting and print the design with registration marks and roll media bar code for printing and cutting Step 4 Save cutting data in data link server Create a job file and save it in the data link server Since cu...

Страница 282: ...name to use For USB connection select the Graphtec USB For network connection select the TCP IP and then enter the IP address of the cutting plotter The explanation here is limited to using a personal computer instead of the server for the data link server 2 The Cut Contour screen is displayed Select the Hold in list from the Send mode Press the Send 3 Switch to Production Manager Confirm that the...

Страница 283: ...g data to Hide Supplement When the Cut Plot screen is displayed for the first time the Add Device screen is displayed Follow the instructions on the screen to select the model name to use For USB connection select the Graphtec USB For network connection select the TCP IP and then enter the IP address of the cutting plotter The explanation here is limited to using a personal computer instead of the...

Страница 284: ...13 30 3 Switch to Cutting Master4 Confirm that the sent file is held in the Hold item Windows Mac ...

Страница 285: ...t work properly When using the data link server do not use USB connection and network connection at the same time Connect to the interface only that uses the data link server When using a data link server with network connection always connect with a LAN cable When connecting with wireless Wi Fi it may not operate properly 1 Press the Data link icon to start the data link server 2 Each time the ic...

Страница 286: ... at the same time Connect to the interface only that uses the data link server When using a data link server with network connection always connect with a LAN cable When connecting with wireless Wi Fi it may not operate properly 1 Press the Data link icon to start the data link server 2 Each time the icon is clicked start stop of the datalink server is switched In the start state a red frame is di...

Страница 287: ...yed 6 3 Press the 1 key DESTINATION DESTINATION screen is displayed Supplement It is not necessary to set the IP address of the data link server in the cutting plotter 6 4 Press the 2 key SERVER USB or the 3 key SERVER LAN Select the connection method to the personal computer set in Step 5 Start data link server 6 5 Confirm the setting and press the ENTER key SET Setting will be confirmed and it w...

Страница 288: ... direction of media Feed direction of media MARK TYPE 1 MARK TYPE 2 Bar code Bar code Supplement You can go from the MENU screen to the Continuous Operation starting screen Press the PAUSE MENU key in the default screen The following screen will be displayed Press the key LINK The following screen will be displayed Press the 4 key Continuous Operation The following screen will be displayed 7 2 Pre...

Страница 289: ...ch is the forward side of the start mark 7 4 Confirm the tool position and press the ENTER key Bar code scanning starts the corresponding data is read from the personal computer and cutting starts when the registration mark scanning is completed In continuous operation after cutting of the first data is completed the cutting plotter automatically scans the bar code receive the data and repeat the ...

Страница 290: ......

Страница 291: ...chapter describes the settings for the maintenance PRODUCT SUMMARY 14 1 Daily Maintenance 14 2 Replacing Cutter Blade 14 3 Cleaning the Cutter Pen 14 4 Cutter Plunger Exchange 14 5 Setting the Alarm for Degree of Wear BLADE WEAR ALARM ...

Страница 292: ...ith water 4 Clean the plotter s paper sensors using a cloth moistened in a neutral detergent diluted with water Never use thinner benzene alcohol or similar solvents to clean the sensors cleaners such as these will damage the sensors 5 When the Y rail sliding surface gets dirty gently wipe the dirt away with a clean dry towel The sliding surface has lubricant on it so be sure not to wipe all the l...

Страница 293: ... 1 Turn the blade length adjustment knob in the direction of the B arrow and pull the blade into the plunger One scale unit approximately 0 1 mm Scale Scale PHP33 CB09N HS PHP33 CB15N HS 2 Turn the plunger cap in the counter clockwise direction to remove it from the plunger 3 Remove the blade from inside the plunger cap 4 Take a new blade out of its pack Insert the new blade into the hole provided...

Страница 294: ...cutter blade straight into the plunger cap If the cutter blade cannot be inserted straight please insert the cutter blade after pressing the insertion port of the cutter blade several times Insertion port of the cutter blade If not installed correctly it may result in damage to the cutter blade or the plotter itself ...

Страница 295: ...uild up CAUTION To avoid bodily injury handle cutter blades with care Cleaning 1 Please clean off paper dust and media powder build up from the blade After cleaning it return it to its proper place Spin the plunger cap remove it and then clean the blade entrance area Cutter blade Plunger cap Plunger PHP33 CB09N HS PHP33 CB15N HS Cleaning 2 After completing cleaning attach the plunger cap ...

Страница 296: ...with the media When the tip of the cutter plunger gets worn down cut quality suffers When the tip of the plunger cap gets worn down it is recommended that you exchange the cutter plunger Cutter Plunger PHP33 CB09N HS PHP33 CB15N HS Tip CAUTION To avoid bodily injury handle cutter blades with care ...

Страница 297: ...LADE WEAR DETECT ON OFF SET BLADE GROUP ALARM DISTANCE and BLADE WEAR DETECT settings are required Operation Supplement Perform the settings in Normal mode 1 Press the PAUSE MENU key MENU screen is displayed 2 Press the 1 key TOOL TOOLS SETTING screen 1 4 is displayed 3 Press the POSITION key TOOLS SETTING screen 4 4 is displayed 4 Press the 1 key BLADE WEAR ALARM SETUP BLADE WEAR ALARM SETUP scre...

Страница 298: ... BLADE GROUP SET BLADE GROUP screen is displayed Supplement You can set the range between 1 and 8 9 Press the POSITION key to select the Tool Condition No CONDITION No Supplement You can set the range between 0 and 8 When set to 0 the alarm will not belong to any group 10 Press the POSITION key and increase or decrease the setting value 11 Confirm the setting and press the ENTER SET Setting will b...

Страница 299: ...crease or decrease the setting value 15 Confirm the setting and press the ENTER key SET Setting will be confirmed and it will return to BLADE WEAR ALARM SETUP screen 16 Press the 4 key CLEAR B WEAR VALUE GROUP CLEAR B WEAR VALUE GROUP screen is displayed 17 Press the POSITION key to select the GROUP No Supplement It will return to CLEAR B WEAR VALUE GROUP screen without clearing it when you press ...

Страница 300: ...EAR B WEAR is cleared it will return to CLEAR B WEAR VALUE GROUP screen 20 Press the ESC key CANCEL Setting will be confirmed and it will return to CLEAR B WEAR VALUE GROUP screen 21 Press the PAUSE MENU key It will return to default screen ...

Страница 301: ...rk right It also describes the settings of the plotter confirming the cutting data and method to create test patterns PRODUCT SUMMARY 15 1 Troubleshooting 15 2 Printing the Setting of the Plotter 15 3 Creating Test Pattern 15 4 Creating CUTTING PRO 15 5 Confirm the Cutting Data 15 6 Self Diagnostic Test ...

Страница 302: ...plotter is defective Check that the power cord is securely connected to the plotter s AC line inlet and the electrical outlet Check that the power is supplied to the electrical outlet Contact your Graphtec customer center if the problem still exists Sum Ck ROM RAM ERR is displayed on the LCD panel The ROM or RAM is defective Contact your Graphtec customer center if the problem still exists ...

Страница 303: ...ect disturbing the operation and turn on the plotter after turning it off once External force is applied to the pen carriage while cutting Move the object disturbing the operation and turn on the plotter after turning it off once Movement is disturbed by the media chaff in the operation area Move the object disturbing the operation and turn on the plotter after turning it off once The plotter is d...

Страница 304: ...specified length Slight distance error Media is slipping Make the speed slower Reduce the moving speed Perform feeding Setting the Tool Condition Pre Feed of Media Paper or Marking Film Setting the Tool Up Speed Distance adjust value is not correct Perform distance adjust Setting the Distance Adjust LOAD MEDIA is displayed even if the media is set and media set lever is moved up Media is close to ...

Страница 305: ...t media cannot be pulled up using retack sheet The retack sheet is not sticky enough Switch to a stickier retack sheet Media gets entangled during cutting Reduce the blade length Lower the FORCE setting Cleaning of cut media was postponed too long Promptly weed cut media Abnormal noise generated from the tool carriage during cutting The media is discolored where the blade has passed Media is rubbe...

Страница 306: ...nfigure to drive the plotter from the menu of the software The software configuration regarding the output device has been changed Reset the interface settings of the software The plotter s interface conditions have changed Reset the interface settings of the plotter E02005 An error occurred in the receipt of data within the interface Configure to drive the plotter from the menu of the software Th...

Страница 307: ...ror 2 Wrong number of parameters were specified Execute the command with the correct number of parameters E03003 Error 3 An unusable parameter was executed Execute a recognizable parameter E03005 Error 5 An unusable character set was specified Specify usable character set E03006 Error 6 Coordinates of command specified out of cutting area Execute coordinates within the cutting area E03007 Error 7 ...

Страница 308: ...the I O related command Check the program E03014 Error 14 Too many parameters in the I O related command Check the program E03015 Error 15 Framing error parity error or overrun error has occurred Set the RS 232C transmission condition E03016 Error 16 Interface buffer memory has overflowed Set the RS 232C transmission condition ...

Страница 309: ...in the plotting area for sensor position adjustment Move the media toward center and plot the test pattern E04008 Media end was detected while detecting the registration mark Check the media Check the print position of the registration mark E04009 It has exceeded detection area while detecting the registration mark Check the media Check the print position of the registration mark E04010 It has exc...

Страница 310: ...s exceeded detection area while detecting the registration mark Check the media Check the print position of the registration mark E04017 It has exceeded detection area while detecting the registration mark Check the media Check the print position of the registration mark E04018 Media set lever was lowered Reload the media and try again E04019 There was cancel operation by the user Redo the process...

Страница 311: ... was not detected Change the color of the registration mark Check the media Check the print position of the registration mark E04025 Registration mark was not detected Change the color of the registration mark Check the media Check the print position of the registration mark ...

Страница 312: ...nter E01010 The plotter is defective Contact your sales representative or the Graphtec call center E01011 The plotter is defective Contact your sales representative or the Graphtec call center E01012 The plotter is defective Contact your sales representative or the Graphtec call center E01013 The plotter is defective Contact your sales representative or the Graphtec call center E01014 The plotter ...

Страница 313: ...Data larger than the buffer size cannot be copied Perform normal cutting not using the copy mode E05002 There is no data to copy Perform normal cutting by sending the data then use the copy mode E05003 Media valid area to copy is too small Use larger media Confirm the copy start position E05004 The push roller is not on the grit roller Set the push roller on the grit roller E05006 Distance between...

Страница 314: ...tting data for the data link server Check the data link server E05016 The communication to the data link server is not established Check the data link server Increase the time until the timeout E05017 Media set lever is lowered Set the media again E05018 A trouble occurs in the data link server Restart the data link server E05019 A trouble occurs in communication to the data link server Set the me...

Страница 315: ...tion W06008 When command is set to auto the DUMP mode is not available W06009 When panel cutting has been set to ON the following functions are not available ARMS function AREA function COPY function BARCODE CUT function CONTINUOUS OPERATION function ...

Страница 316: ...ement See Loading Media Paper or Marking Film for loading the media 1 Load a media larger than A3 size Supplement See Attaching a Tool for setting the pen tool For changing the tool conditions please refer to Selecting Tool Condition and for tool settings please refer to Setting the Tool 2 Set the pen tool to the tool holder Backward and select the condition where the pen tool is set Supplement Pe...

Страница 317: ...eys CAUTION Do not place you hand around the moving areas The tool carriage will start moving so there is a chance of injury 8 Confirm that movable parts of the tool and media can safely operate and press the ENTER key Selected page of the CONDITION LIST is printed 9 It will return to READY status when the printing is completed Supplement Load the media and repeat steps 6 to 8 to print different p...

Страница 318: ...ding the media 1 Load a media larger than A3 size Supplement See Attaching a Tool for setting the pen tool For changing the tool conditions please refer to Selecting Tool Condition and for tool settings please refer to Setting the Tool 2 Set the pen tool to the tool holder Backward and select the condition where the pen tool is set Supplement Perform the settings in Normal mode 3 Press the PAUSE M...

Страница 319: ...irm that operation area of tool and media is safe Supplement t will return to TEST screen without printing by pressing the ESC key CANCEL SELF TEST 8 Press the 1 key DONE Plotting of the test pattern starts Supplement It will keep on printing until the power is turned off once the printing is started by pressing the 1 key DONE 9 Turn the power off to stop the printing ...

Страница 320: ...he media 1 Load a media larger than A3 size Supplement See Attaching a Tool for setting the pen tool For changing the tool conditions please refer to Selecting Tool Condition and for tool settings please refer to Setting the Tool 2 Set the pen tool to the tool holder Backward and select the condition where the pen tool is set Supplement Perform the settings in Normal mode 3 Press the PAUSE MENU ke...

Страница 321: ...riage will start moving so there is a chance of injury 7 Confirm that operation area of tool and media is safe Supplement It will return to TEST screen without printing by pressing the ESC key CANCEL 8 Press the 1 key START Start the CUTTING PRO 9 After the completion of print the TEST screen 1 2 is displayed ...

Страница 322: ...es not match Check the transmission condition and the command If the command setting is Auto the dump list of the cutting data is not output Please set the command to GP GL or HP GL Operation Supplement See Loading Media Paper or Marking Film for loading the media 1 Load a media larger than A4 size Supplement See Attaching a Tool for setting the pen tool For changing the tool conditions please ref...

Страница 323: ...f injury 7 Confirm that operation area of tool and media is safe Supplement It will return to TEST screen without printing by pressing the ESC key CANCEL DATA DUMP 8 Press the 1 key DONE 9 Send the cutting data The received cutting data command is output Supplement It will keep on printing until the power is turned off once the printing is started by pressing the 1 key DONE 10 Turn the power off t...

Страница 324: ...s turned on DIAGNOSTICS cannot be selected from the menu once any operation such as loading media is performed Operation 1 Confirm that the power is turned off 2 Turn the power on without loading the media Supplement Perform the settings in Normal mode 3 In the default screen press the PAUSE MENU key MENU screen is displayed 4 Press the POSITION key TEST TEST screen 1 2 is displayed 5 Press the PO...

Страница 325: ...next test will start It will return to TEST screen once all the test items are completed Test items are as following It may be changed 1 Set lever sensor 2 Home sensor 3 Push roller sensor 4 X media sensor 5 X media sensor 6 X motor signal 7 Y motor signal 8 Tool height signal 9 1 key 10 2 key 11 3 key 12 4 key 13 BARCODE key 14 SLOW key 15 POSITION key 16 POSITION key 17 POSITION key 18 POSITION ...

Страница 326: ...RROR will be displayed if there is no error Up to 4 error messages will be displayed on the screen Up to 32 error messages can be displayed by pressing the POSITION key When displayed while the power is on it indicates how long ago an error occurred The lower the value the more recently the error occurred 4 Press the 3 key ERROR MESSAGES ERROR MESSAGES screen is displayed Left column is time the e...

Страница 327: ...d Supplement Press the POSITION key in the screen of step 4 as necessary and repeat steps 5 and 6 if there are multiple error messages you would like to see 6 Press the ENTER key CONFIRM when the error message is confirmed It will return to ERROR MESSAGES screen 7 Press the PAUSE MENU key It will return to default screen ...

Страница 328: ......

Страница 329: ...A 1 Appendix This chapter describes the specification of the plotter PRODUCT SUMMARY A 1 Main Specifications A 2 Options and Supplies A 3 External Dimensions A 4 Menu Tree A 5 Initial Setting ...

Страница 330: ...utters pens 1 pc Usable pen type Water based fiber tip and oil based ballpoint Compatible media Mono vinyl chloride media fluorescent media and reflective media up to 0 25 mm thick Excluding high intensity reflective film Interface USB2 0 Full Speed Ethernet 10BASE T 100BASE TX RS 232C 6 Buffer memory 2 MB Resident command sets GP GL HP GL 4 Control panel switching Auto switching LCD display Graph...

Страница 331: ...Oil based ballpoint pen KB700 BK 1 set 10 pcs Black Carrier Sheet CR09300 A3 2 sht For detailed information about the cutter blade refer to the Cutter Blade Manual Please check our company s home page for the latest information on supplies Options Item Model Contents Quantity Stand ST0118 Used with CE7000 60 1 set Basket PG0103 Used with CE7000 60 1 set PG0104 Used with CE7000 130 1 set PG0105 Use...

Страница 332: ...A 4 A 3 External Dimensions CE7000 40 H D W Unit mm Dimensional accuracy 5mm CE7000 40 External dimensions approx W D H Unit mm 772 460 313 ...

Страница 333: ...A 5 CE7000 60 H D W Unit mm Dimensional accuracy 5mm CE7000 60 External dimensions approx W D H Unit mm 1005 582 1092 Stand are included ...

Страница 334: ...A 6 CE7000 130 160 H D W Unit mm Dimensional accuracy 5mm CE7000 130 CE7000 160 External dimensions approx W D H Unit mm 1704 811 1215 1916 811 1215 Stand are included ...

Страница 335: ...A 7 A 4 Menu Tree Simple mode MENU screen MEDIA SETTING 1 1 CUT TEST INTERFACE 1 1 ADVANCE 1 1 PAUSE MENU 1 CUT TEST 2 3 Default screen CONDITION setting 1 3 COND TEST COPY ...

Страница 336: ...A 8 Normal mode ENTER COPY ENTER COPY Default screen CONDITION setting 1 3 CONDITION setting 2 3 CONDITION setting 3 3 COND TEST 1 2 3 4 1 2 3 4 1 2 3 4 Continued ...

Страница 337: ...A 9 Continued Default screen Continued MENU screen TOOLS SETTING 1 4 TOOLS SETTING 2 4 TOOLS SETTING 3 4 PAUSE MENU 1 TOOLS SETTING 4 4 2 3 4 1 2 3 1 2 1 2 3 ...

Страница 338: ...A 10 PAUSE MENU 2 Continued MENU screen ARMS SETTING 1 3 ARMS SETTING 2 3 ARMS SETTING 3 3 Default screen Continued 1 2 3 1 2 3 2 4 3 ...

Страница 339: ...A 11 3 PAUSE MENU Continued MENU screen AREA PARAMETERS 1 2 AREA PARAMETERS 2 2 Default screen Continued 1 2 3 1 2 ...

Страница 340: ...A 12 1 2 3 4 1 3 MEDIA SETTING 2 2 4 PAUSE MENU Continued MENU screen MEDIA SETTING 1 2 Default screen Continued ...

Страница 341: ...A 13 PAUSE MENU Continued MENU screen INTERFACE 1 3 Default screen Continued INTERFACE 2 3 INTERFACE 3 3 2 3 1 4 2 3 1 4 1 2 When the RS 232C interface is installed ...

Страница 342: ...A 14 PAUSE MENU Continued MENU screen ADVANCE 1 4 ADVANCE 2 4 ADVANCE 3 4 ADVANCE 4 4 Default screen Continued 2 3 1 2 1 4 2 1 4 1 3 4 2 CE7000 130 160 only ...

Страница 343: ...A 15 PAUSE MENU Continued MENU screen TEST 1 2 TEST 2 2 Default screen Continued 2 3 1 1 4 ...

Страница 344: ...A 16 2 3 1 2 3 1 PAUSE MENU MENU screen DATA LINK 1 2 DATA LINK 2 2 Default screen Continued Default screen Finish ...

Страница 345: ...R LEFT GP GL STEP SIZE 0 100mm ADVANCE ADV LANGUAGE SELECTION Select when initially turning on power LENGTH UNIT Select when initially turning on power TOOL SETTING Condition Media name Speed cm s Force Standard Value For outdoor use 20 12 0 For decorative use 20 15 0 Transparent film 20 17 0 Reflective film 20 17 0 Fluorescent film 15 22 0 Setting items and initial values may be changed ...

Страница 346: ...0 0cm CE7000 60 130 160 INITIAL FEED OFF FEED SPEED NORMAL POSITION PANEL CUTTING OFF DIVIDE LENGTH 100 0cm TAKE UP OFF INTERFACE I F HP GL ORIGIN POINT LOWER LEFT HP GL MODEL EMULATED 7586 GP GL STEP SIZE 0 100mm RS 232C SWITCHING SETTING NUMBERS No 1 RS232C FORWARDING CONDITION BAUD RATE DATA BIT PARITY HARDWIRE HANDSHAKE RS 232C No 1 9600 8 NONE HARD RS 232C No 2 9600 7 EVEN HARD RS 232C No 3 9...

Страница 347: ...ondition No Condition No 4 TOOL CB09U SPEED FORCE ACCELERATION 20 17 1 Same as Condition No 1 from CUT LINE PATTERN to INITIAL DOWN FORCE Same as Condition No 1 CONDITION 5 Condition No Condition No 5 TOOL CB09U SPEED FORCE ACCELERATION 60 17 3 CE7000 40 64 17 3 CE7000 60 71 17 2 CE7000 130 160 Same as Condition No 1 from CUT LINE PATTERN to INITIAL DOWN FORCE Same as Condition No 1 CONDITION 6 Co...

Страница 348: ......

Страница 349: ...ler position guide 1 4 1 6 2 25 1 8 Grit rollers 1 4 1 6 1 8 Sign 1 2 3 4 2 32 A About the Default Screen 2 29 Accessories 1 2 Accessory case 1 5 1 7 1 9 AC line inlet 1 5 1 7 1 9 Adjusting for the registration mark scan position 5 16 Adjusting the blade length 2 4 Adjustment for cutting out 2 59 Adjustment for Half Cutting 2 59 Adjustment of Offset 2 59 Adjustment on the media 5 20 Adjustment reg...

Страница 350: ...Origin Point Settings When configuring HP GL 2 67 P Page Length 2 65 Panel Cutting 4 15 Pause key select setting 10 9 PAUSE MENU 2 31 POSITION 2 32 Positioning 5 6 Power cable 1 2 Power switch 1 5 1 7 1 8 Pre Feed of Media 2 39 Printing the Setting of the Plotter 15 16 Priority of tool condition selection 11 3 Push roller hold down force switching lever 1 9 Push rollers 1 4 1 6 1 8 Push roller sen...

Страница 351: ...etting tool No 2 53 SETUP MANUAL 1 2 Sheet media 2 16 2 18 Simple mode 2 34 2 63 Simple mode setting 10 10 Skew Scanning 12 12 SLOW 2 32 Software Activation Code 1 2 Sorting 8 2 Speed and Force 2 44 Stand 1 7 1 9 Start Mark Auto Scan 12 8 STEP PASS 7 8 Step Size 2 68 Stock shaft 1 7 1 9 Stop Cutting 3 12 Stopper 1 7 1 9 Subnet mask 9 7 Supplies A 3 T Tangential mode 7 2 TEST 2 35 Test pattern 15 2...

Страница 352: ......

Страница 353: ...Specifications are subject to change without notice CE7000 Series User s Manual CE7000 UM 151 MAY 20 2019 1st edition 01 GRAPHTEC CORPORATION ...

Страница 354: ......

Отзывы: