13-11
Graphtec Studio
Step 1: Create registration mark (alignment mark) data.
When printing and cutting, it is necessary to attach registration marks (alignment marks) in order to know exactly
the printing position.
Margin is necessary around the registration marks.
When printing on sheet media, the following margins are required.
Leading edge
Trailing edge
Right and left
edges
MARK TYPE 1
15mm or more
35mm or more
15mm or more
MARK TYPE 2
17mm or more
37mm or more
15mm or more
When printing on roll media, it is necessary to provide a margin of 6
mm or more between the registration mark of the first sheet and the
registration mark of the second sheet. In addition, margins of 15 mm
or more must be provided at the left and right edges.
* The printing position may be different depending on the printer you
want to use, therefor It's recommended to take a margin as long as
several mm.
Fe
ed d
ire
ct
io
n o
f m
ed
ia
Margin
Operation
1-
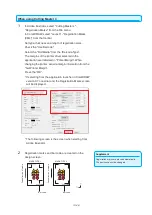
1 Open the "Registration Marks" tab.
Specify the pattern, length, thickness, reference position of
registration mark.
Registration marks are created on the design screen.
Fe
ed d
ire
ct
io
n o
f m
ed
ia
Fe
ed d
ire
ct
io
n o
f m
ed
ia
MARK TYPE 1
MARK TYPE 2
Содержание CE7000 Series
Страница 1: ...CE7000 SERIES CUTTING PLOTTER USER S MANUAL MANUAL NO CE7000 UM 151 ...
Страница 2: ......
Страница 18: ......
Страница 104: ......
Страница 118: ......
Страница 168: ......
Страница 220: ......
Страница 232: ......
Страница 254: ......
Страница 284: ...13 30 3 Switch to Cutting Master4 Confirm that the sent file is held in the Hold item Windows Mac ...
Страница 290: ......
Страница 328: ......
Страница 339: ...A 11 3 PAUSE MENU Continued MENU screen AREA PARAMETERS 1 2 AREA PARAMETERS 2 2 Default screen Continued 1 2 3 1 2 ...
Страница 340: ...A 12 1 2 3 4 1 3 MEDIA SETTING 2 2 4 PAUSE MENU Continued MENU screen MEDIA SETTING 1 2 Default screen Continued ...
Страница 343: ...A 15 PAUSE MENU Continued MENU screen TEST 1 2 TEST 2 2 Default screen Continued 2 3 1 1 4 ...
Страница 344: ...A 16 2 3 1 2 3 1 PAUSE MENU MENU screen DATA LINK 1 2 DATA LINK 2 2 Default screen Continued Default screen Finish ...
Страница 348: ......
Страница 352: ......
Страница 354: ......


