4-8
Expanding Your Computer
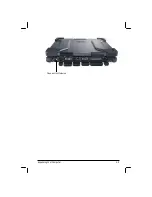
Connecting an IR Device
Your computer has an IR (infrared) port for connecting an
infrared-equipped device wirelessly such as another computer, printer, or
PDA (Personal Digital Assistant).
Follow this procedure to connect an IR device:
1.
Under Windows, make sure that the IrDA Fast Infrared Port is set to
HP HSDL-2300/3600.
2.
Make sure that the “COM Ports” and its “COM2 (FIR) setting ” items
are set properly in the SCU program. (See “Advanced Menu” in
Chapter 5 for information.)
3.
When using the IR port:
Place the transmitting device where its IR port faces the IR port of
your computer within the effective range
−
within
±
20-degrees
vertical angle and within
±
20-degrees horizontal angle at no greater
than 0.8~1.0 meter distance.
Place the receiving device where the IR port of your computer faces
its IR port within the effective range
−
within
±
15-degrees vertical
angle and within
±
15-degrees horizontal angle at no greater than
0.8~1.0 meter distance.
NOTES: During infrared communication, take note of the following:
z
Do not move the computer and IR device.
z
Do not enter Standby mode.
z
Do not use a cell phone or another IR device near the computer.
z
Avoid strong light such as sunlight or fluorescent light.
z
Disable the screen saver.
Содержание M220
Страница 1: ...M220 Operation Manual Part Number 799001151001R00 24 Mar 062006 ...
Страница 7: ...v European Union CE Marking and Compliance Notices B 9 ...
Страница 8: ......
Страница 11: ...M220 Operation Manual Part Number 799001151001R00 24 Mar 062006 ...
Страница 17: ...v European Union CE Marking and Compliance Notices B 9 ...
Страница 18: ......
Страница 38: ...1 18 Getting Started ...
Страница 65: ...Operating Your Computer 2 27 3 Click on Next to continue ...
Страница 69: ...Operating Your Computer 2 31 ...
Страница 88: ...Expanding Your Computer 4 9 Connect to IR device ...
Страница 93: ...4 14 Expanding Your Computer ...
Страница 98: ...Setup Configuration Utility SCU 5 5 Main Menu Date and Time ...
Страница 100: ...Setup Configuration Utility SCU 5 7 Advanced Menu Geyserville Support ...
Страница 104: ...Setup Configuration Utility SCU 5 11 Security Menu Power on Password ...
Страница 107: ...5 14 Setup Configuration Utility SCU Boot Menu Boot Sequence ...
Страница 110: ...Setup Configuration Utility SCU 5 17 ...
Страница 116: ...6 6 Installing Software Drivers ...


