2-10 Operating
Your
Computer
Term
Action
Point
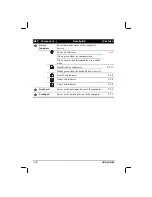
Move your finger on the pad until the cursor points to the
selection on the screen.
Click
Press and release the left button.
–or–
Tap gently anywhere on the pad.
Double-
click
Press and release the left button twice in quick succession.
–or–
Tap twice on the pad rapidly.
Drag
and
drop
Press and hold the left button, then move your finger until you
reach your destination (drag). Finally, release the button (drop)
when you finish dragging your selection to the destination. The
object will drop into the new location.
–or–
Gently tap twice on the pad and on the second tap, keep your
finger in contact with the pad. Then, move your finger across the
pad to drag the selected object to your destination. When you lift
your finger from the pad, the selected object will drop into place.
Scroll
To scroll is to move up and down or left and right in the working
area on the screen.
To move vertically, place your finger on the right edge of the
pad and slide your finger up and down along the edge. To move
horizontally, place your finger on the bottom edge of the pad and
slide your finger left and right.
This function works only after you install the touchpad driver
supplied with the computer and it may not work for all
applications.
TABLE NOTE
:
If you swap the left and right buttons, “tapping” on the touchpad
as an alternative method of pressing the left button will no longer be valid.
Содержание M220
Страница 1: ...M220 Operation Manual Part Number 799001151001R00 24 Mar 062006 ...
Страница 7: ...v European Union CE Marking and Compliance Notices B 9 ...
Страница 8: ......
Страница 11: ...M220 Operation Manual Part Number 799001151001R00 24 Mar 062006 ...
Страница 17: ...v European Union CE Marking and Compliance Notices B 9 ...
Страница 18: ......
Страница 38: ...1 18 Getting Started ...
Страница 65: ...Operating Your Computer 2 27 3 Click on Next to continue ...
Страница 69: ...Operating Your Computer 2 31 ...
Страница 88: ...Expanding Your Computer 4 9 Connect to IR device ...
Страница 93: ...4 14 Expanding Your Computer ...
Страница 98: ...Setup Configuration Utility SCU 5 5 Main Menu Date and Time ...
Страница 100: ...Setup Configuration Utility SCU 5 7 Advanced Menu Geyserville Support ...
Страница 104: ...Setup Configuration Utility SCU 5 11 Security Menu Power on Password ...
Страница 107: ...5 14 Setup Configuration Utility SCU Boot Menu Boot Sequence ...
Страница 110: ...Setup Configuration Utility SCU 5 17 ...
Страница 116: ...6 6 Installing Software Drivers ...


