Chapter V. The Scanner Software
57
Utility window which will automatically open
(click on the down-arrow to change fax drivers).
5.
Adjust any settings if needed (see below for details
about the settings).
6.
Make sure to choose the appropriate scan mode by
clicking on either the B/W Photo or Text buttons.
7.
Click on the big green Start button towards the
right side of the Fax Utility window to begin the
scanning and faxing process.
The document will now be sent to your fax
software for addressing.
Fax Utility Settings
•
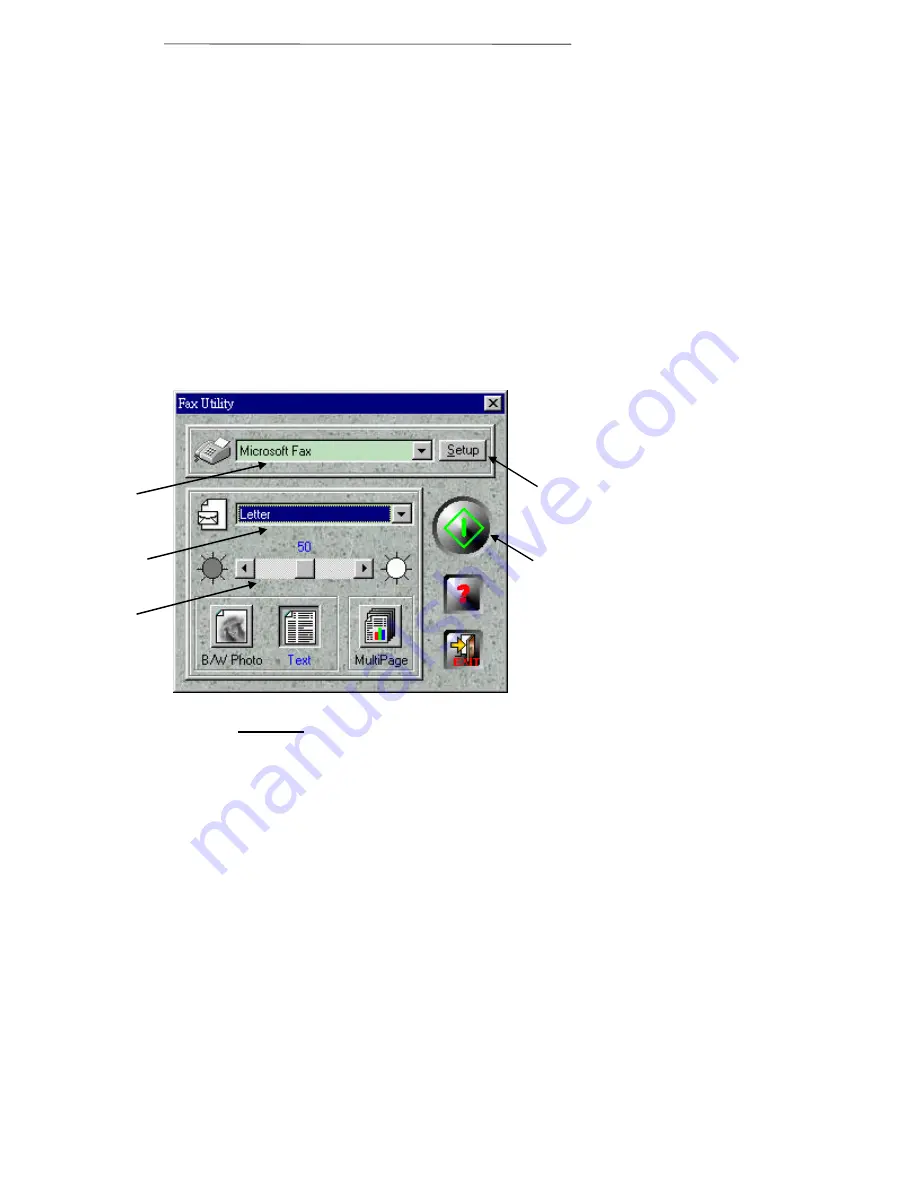
SELECT FAX SOFTWARE
allows you to
select between different fax software that may be
installed on your computer. The Fax Utility sends
the scanned image to your fax software and
NOT
directly to your fax modem. Thus, after you click
on the Start button in the Fax Utility window, the
document will be scanned and then the fax
software (driver) you define here will be run with
the scanned image already loaded into it.
•
SETUP FAX
is where you can define a number
of settings for your fax software. Clicking on the
Figure 19. Fax Utility Window
Select
Fax
Paper
Size
Fax
Setup
Brightness
Start
Button
Содержание VividPro II
Страница 8: ...1 Chapter I Hardware Installation...
Страница 13: ...6 Chapter II Software Setup...
Страница 16: ...9 Chapter III Usage and Maintenance...
Страница 31: ...24 Chapter IV The TWAIN Interface...
Страница 56: ...49 Chapter V The Scanner Software...


