32
•
Operational Reference
Genie Nano-CL Series™
•
Parameters pane: Allows viewing or changing all acquisition parameters supported by the
acquisition device. CamExpert displays parameters only if those parameters are supported by
the installed device. This avoids confusion by eliminating parameter choices when they do not
apply to the hardware in use.
When using a Teledyne DALSA frame grabber and camera link camera, CamExpert groups all
frame grabber parameters first and then follows with the supported camera features. Together
the user configures the imaging system.
•
Display pane: Provides a live or single frame acquisition display. Frame buffer parameters are
shown in an information bar above the image window.
•
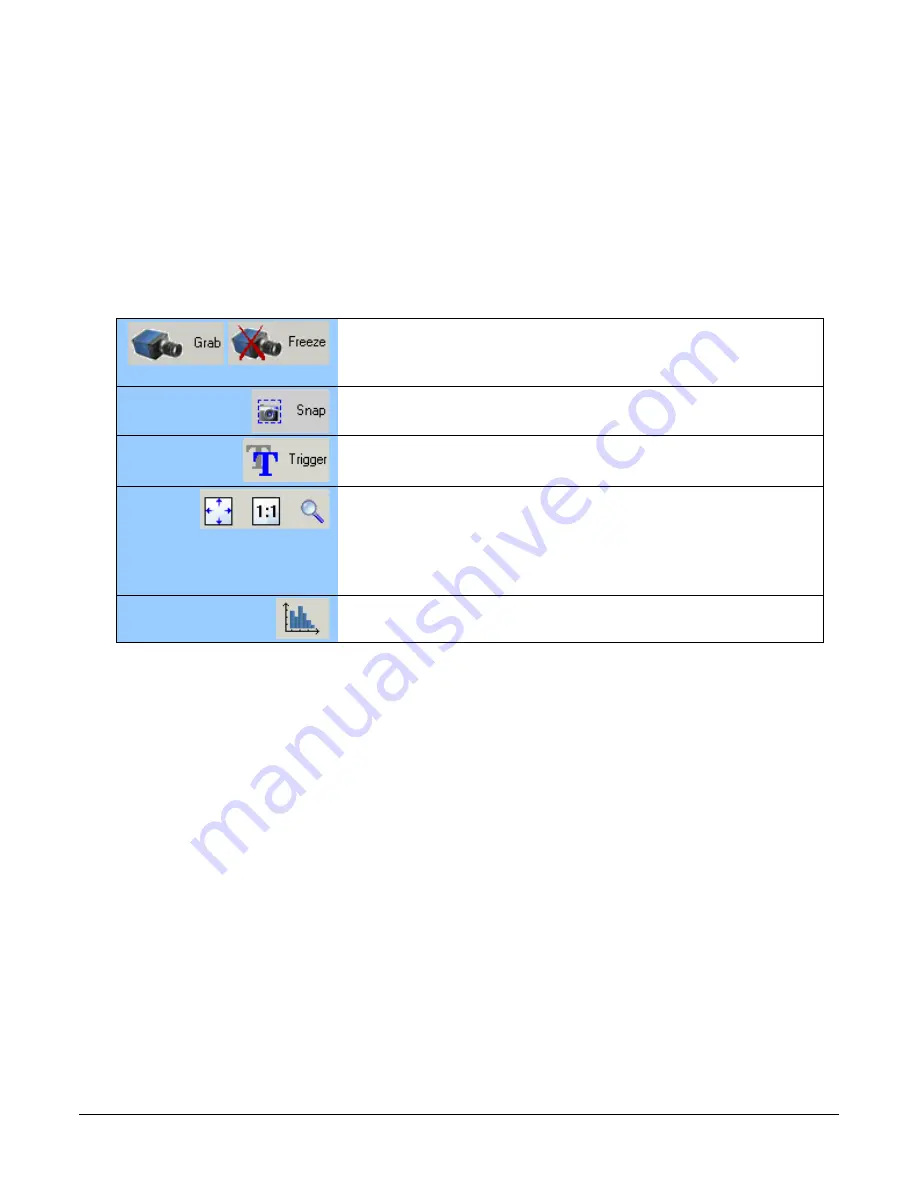
Control Buttons: The Display pane includes CamExpert control buttons. These are:
Acquisition control button:
Click once to start the frame grabber live grab mode, click again to stop.
The Nano-CL is always in free running acquisition mode unless configured to
use an external trigger.
Single frame grab:
Click to acquire one frame from the frame grabber device.
Software trigger button:
With the I/O control parameters set to Trigger Enabled / Software Trigger
type, click to send a single software trigger command.
CamExpert display controls:
(these do not modify the frame buffer data)
Stretch (or shrink) image to fit, set image display to original size, or zoom
the image to any size and ratio. Note that under certain combinations of
image resolution, acquisition frame rate, and host computer speed, the
CamExpert screen display may not update completely due to the host CPU
running at near 100%. This does not affect the acquisition.
Histogram / Profile tool:
Select to view a histogram or line/column profile during live acquisition.
•
Output pane: Displays messages from CamExpert or the GigE Vision driver.
•
Camera Link Signals: Displays the status of various Camera Link timing signals plus active
PoCL connections.
CamExpert View Parameters Option
While the Board section shows all frame grabber parameters, the Attached Camera section
shows camera features filtered by a Visibility attribute which defines its requirement or complexity.
The states vary from Beginner (features required for basic operation of the device) to Guru
(optional features required only for complex operations).
CamExpert presents camera features based on their visibility attribute and provides quick Visibility
level selection via controls below each Category Parameter list [ << Less More>> ]. The user can
also choose the Visibility level from the View ∙ Parameters Options menu.
About the Device User ID
The Nano-CL can be programmed with a user defined name to aid identifying multiple cameras
connected to the network. For instance, on an inspection system with 4 cameras, the first camera
might be labeled “top view”, the second “left view”, the third “right view” and the last one “bottom
view”. The factory default user name is the camera serial number for quick initial identification.
Содержание Nano-CL C2450
Страница 94: ...92 Technical Specifications Genie Nano CL Series EC FCC Declarations of Conformity...
Страница 104: ...102 Additional Reference Information Genie Nano CL Series Cable Assembly G3 AIOC BLUNT1M...
Страница 105: ...Genie Nano CL Series Additional Reference Information 103 Cable Assembly G3 AIOC BLUNT2M...
Страница 106: ...104 Additional Reference Information Genie Nano CL Series...
Страница 107: ...Genie Nano CL Series Additional Reference Information 105 Cable Assembly G3 AIOC BRKOUT2M...
Страница 108: ...106 Additional Reference Information Genie Nano CL Series...
Страница 109: ...Genie Nano CL Series Additional Reference Information 107 Nano Generic Power Supply with no I O...
Страница 111: ...Genie Nano CL Series Additional Reference Information 109 Cable Assembly Right Angle I O to Euro Block...


