background image

GE

LOGIQ V5/LOGIQ V3

D

IRECTION

 5496012-100, R

EVISION


3


B

ASIC

 S

ERVICE

 M

ANUAL

Chapter 3 - System Setup

3 - 21

3-6-5-3Connect Peripherals 

(cont’d)

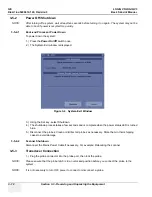
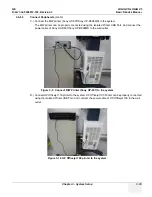
F.) Connect the USB Memory to the system. The USB Memory can be properly connected using the 

USB ports.

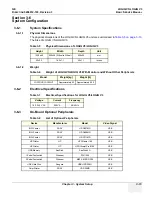
G.) Connect the USB HDD to the system. The USB Harddisk can be properly connected using USB 

ports.

Figure 3-12  USB Memory Connection

Figure 3-13  USB Hard Disk Connection

Содержание LOGIQ V3

Страница 1: ...GE LOGIQ V5 LOGIQ V3 Basic Service Manual Part Number 5496012 100 Revision 3 ...

Страница 2: ......

Страница 3: ...AIS C EST AU CLIENT QU IL INCOMBE DE LE FAIRE TRADUIRE NE PAS TENTER D INTERVENTION SUR LES éQUIPEMENTS TANT QUE LE MANUEL SERVICE N A PAS éTé CONSULTé ET COMPRIS LE NON RESPECT DE CET AVERTISSEMENT PEUT ENTRAîNER CHEZ LE TECHNICIEN L OPéRATEUR OU LE PATIENT DES BLESSURES DUES à DES DANGERS éLECTRIQUES MéCANIQUES OU AUTRES DIESES KUNDENDIENST HANDBUCH EXISTIERT NUR IN ENGLISCHER SPRACHE FALLS EIN ...

Страница 4: ... PACIENTE DEVIDO A CHOQUES ELéTRICOS MECâ NICOS OU OUTROS ESTE MANUAL DE ASSISTÊNCIA ESTÁ DISPONÍVEL APENAS EM INGLÊS SE QUALQUER OUTRO SERVIÇO DE ASSISTÊNCIA TÉCNICA QUE NÃO A GEHC SOLICITAR ESTES MANUAIS NOUTRO IDIOMA É DA RESPONSABILIDADE DO CLIENTE FORNECER OS SERVIÇOS DE TRADUÇÃO NÃO TENTE EFECTUAR REPARAÇÕES NO EQUIPAMENTO SEM TER CONSULTADO E COMPREENDIDO PREVIAMENTE ESTE MANUAL A INOBSERVÂ...

Страница 5: ... N TAI POTILAAN VAHINGOITTUMINEN Sä HKö ISKUN MEKAANISEN VIAN TAI MUUN VAARATILANTEEN VUOKSI ΤΟ ΠΑΡΟΝ ΕΓΧΕΙΡΙ ΙΟ ΣΕΡΒΙΣ ΙΑΤΙΘΕΤΑΙ ΣΤΑ ΑΓΓΛΙΚΑ ΜΟΝΟ ΕΑΝ ΤΟ ΑΤΟΜΟ ΠΑΡΟΧΗΣ ΣΕΡΒΙΣ ΕΝΟΣ ΠΕΛΑΤΗ ΑΠΑΙΤΕΙ ΤΟ ΠΑΡΟΝ ΕΓΧΕΙΡΙ ΙΟ ΣΕ ΓΛΩΣΣΑ ΕΚΤΟΣ ΤΩΝ ΑΓΓΛΙΚΩΝ ΑΠΟΤΕΛΕΙ ΕΥΘΥΝΗ ΤΟΥ ΠΕΛΑΤΗ ΝΑ ΠΑΡΕΧΕΙ ΥΠΗΡΕΣΙΕΣ ΜΕΤΑΦΡΑΣΗΣ ΜΗΝ ΕΠΙΧΕΙΡΗΣΕΤΕ ΤΗΝ ΕΚΤΕΛΕΣΗ ΕΡΓΑΣΙΩΝ ΣΕΡΒΙΣ ΣΤΟΝ ΕΞΟΠΛΙΣΜΟ ΕΚΤΟΣ ΕΑΝ ΕΧΕΤΕ ΣΥΜΒΟΥΛΕΥΤΕΙ ΚΑΙ ΕΧΕ...

Страница 6: ...KA POSKYTOVATELE SLUŽEB OBSLUŽNéHO PERSONá LU NEBO PACIENTů VLIVEM ELEKTRICKéHOP PROUDU RESPEKTIVE VLIVEM K RIZIKU MECHANICKÉHO POŠKOZENÍ NEBO JINÉMU RIZIKU DENNE SERVICEMANUAL FINDES KUN PÅ ENGELSK HVIS EN KUNDES TEKNIKER HAR BRUG FOR ET ANDET SPROG END ENGELSK ER DET KUNDENS ANSVAR AT SØRGE FOR OVERSÆTTELSE FORSØG IKKE AT SERVICERE UDSTYRET MEDMINDRE DENNE SERVICEMANUAL ER BLEVET LÆST OG FORSTÅE...

Страница 7: ... BŪTI SUŽEISTAS DĖL ELEKTROS SMŪGIO MECHANINIŲ AR KITŲ PAVOJŲ DENNE SERVICEHÅNDBOKEN FINNES BARE PÅ ENGELSK HVIS KUNDENS SERVICELEVERANDØR TRENGER ET ANNET SPRÅK ER DET KUNDENS ANSVAR Å SØRGE FOR OVERSETTELSE IKKE FORSØK Å REPARERE UTSTYRET UTEN AT DENNE SERVICEHÅNDBOKEN ER LEST OG FORSTÅTT MANGLENDE HENSYN TIL DENNE ADVARSELEN KAN FØRE TIL AT SERVICELEVERANDØREN OPERATØREN ELLER PASIENTEN SKADES ...

Страница 8: ...РИВЕСТИ К ТОМУ ЧТО СПЕЦИАЛИСТ ПО ТЕХОБСЛУЖИВАНИЮ ОПЕРАТОР ИЛИ ПАЦИЕНТ ПОЛУЧАТ УДАР ЗЛЕКТРИЧЕСКИМ ТОКОМ МЕХАНИЧЕСКУЮ ТРАВМУ ИЛИ ДРУГОЕ ПОВРЕЖДЕНИЕ ТОВА СЕРВИЗНО РЪКОВОДСТВО Е НАЛИЧНО САМО НА АНГЛИЙСКИ ЕЗИК АКО ДОСТАВЧИКЪТ НА СЕРВИЗНИ УСЛУГИ НА КЛИЕНТ СЕ НУЖДАЕ ОТ ЕЗИК РАЗЛИЧЕН ОТ АНГЛИЙСКИ ЗАДЪЛЖЕНИЕ НА КЛИЕНТА Е ДА ПРЕДОСТАВИ ПРЕВОДАЧЕСКА УСЛУГА НЕ СЕ ОПИТВАЙТЕ ДА ИЗВЪРШВАТЕ СЕРВИЗНО ОБСЛУЖВАНЕ НА...

Страница 9: ...OUZROČENE STRUJNIM UDAROM MEHANIČKIM I DRUGIM OPASNOSTIMA TÁTO SERVISNÁ PRÍRUČKA JE K DISPOZíCII LEN V ANGLIČTINE AK ZÁKAZNÍKOV POSKYTOVATEĽ SLUŽIEB VYŽADUJE INÝ JAZYK AKO ANGLIČTINU POSKYTNUTIE PREKLADATEĽSKÝCH SLUŽIEB JE ZODPOVEDNOSŤOU ZÁKAZNÍKA NEPOKÚŠAJTE SA VYKONÁVAŤ SERVIS ZARIADENIA SKÔR AKO SI NEPREČÍTATE SERVISNÚ PRÍRUČKU A NEPOROZUMIETE JEJ ZANEDBANIE TOHTO UPOZORNENIA Mô ŽE VYÚSTIŤ DO Z...

Страница 10: ...UZUN İNGİLİZCE DIŞINDAKİ BİR DİLDE OLMASINI İSTERSE KILAVUZU TERCÜME ETTİRMEK MÜŞTERİNİN SORUMLULUĞUNDADIR SERVİS KILAVUZUNU OKUYUP ANLAMADAN EKİPMANLARA MÜDAHALE ETMEYİNİZ BU UYARININ GÖZ ARDI EDİLMESİ ELEKTRİK ÇARPMASI YA DA MEKANİK VEYA DİĞER TÜRDEN KAZALAR SONUCUNDA TEKNİSYENİN OPERATÖRÜN YA DA HASTANIN YARALANMASINA YOL AÇABİLİR DİKKAT TR JA Traditional Chinese ...

Страница 11: ...GE LOGIQ V5 LOGIQ V3 DIRECTION 5496012 100 REVISION 3 BASIC SERVICE MANUAL ix ZH CN KO ...

Страница 12: ...ll comply with the requirements of the applicable electrical codes The purchaser of GE equipment shall only utilize qualified personnel i e GE s field engineers personnel of third party service companies with equivalent training or licensed electricians to perform electrical servicing on the equipment OMISSIONS ERRORS If there are any omissions errors or suggestions for improving this documentatio...

Страница 13: ... or basic service software does not extend to or cover this software or related documentation If you are a GE employee or a customer who has entered into such a license agreement with GE to use this proprietary software you are authorized to use this Material according to the conditions stated in your license agreement However you do not have the permission of GE to alter decompose or reverse asse...

Страница 14: ... 28 3 Chapter 8 Replacement Procedures pages 8 1 to 8 6 3 Important Precautions pages i to x 3 Chapter 4 Functional Checks pages 4 1 to 4 32 3 Chapter 9 Replacement Parts pages 9 1 to 9 10 3 Table of Contents pages i to xii 3 Chapter 5 Theory pages 5 1 to 5 4 3 Chapter 10 Periodic Maintenance pages 10 1 to 10 18 3 Chapter 1 Introduction pages 1 1 to 1 17 3 Chapter 6 Service Adjustments pages 6 1 t...

Страница 15: ...rtant Conventions 1 5 Conventions Used in Book 1 5 Standard Hazard Icons 1 6 Product Icons 1 7 Safety Considerations 1 10 Introduction 1 10 Human Safety 1 10 Mechanical Safety 1 10 Electrical Safety 1 11 Label Locations 1 11 Dangerous Procedure Warnings 1 12 Returning Shipping Probes and Repair Parts 1 13 Lockout Tagout LOTO requirements 1 14 EMC EMI and ESD 1 15 Electromagnetic Compatibility EMC ...

Страница 16: ... 2 Console Environmental Requirements 2 2 Electrical Requirements 2 2 EMI Limitations 2 4 Scan Probe Environmental Requirements 2 5 Facility Needs 2 6 Purchaser Responsibilities 2 6 Required Features 2 7 Minimal floor plan suggestion 2 8 Recommended floor plan suggestion 2 9 Suggested floor plan Ultrasound system and EchoPAC PC in same room 2 10 Networking Pre installation Requirements 2 11 ...

Страница 17: ...r Order 3 10 Physical Inspection 3 10 EMI Protection 3 10 Completing the Installation 3 11 Power On Boot Up 3 11 Power Off Shutdown 3 12 Transducer Connection 3 12 System Configuration 3 13 System Specifications 3 13 Electrical Specifications 3 13 On Board Optional Peripherals 3 13 Connecting Cables 3 14 Peripherals Accessories Connector Panel 3 14 Available Probes 3 24 Software Option Configurati...

Страница 18: ...er On Boot Up 4 2 Power Off Shutdown 4 3 Archiving and Loading Presets 4 5 Adjusting the Display Monitor 4 6 System Features 4 7 B Mode Checks 4 10 M Mode Controls 4 14 Doppler Mode Checks 4 16 Color Flow Mode Checks 4 19 Basic Measurements 4 22 Probe Connectors Usage 4 23 Using Cine 4 24 Backup and Restore Database Preset Configurations and Images 4 25 Software Configuration Checks 4 32 Periphera...

Страница 19: ...ION 5496012 100 REVISION 3 BASIC SERVICE MANUAL Table of Contents v CHAPTER 5 Components and Functions Theory Overview 5 1 Purpose of Chapter 5 5 1 Block Diagram 5 2 System Diagram 5 2 Common Service Platform 5 3 Introduction 5 3 ...

Страница 20: ...V5 LOGIQ V3 DIRECTION 5496012 100 REVISION 3 BASIC SERVICE MANUAL vi Table of Contents CHAPTER 6 Service Adjustments Overview 6 1 Purpose of this chapter 6 6 1 Monitor Adjustments 6 2 Adjustments Procedures 6 2 ...

Страница 21: ...ing Trouble Data 7 2 Overview 7 2 Collect Vital System Information 7 2 Collect a Trouble Image with Logs 7 3 Screen Captures 7 4 Check and Record the Store Key Function 7 4 Setting the Store Key to Screen Capture 7 4 Capturing a Screen 7 5 Reset the Store Key to Customer s Functionality 7 6 Common Diagnostics 7 7 Utilities 7 7 Network Configuration 7 8 Network Configuration 7 8 ...

Страница 22: ...ON 3 BASIC SERVICE MANUAL viii Table of Contents CHAPTER 8 Replacement Procedures Overview 8 1 Purpose of Chapter 8 8 1 DISASSEMBLY RE ASSEMBLY 8 2 Warning and Caution 8 2 Returning Shipping for repairs 8 2 Footrest 8 3 Loading Base Image Software 8 4 ...

Страница 23: ... MANUAL Table of Contents ix CHAPTER 9 Renewal Parts Overview 9 1 Purpose of Chapter 9 9 1 List of Abbreviations 9 1 Renewal Parts Lists 9 2 Equipment Models Covered in this Chapter 9 2 Operator Console Assy 9 3 CRU Parts List 9 4 Manuals 9 5 Peripheral 9 7 Probes 9 9 ...

Страница 24: ...2 How often should care maintenance tasks be performed 10 2 Tools Required 10 4 Standard GE Tool Kit 10 4 Special Tools Supplies and Equipment 10 6 Input Power 10 7 Cleaning 10 7 Physical Inspection 10 7 Outlet Test Wiring Arrangement USA Canada 10 8 Grounding Continuity 10 9 Chassis Leakage Current Test 10 10 Isolated Patient Lead Source Leakage Lead to Lead 10 11 Isolated Patient Lead Sink Leaka...

Страница 25: ...as part of the installation or as required during servicing and periodic maintenance 5 Chapter 5 Components and Functions Theory Contains block diagrams and functional explanations of the electronics 6 Chapter 6 Service Adjustments Contains instructions on how to make available adjustments to the LOGIQ V5 LOGIQ V3 7 Chapter 7 Diagnostics Troubleshooting Provides procedures for running diagnostic o...

Страница 26: ...r Manual s should be fully read and understood before operating the LOGIQ V5 LOGIQ V3 and also kept near the unit for quick reference NOTE Probe information displayed on screen does not necessarily reflect the probes available on your ultrasound system Please refer to the probe list for available probes and features 1 1 5 LOGIQ V5 LOGIQ V3 Models Covered by this Manual Table 1 2 LOGIQ V Model Desi...

Страница 27: ......

Страница 28: ...t 5176499 1 N 1018 3Sc RS biopsy kit 5329137 1 N System and Application Software USB 1019 LOGIQ V Series R1 0 0 System and Application Software USB 5501727 1 Y 1020 LOGIQ V Series R1 0 1 System and Application Software USB 5501727 2S 1 Y 1021 LOGIQ V Series R1 0 2 System and Application Software USB 5501727 3S 1 Y 1022 LOGIQ V Series R1 0 3 System and Application Software USB 5501727 4S 1 Y Table ...

Страница 29: ...potential hazards are labeled in one of following ways NOTE Notes provide important information about an item or a procedure Information contained in a NOTE can often save you time or effort DANGER DANGER IS USED TO INDICATE THE PRESENCE OF A HAZARD THAT WILL CAUSE SEVERE PERSONAL INJURY OR DEATH IF THE INSTRUCTIONS ARE IGNORED WARNING WARNING WARNING IS USED TO INDICATE THE PRESENCE OF A HAZARD T...

Страница 30: ...ddition to text several different graphical icons symbols may be used to make you aware of specific types of hazards that could cause harm Other hazard icons make you aware of specific procedures that should be followed Table 1 4 Standard Hazard Icons ELECTRICAL MECHANICAL RADIATION LASER HEAT PINCH Table 1 5 Standard Icons Indicating a Special Procedure Be Used AVOID STATIC ELECTRICITY TAG AND LO...

Страница 31: ...es the degree of protection provided by the enclosure per IEC60 529 Bottom of footswitch Type BF Applied Part man in the box symbol is in accordance with IEC 60878 02 03 Beside the probe connector General Warning Various CAUTION Dangerous voltage the lightning flash with arrowhead is used to indicate electric shock hazards Various Indicates the power on and power off position of the power switch C...

Страница 32: ...environmental pollution bodily injury or damage to any assets Probe and Rear Panel China Rating Plate Do not place any objects on the monitor Back of LCD Do not force the LCD monitor with your hands Back of LCD There is a pinch point on the LCD monitor Take care to avoid injuring hands or fingers when flipping down the LCD monitor Back of LCD Use the rear handle for horizontal movement only Back o...

Страница 33: ...istration is complete this label will be located on the console rating plate NRTL Listing and Certification Mark is used to designate conformance to nationally recognized product safety standards The Mark bears the name and or logo of the testing laboratory product category safety standard to which conformity is assessed and a control number Rear Panel United States only Presciption Requirement la...

Страница 34: ...ECOME UNSTABLE AND TIP OVER WARNING WARNING ULTRASOUND PROBES ARE HIGHLY SENSITIVE MEDICAL INSTRUMENTS THAT CAN EASILY BE DAMAGED BY IMPROPER HANDLING USE CARE WHEN HANDLING AND PROTECT FROM DAMAGE WHEN NOT IN USE DO NOT USE A DAMAGED OR DEFECTIVE PROBE FAILURE TO FOLLOW THESE PRECAUTIONS CAN RESULT IN SERIOUS INJURY AND EQUIPMENT DAMAGE WARNING WARNING NEVER USE A PROBE THAT HAS FALLEN TO THE FLO...

Страница 35: ...ent chassis must be connected to an electrical ground The system is equipped with a three conductor AC power cable This must be plugged into an approved electrical outlet with safety ground The power outlet used for this equipment should not be shared with other types of equipment Both the system power cable and the power connector meet international electrical standards 1 3 5 Label Locations Refe...

Страница 36: ...NG WARNING WARNING EXPLOSION WARNING DO NOT OPERATE THE EQUIPMENT IN AN EXPLOSIVE ATMOSPHERE OPERATION OF ANY ELECTRICAL EQUIPMENT IN SUCH AN ENVIRONMENT CONSTITUTES A DEFINITE SAFETY HAZARD WARNING WARNING DO NOT SUBSTITUTE PARTS OR MODIFY EQUIPMENT BECAUSE OF THE DANGER OF INTRODUCING ADDITIONAL HAZARDS DO NOT INSTALL SUBSTITUTE PARTS OR PERFORM ANY UNAUTHORIZED MODIFICATION OF THE EQUIPMENT WAR...

Страница 37: ...l waste disposal regulation Equipment being returned must be clean and free of blood and other infectious substances GE policy states that body fluids must be properly removed from any part or equipment prior to shipment GE employees as well as customers are responsible for ensuring that parts equipment have been properly decontaminated prior to shipment Under no circumstance should a part or equi...

Страница 38: ... equipment 3 Isolate the equipment 4 Apply Lockout Tagout Devices 5 Control all stored and residual energy 6 Verify isolation All potentially hazardous stored or residual energy is relieved NOTICE Energy Control and Power Lockout for LOGIQ V5 LOGIQ V3 WHEN SERVICING PARTS OF THE SYSTEM WHERE THERE IS EXPOSURE TO VOLTAGE GREATER THAN 30 VOLTS 1 TURN OFF THE SCANNER 2 UNPLUG THE SYSTEM 3 MAINTAIN CO...

Страница 39: ... power of signal cables In addition to electromagnetic energy EMC also includes possible effects from electrical fields magnetic fields electrostatic discharge and disturbances in the electrical power supply 1 5 2 CE Compliance The LOGIQ V5 LOGIQ V3 unit conforms to all applicable conducted and radiated emission limits and to immunity from electrostatic discharge radiated and conducted RF fields m...

Страница 40: ...for Customer Assistance LOCATION PHONE NUMBER USA GE Medical Systems Ultrasound Service Engineering 9900 Innovation Drive Wauwatosa WI 53226 Service On site Service Parts Application Support 1 800 437 1171 1 800 558 2040 1 800 682 5327 or 1 262 524 5698 Canada 1 800 668 0732 Latin America Service Application Support 1 800 321 7937 1 262 524 5698 Europe OLC EMEA GE Ultraschall Deutschland GmbH Beet...

Страница 41: ... Manufacturer FAX Number GE Medical Systems China Co Ltd No 19 Changjiang Road Wuxi National Hi Tech Development Zone Jiangsu P R China 214028 TEL 86 510 85225888 FAX 86 510 85226688 Table 1 9 Factory Site Factory Site FAX Number GE Medical Systems China Co Ltd No 19 Changjiang Road Wuxi National Hi Tech Development Zone Jiangsu P R China 214028 TEL 86 510 85225888 FAX 86 510 85226688 ...

Страница 42: ...GE LOGIQ V5 LOGIQ V3 DIRECTION 5496012 100 REVISION 3 BASIC SERVICE MANUAL 1 18 Section 1 6 Customer Assistance This page was intentionally left blank ...

Страница 43: ... 2 This chapter provides the information required to plan and prepare for the installation of LOGIQ V5 LOGIQ V3 Included are descriptions of the facility and electrical needs to be met by the purchaser of the unit Table 2 1 Contents in Chapter 2 Section Description Page Number 2 1 Overview 2 1 2 2 General Console Requirements 2 2 2 3 Facility Needs 2 6 ...

Страница 44: ...und equipment This dedicated power shall originate at the last distribution panel before the system Sites with a mains power system with defined Neutral and Live The dedicated line shall consist of one phase a neutral not shared with any other circuit and a full size ground wire from the distribution panel to the Ultrasound outlet Sites with a mains power system without a defined Neutral The dedic...

Страница 45: ...des 2 2 2 5 Unit Power Plug If the unit arrives without the power plug or with the wrong plug you must contact your GE dealer or the installation engineer must supply what is locally required 2 2 2 6 Power Stability Requirements Voltage drop out Max 10 ms Power Transients All applications Less than 25 of nominal peak voltage for less than 1 millisecond for any type of transient including line freq...

Страница 46: ...grounding is the most likely reason a unit will have noisy images Check grounding of the power cord and power outlet Replace all screws RF gaskets covers cores After you finish repairing or updating the system replace all covers and tighten all screws Any cable with an external connection requires a magnet wrap at each end Install the shield over the front of card cage Loose or missing covers or R...

Страница 47: ...onmental Requirements Operation 10 to 40 C Storage 5 to 50 C NOTE Temperature in degrees C Conversion to Degrees F Degrees C 9 5 32 NOTICE SYSTEMS AND ELECTRONIC PROBES ARE DESIGNED FOR STORAGE TEMPERATURES OF 10 TO 60 degrees C WHEN EXPOSED TO LARGE TEMPERATURE VARIATIONS THE PRODUCT SHOULD BE KEPT IN ROOM TEMPERATURE FOR 10 HOURS BEFORE USE ...

Страница 48: ...rs Other connections between pieces of electrical equipment products involved and the accompanying electrical installations are highly sophisticated and special engineering competence is required All electrical work on these product must comply with the requirements of applicable electrical codes The purchaser of GE equipment must only utilize qualified personnel to perform electrical servicing on...

Страница 49: ...stem without a defined Neutral The dedicated line shall consist of one phase two lines not shared with any other circuit and a full size ground wire from the distribution panel to the Ultrasound outlet Please note that image artifacts can occur if at any time within the facility the ground from the main facility s incoming power source to the Ultrasound unit is only a conduit Dedicated single bran...

Страница 50: ... least 762 mm 30 inches 2 Film Viewer 3 Counter Top Sink with hot and cold water and Supplies Storage 4 Linen Supply 5 Probes Supplies 6 Examination Table 1930 x 610 mm 76 x 24 inches 7 Footswitch 8 Stool 9 Ultrasound system 10 External Peripherals 11 Dedicated Power Outlet Circuit Breaker protected and easily accessible 12 Network Interface 13 457 mm 18 inches distance of Ultrasound system from w...

Страница 51: ... Cabinet 3 Film Viewer 4 Counter Top 5 Counter Top and Sink with hot and cold water 6 Overhead Lights Dimmer Dual Level Lighting bright and dim 7 Emergency Oxygen 8 Suction Line 9 Ultrasound system 10 Dedicated Power Outlet Circuit Breaker protected and easily accessible 11 Network Interface 12 457 mm 18 inches distance of Ultrasound system from wall or objects 13 Stool 14 Footswitch 15 Storage fo...

Страница 52: ... 3 5 Suggested floor plan Ultrasound system and EchoPAC PC in same room Figure 2 2 Suggested Room with EchoPAC PC workstation and Ultrasound Scanner 1 EchoPAC PC workstation parts 2 UPS 3 Ethernet network wall outlet 4 3x mains power outlets 5 Hot and Cold water 6 Dedicated mains power outlet 7 Ethernet network wall outlet ...

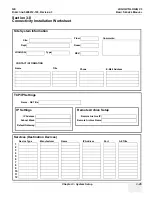
Страница 53: ...ees up the on board monitor and peripherals enabling viewing to be done while scanning continues With DICOM images can be archived stored and retrieved faster easier and at a lower cost 2 3 6 4 DICOM Option Pre installation Requirements To configure the LOGIQ V5 LOGIQ V3 to work with other network connections the site s network administrator must provide some necessary information Information must...

Страница 54: ...ts cont d Figure 2 2 Worksheet for DICOM Network Information LOGIQ V5 Host Name AE Title Local Port IP Address Net Mask ROUTING INFORMATION ROUTER2 ROUTER3 ROUTER1 Destination IP Addresses GATEWAY IP Addresses Default DICOM APPLICATION INFORMATION NAME Store 2 Store 3 Store 1 MAKE REVISION IP ADDRESSES PORT AE TITLE Store 5 Store 6 Store 4 Storage Commit MPPS Worklist ...

Страница 55: ... to check and test the unit and external peripherals for electrical safety are included in this procedure Also included LOGIQ V5 LOGIQ V3 in this section are guidelines for transporting the unit to a new site Table 3 1 Contents in Chapter 3 Section Description Page Number 3 1 Overview 3 1 3 2 Setup Reminders 3 2 3 3 Receiving and Unpacking the Equipment 3 5 3 4 Preparing for Installation 3 10 3 5 ...

Страница 56: ...nstalled and checked out by an experienced service technician in approximately 1 hour LOGIQ V5 LOGIQ V3 consoles with optional equipment may take slightly longer Table 3 2 Average Installation Time Description Average Installation Time Comments Unpacking the scanner 0 5 hour Scanner wo options 0 5 hour Dependant on the configuration that is required DICOM Option 0 5 hour Dependant on the amount of...

Страница 57: ...e personnel should carry out servicing and troubleshooting NOTE For information regarding packing labels refer to LABELS ON PACKAGE 3 After being transported the unit may be very cold or hot If this is the case allow the unit to acclimate before you turn it on It requires one hour for each 2 5 C increment it s temperature is below 10 C or above 30 C CAUTION Equipment damage possibility Turning the...

Страница 58: ...connect the unit to a properly grounded power outlet Do not use a three to two prong adapter This defeats safety grounding CAUTION Do NOT wear the ESD wrist strap when you work on live circuits and more than 30 V peak is present CAUTION Do not use a 20 Amp to 15 Amp adapter on the 120 Vac unit s power cord This unit requires a dedicated 20 A circuit and can have a 15A plug if the on board peripher...

Страница 59: ... in Chapter 1 CAUTION Do not lift the unit by the Keyboard Equipment damage may result CAUTION The crate with the LOGIQ V5 LOGIQ V3 weighs approximately 50kg Be prepared for a sudden shift of weight as the unit is removed from its base pallet Table 3 4 Unpacking the equipment Step Description Corresponding Graphic 1 Tear the stop open mark 2 Cut the two packing straps around the crate Note To avoi...

Страница 60: ...g and Unpacking the Equipment 4 Open the four plastic locks Note Rotate the inside plastic lock counterclockwise to remove it and then remove the outside lock 5 Remove the outside shipping box 6 Remove the dust bag from the unit Table 3 4 Unpacking the equipment Step Description Corresponding Graphic ...

Страница 61: ...er 3 System Setup 3 7 7 Remove the clear plastic wrapped around the LOGIQ V5 LOGIQ V3 from the unit Note To avoid damaging the unit please use a pair of scissors instead of the knife 8 Remove the accessory box Table 3 4 Unpacking the equipment Step Description Corresponding Graphic ...

Страница 62: ... packing straps around the four wheels and remove the foams beside the wheels Note To aviod injury lock the wheels before cutting the packing straps 11 Unlock the wheels and then hold the control panel at the front side to move the system until the front two wheels on the ground and then slowly move the whole system on the ground Table 3 4 Unpacking the equipment Step Description Corresponding Gra...

Страница 63: ...the front of the unit Before moving store all loose parts in the unit Wrap transducers in soft cloth or foam to prevent damage Although LOGIQ V5 LOGIQ V3 is a mobile machine two people should move it over rough surfaces or up and down grades 3 3 2 Product Locator Installation Card NOTE The Product Locator Installation Card shown may not be same as the provided Product Locator card CAUTION Do not t...

Страница 64: ...GIQ V5 LOGIQ V3 is found on a label to the right of the Power switch and External I O on the rear of the system 3 4 2 2 Video Formats Check that the video format is set to the locally used video standard NTSC or PAL 3 4 3 EMI Protection This Unit has been designed to minimize the effects of Electro Magnetic Interference EMI Many of the covers shields and screws are provided primarily to protect th...

Страница 65: ...led too quickly 3 5 1 1 Scanner Power On When power is applied to the scanner power is distributed to the Cooling Unit Control Panel LCD Peripherals and the Back end Processor 3 5 1 2 Turn on the system Press the Power On Off switch at the front of the system once When the Power On Off switch on the Control Panel is pressed once the Back end Processor starts and the software code is distributed to...

Страница 66: ... Set key select Shutdown 4 The shutdown process takes a few seconds and is complete when the power status LED is turned blue 5 Disconnect the probes Clean or disinfect all probes as necessary Store them in their shipping cases to avoid damage 3 5 2 2 Scanner Shutdown Disconnect the Mains Power Cable if necessary For example Relocating the scanner 3 5 3 Transducer Connection 1 Plug the probe connec...

Страница 67: ... 5 1 1 25 1 1 inches Table 3 6 Weight of LOGIQ V5 LOGIQ V3 With Monitor and Without Other Peripherals Model Weight kg Weight lb LOGIQ V5 LOGIQ V3 Approximately 45 Approximately 99 2 Table 3 7 Electrical Specifications for LOGIQ V5 LOGIQ V3 Voltage Current Frequency 100 240 V AC 300VA 50 60Hz Table 3 8 List of Optional Peripherals Device Manufacturer Model Video Signal B W Printer SONY UP D897MD US...

Страница 68: ...y connected using the side connector panel 3 6 5 1 Rear Panel Connector NOTE The AC printer can be connected to the isolated Printer USB port on the rear panel only WARNING WARNING Equipment damage possibility Be sure to use the following recommended connecting cables to connect recording devices and a network with LOGIQ V5 LOGIQ V3 console Table 3 9 List of Connecting Cables Name Part No Figure N...

Страница 69: ...inter ONLY 3 USB Ports USB Ports 4 Ethernet LAN for InSite Connection RJ45 5 Circuit breaker 6 5A 6 AC Inlet 100 240V Table 3 11 Pin Assignments of External VGA Pin No Signal Pin No Signal 1 RED 9 NC 2 GREEN 10 NC 3 BLUE 11 NC 4 NC 12 NC 5 NC 13 HSY 6 GND 14 VSY 7 GND 15 NC 8 GND Table 3 12 Pin Assignments of USB Pin No Signal Pin No Signal 1 5 VDC 5 5 VDC 2 DATA 6 DATA 3 DATA 7 DATA 4 GND 8 GND T...

Страница 70: ...NUAL 3 16 Section 3 3 Receiving and Unpacking the Equipment Table 3 14 Pin Assignment of S Video Pin No Output Signal Pin No Output Signal 1 GND 3 Y 2 GND 4 C Table 3 15 Pin Assignment of Composite Video Out Pin No Output Signal Pin No Output Signal 1 Composite Out 2 GND ...

Страница 71: ...nnect Peripherals A Connect B W printer to the system Sony UP D711MD Printer can be properly connected using the STD and DC cables Sony UP D711MD is connected to the LOGIQ V5 LOGIQ V3 system via the STD and DC cables under the control panel Figure 3 6 Connect B W printer to the system Figure 3 7 STD cable location ...

Страница 72: ...npacking the Equipment 3 6 5 3Connect Peripherals cont d B Connect Sony UP D25MD color printer to the system Sony UP D25MD Color Printer can be properly connected using the isolated Printer USB Port And connect the power cable of Sony UP D25MD to the wall outlet Figure 3 8 Connect color printer to the system ...

Страница 73: ...y connected using the isolated Printer USB Port And connect the power cable of Sony UP D897 Sony UP D898MD to the wall outlet D Connect HP Officejet 100 printer to the system HP Officejet 100 Printer can be properly connected using the isolated Printer USB Port And connect the power cable of HP Officejet 100 to the wall outlet Figure 3 9 Connect B W Printer Sony UP 897 to the system Figure 3 10 HP...

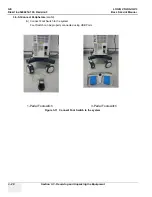
Страница 74: ...MANUAL 3 20 Section 3 3 Receiving and Unpacking the Equipment 3 6 5 3Connect Peripherals cont d E Connect Foot Switch to the system Foot Switch can be properly connected using USB Ports Figure 3 11 Connect Foot Switch to the system 1 Pedal Footswitch 3 Pedal Footswitch ...

Страница 75: ...21 3 6 5 3Connect Peripherals cont d F Connect the USB Memory to the system The USB Memory can be properly connected using the USB ports G Connect the USB HDD to the system The USB Harddisk can be properly connected using USB ports Figure 3 12 USB Memory Connection Figure 3 13 USB Hard Disk Connection ...

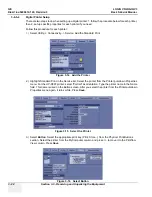
Страница 76: ...ghlight Standard Print in the Service list Select the printer from the Printer pull down Properties menu For the UP D897 printer select Portrait as orientation Type the printer name in the Name field This name is used on the Button screen After you select the printer from the Printer pull down Properties menu again it turns white Press Save 3 Select Button Select the appropriate print key Print St...

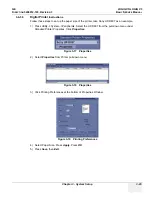
Страница 77: ...ny UP D897 as an example 1 Press Utility System Peripherals Select the UP D897 from the pull down menu under Standard Printer Properties Click Properties 2 Select Properties from Printer pull down menu 3 Click Printing Preferences at the bottom of Properties Window 4 Select Paper Size Press Apply Press OK 5 Press Save then Exit Figure 3 17 Properties Figure 3 18 Properties Figure 3 19 Printing Pre...

Страница 78: ...s like Hospital Department Language Units of measure Date Time and Date Format For information on configuring Software Options Refer to the LOGIQ V5 LOGIQ V3 Basic User Manual Chapter 16 Customizing Your System For information on configuring DICOM Connectivity Refer to the LOGIQ V5 LOGIQ V3 Basic User Manual Chapter 16 Customizing Your System Probe Name Material of Headshell Area of Using TYPE Cat...

Страница 79: ... Information Services Destination Devices TCP IP Settings Device Type Manufacturer Name IP Address Port AE Title 1 2 3 4 5 6 7 8 9 10 11 12 Name AE Title Dept LOGIQ SN Type Floor Room REV Comments CONTACT INFORMATION Name Title Phone E Mail Address Site IP Settings IP Address Subnet Mask Default Gateway Remote Archive Setup Remote Archive IP Remote Archive Name ...

Страница 80: ...V5 LOGIQ V3 DIRECTION 5496012 100 REVISION 3 BASIC SERVICE MANUAL 3 26 Section 3 9 Loading Base Image Software Section 3 9 Loading Base Image Software Refer to Section 8 3 Loading Base Image Software on page 8 4 ...

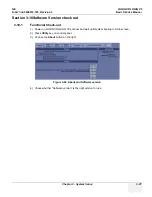
Страница 81: ...10Software Version check out 3 10 1 Functional Check out 1 Power on LOGIQ V5 LOGIQ V3 scanner and wait until system booting to main screen 2 Press Utility key on control panel 3 Choose the About button on the right 4 Check whether Software version is the right version for use Figure 3 20 About and Software version ...

Страница 82: ...afety and user information is available during the operation and service of the complete system 3 11 1 Product Locator Installation NOTE The Product Locator Installation Card shown may not be same as the provided Product Locator card 3 11 2 User Manual s User Check that the correct User Manual s for the system and software revision is included with the installation Specific language versions of th...

Страница 83: ...Q V5 LOGIQ V3 console diagnostics by using the built in service software and power supply Section 4 2 Required Equipment To perform these tests you ll need any of the sector linear or convex transducers normally you should check all the transducers used on the system Table 4 1 Contents in Chapter 4 Section Description Page Number 4 1 Overview 4 1 4 2 Required Equipment 4 1 4 3 General Procedure 4 ...

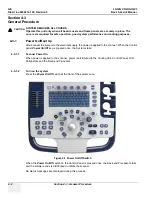
Страница 84: ...the Cooling Unit Control Panel LCD Peripherals and the Back end Processor 4 3 1 2 Turn on the system Press the Power On Off switch at the front of the system once When the Power On Off switch on the Control Panel is pressed once the Back end Processor starts and the software code is distributed to initiate the scanner No status messages are displayed during this process CAUTION SYSTEM REQUIRES ALL...

Страница 85: ...ce 2 The System Exit window is displayed 3 Using the Set key select Shutdown 4 The shutdown process takes a few seconds and the power off sequence is complete when the power status LED is turned blue 5 Disconnect the probes Clean or disinfect all probes as necessary Store them in their shipping cases to avoid damage 4 3 2 2 Scanner Shutdown Disconnect the Mains Power Cable is necessary For example...

Страница 86: ...of last boot up The BIOS time is changed by 24 hours earlier than the current system by resetting BIOS time replacing BIOS module or changing BIOS time This warning message is to remind the user to check the system date in case the system date and time is incorrect Move the cursor to OK and press Cursor key on the control panel to select OK The system enters scanning mode Check the system date and...

Страница 87: ...rchiving Presets to an CD R Disk or USB memory device 1 Insert an empty blank CD R disk into the DVD RW 2 Access to the Utility Menu and select System The Backup sheet will be shown on the LCD display 3 Select the item to back up either from Resource Files 4 Enter backup destination or browse through the disk to locate the destination 5 Select Backup now The backup status for each item is displaye...

Страница 88: ... the DVD RW 2 Access to the Utility Menu and select System The Restore sheet will be shown on the LCD display 3 Select the item to restore either from Resource Files 4 Enter restore destination or browse through the disk to locate the destination 5 Select Restore The restore status for each item is displayed on the Result column 4 3 4 Adjusting the Display Monitor Please refer to Section 6 2 Monit...

Страница 89: ...p Down keys 4 TGC 5 AN Keyboard 6 User Defined Keys 7 Patient Preset key 8 Probe key 9 User Preset key 10 Worksheet key 11 End Exam key 12 Archive key 13 Scan Coach 14 Mode Gain 15 Cursor key 16 Clear key 17 Comment key 18 Body Pattern 19 Measure key 20 Ellipse Zoom key 21 M D Cursor key 22 Scan Area key 23 Set B Pause key 24 B Steer Depth key 25 AO and CHI key 26 Left Right key 27 Freeze key 28 P...

Страница 90: ...12 100 REVISION 3 BASIC SERVICE MANUAL 4 8 Section 4 3 General Procedure 4 3 5 2 LOGIQ V5 LOGIQ V3 SoftMenu Key Tour 1 Rotary key Rotate to adjust the menu 2 Page Up Down key To turn the menu page up and down Figure 4 6 SoftMenu Key Tour ...

Страница 91: ...een 8 Delete Image 9 Save As Menu 10 Number of Images in Exam 11 Page Indication 12 Touchpad Functionality Status 13 Current date and time Caps Lock lit when on network connection indicator PC connected PC with X not connected system messages display InSite status InSite controls Image Preview 14 Image Preview 15 Measurement Summary Window 16 Worksheet Direct Report 17 Probe Orientation Marker 18 ...

Страница 92: ...ure 4 3 6 B Mode Checks 4 3 6 1 Preparations 1 Connect one of the probes listed in 3 6 6 Available Probes on page 3 24 in Chapter 3 Installation to the System probe connector 2 Turn ON the scanner if it isn t turned on already Figure 4 8 Controls available in B Mode Figure 4 9 B Mode Screen Picture Example ...

Страница 93: ...imizes the spectral data Auto adjusts the Velocity Scale PRF live imaging only baseline shift dynamic range and invert if preset Upon deactivation the spectrum is still optimized Mode Cursor No Displays the M D Mode cursor on the B Mode image CrossXBeam Yes CrossXBeam is the process of combining three or more frames from different steering angles into a single frame CrossXBeam is available on Conv...

Страница 94: ... NOTE You can colorize realtime or CINE images or Timeline CINE Colorizes the gray scale image to enhance the eye s discrimination capability Spectrum Colorize colorizes the spectrum as a function of power using the inverse of the Colorize map for the signal intensity in each Doppler line Colorize enhances the visibility of the spectrum s characteristics and enhances your ability to identify spect...

Страница 95: ...ilable in 2D imaging and may be used with any transducer or clinical application when image speckle appears to interfere with the desired image detail LOGIQ View Option No LOGIQ View provides the ability to construct and view a static 2D image which is wider than the field of view of a given transducer This feature allows viewing and measurements of anatomy that is larger than what would fit in a ...

Страница 96: ...e 4 3 7 M Mode Controls 4 3 7 1 Preparations 1 Connect one of the probes listed in 3 6 6 Available Probes on page 3 24 in Chapter 3 Installation to the System probe connector 2 Turn ON the scanner if it isn t turned on already Figure 4 10 Controls available in M Mode Figure 4 11 M Mode Screen Picture Example ...

Страница 97: ... Control Possible Bioeffect Description Benefit Sweep Speed No Changes the speed at which the timeline is swept Available in M Mode Doppler Mode and M Color Flow Mode Anatomical M Mode option Yes Anatomical M Mode gives you the ability to manipulate the cursor at different angles and positions The M Mode display changes according to a motion of the M cursor ...

Страница 98: ...Doppler Mode Checks 4 3 8 1 Preparations 1 Connect one of the probes listed in 3 6 6 Available Probes on page 3 24 in Chapter 3 Installation to the System probe connector 2 Turn ON the scanner if it isn t turned on already Figure 4 12 Controls available in Doppler Mode Figure 4 13 Doppler Mode Screen Picture Example ...

Страница 99: ... display Angle Correct No Estimates the flow velocity in a direction at an angle to the Doppler vector by computing the angle between the Doppler vector and the flow to be measured NOTE When the Doppler Mode Cursor and angle correct indicator are aligned the angle is O you cannot see the angle correct indicator Quick Angle No Quickly adjusts the angle by 60 degrees Wall Filter No Insulates the Dop...

Страница 100: ...he calculation automatically which you select in the Modify Auto Calculation when the system is in a state of freeze or live Simultaneous Duplex Triplex Yes When you select Duplex or Triplex everything is live For example both B Mode and PW CW Doppler Modes are active if Duplex is selected When Triplex is selected B Mode PW CW Doppler Mode and CF Doppler Modes are active If Duplex Triplex is not s...

Страница 101: ...TE Color Flow Mode only support by LOGIQ V5 4 3 9 1 Preparations 1 Connect one of the probes listed in 3 6 6 Available Probes on page 3 24 in Chapter 3 Installation to the System probe connector 2 Turn ON the scanner if it isn t turned on already Figure 4 14 Controls available in Color Flow Mode Figure 4 15 CFM Mode Screen Picture Example ...

Страница 102: ...espect to reverse flow or vice versa Baseline adjusts the alias point The default baseline is at the midpoint of the color display and at the midpoint of the color bar reference display Angle Steer Yes You can slant the ROI of the Color Flow linear image left or right to get more information without moving the probe The Angle Steer function only applies to linear probes Accumulation No Accumulatio...

Страница 103: ... based on the number of reflectors that are moving regardless of their velocity PDI does not map velocity therefore it is not subject to aliasing TVI Option Yes Tissue Velocity Imaging TVI calculates and color codes the velocities in tissue The tissue velocity information is acquired by sampling of tissue Doppler velocity values at discrete points The information is stored in a combined format wit...

Страница 104: ...d to this point but not data entered onto worksheets press Clear 4 3 10 2 Circumference Area Ellipse Measurement 1 Press Measure once an active caliper displays 2 To position the active caliper move the Trackball 3 To fix the start point press Set B Pause The system fixes the first caliper and displays a second active caliper 4 To position the second caliper move the Trackball 5 Rotate the Ellipse...

Страница 105: ...ates in the currently selected operating mode The probe s default settings for the mode and selected exam are used automatically 4 3 11 3 Deactivating the probe 1 Press the Freeze key 2 Gently wipe the excess gel from the face of the probe Refer to the User Guide for complete probe cleaning instructions 3 Carefully slide the probe around the right side of the keyboard toward the probe holder Ensur...

Страница 106: ...te the Start Frame button to move to the beginning of the CINE Loop Rotate the Start Frame clockwise to move forward through the CINE Loop Rotate the Start Frame anticlockwise to move backward through the CINE Loop Rotate the End Frame button to move to the end of the CINE Loop Rotate the End Frame button clockwise to move forward through the CINE Loop Rotate the End Frame anticlockwise to move ba...

Страница 107: ...e drop down menu 3 Enter the label for the media as shown in Figure 4 16 on page 4 25 It is best to use all capital letters with no spaces or punctuation marks Select Format 4 The system displays a pop up menu as shown in Figure 4 18 on page 4 26 select OK to continue 5 If desired verify that the format was successful by returning to Utility Connectivity Removable Media and selecting Verify as sho...

Страница 108: ...nsert a formatted media into the drive 2 Enter enter Utility System Backup Restore NOTE If you are not logged in as GE Service or with administrator privileges the Operator Login window is displayed Log on with administrator privileges 3 In the Backup list select Patient Archive Report Archive User Defined Configuration and Service 4 In the Media field select CD DVD or USB memory device 5 Select B...

Страница 109: ...rator Login window is displayed Log on with administrator privileges 3 In the Restore list select Patient Archive Report Archive User Defined Configuration and Service 4 In the Media field select the Backup Restore CD DVD or USB memory device 5 Select Restore The system performs the restore As it proceeds status information is displayed on the Backup Restore screen CAUTION The restore procedure ov...

Страница 110: ... hard drive by date Therefore the best way is to label media by date NOTE Images will be moved from the hard drive by date Therefore the best way to label media is by date When images are moved to the archive media they will be deleted from the system hard drive However the patient database backed up earlier maintains pointers to the location of the images on the archive media 5 Enter Utility Syst...

Страница 111: ...ZMove the EZBackup EZMove wizard starts 8 Verify the information on the first page of EZBack EZMove wizard then select Next If you want to backup all of the exams in the range even if the exam was previously backed up check this option If you uncheck this option the system only backs up exams which have not yet been backed up Figure 4 22 Archive Screen Figure 4 23 EZBackup Wizard 1 ...

Страница 112: ... data and the storage Select Next to continue NOTE The calculation for the number of backup CD is only an estimate Allow for one additional CD when performing an EZBack EZMove NOTE This message Please insert a blank media appears if you press Next without inserting the backup media Insert the media and continue Figure 4 24 EZBackup Wizard 2 Figure 4 25 Insert Media Message ...

Страница 113: ...been complete press Next NOTE If you need to insert the next media a message appears providing you with the media label Label the media then insert the next media and press OK 11 When the backup is complete the completion wizard page appears Press Finish All databases presets and images should now be saved to removable media Figure 4 26 EZBackup Wizard 3 Figure 4 27 EZBackup Completion Window ...

Страница 114: ... Language settings Desired Language is displayed 4 Check assignment of Printer Keys The default function for Store and Print Keys are Store store image Print print Store and Print Keys can also be assigned as desired by the customer 5 Check that all of the customer s options are set up correct All authorized functions are enabled Table 4 7 Peripheral Checks Step Task to do Expected Result s 1 Pres...

Страница 115: ...GE LOGIQ V5 LOGIQ V3 DIRECTION 5496012 100 REVISION 3 BASIC SERVICE MANUAL Chapter 4 Functional Checks 4 33 This page was intentionally left blank ...

Страница 116: ...GE LOGIQ V5 LOGIQ V3 DIRECTION 5496012 100 REVISION 3 BASIC SERVICE MANUAL 4 34 Section 4 5 Peripheral Checks ...

Страница 117: ...ponents and Functions Theory Section 5 1 Overview 5 1 1 Purpose of Chapter 5 This chapter explains LOGIQ V5 LOGIQ V3 system concepts component arrangement and subsystem function Table 5 1 Contents in Chapter 5 Section Description Page Number Section 5 1 Overview 5 1 Section 5 2 Block Diagram 5 2 Section 5 3 Common Service Platform 5 3 ...

Страница 118: ...GIQ V5 LOGIQ V3 DIRECTION 5496012 100 REVISION 3 BASIC SERVICE MANUAL 5 2 Chapter 5 Components and Functions Theory Section 5 2 Block Diagram 5 2 1 System Diagram Figure 5 1 LOGIQ V5 LOGIQ V3 System Diagram ...

Страница 119: ... Functions Theory 5 3 Section 5 3 Common Service Platform 5 3 1 Introduction The Service Platform contains a set of software modules that are common to all PC backend ultrasound and cardiology systems The Common Service Platform will increase service productivity and reduce training and service costs ...

Страница 120: ...GE LOGIQ V5 LOGIQ V3 DIRECTION 5496012 100 REVISION 3 BASIC SERVICE MANUAL 5 4 Chapter 5 Components and Functions Theory This page was intentionally left blank ...

Страница 121: ...ice Adjustments Section 6 1 Overview 6 1 1 Purpose of this chapter 6 This section describes how to test and adjust the scanner These tests are optional You may use them to check the system for errors Table 6 2 Contents in chapter 6 Section Description Page Number Section 6 1 Overview 6 1 Section 6 2 Monitor Adjustments 6 2 ...

Страница 122: ...496012 100 REVISION 3 BASIC SERVICE MANUAL 6 2 Section 6 2 Monitor Adjustments Section 6 2 Monitor Adjustments 6 2 1 Adjustments Procedures To adjust the brightness Press Home and End button on the keyboard Figure 6 2 Light Adjustment ...

Страница 123: ...re that help maintain image quality and system operation Very basic host system and board level diagnostics are run whenever power is applied Some Service Tools may be run at the application level However most software tests are required Table 7 3 Contents in Chapter 7 Section Description Page Number 7 1 Overview 7 1 7 2 Gathering Trouble Data 7 2 7 3 Screen Captures 7 4 7 4 Common Diagnostics 7 7...

Страница 124: ... the manufacturer for analysis There are different options to acquire this data that would give different results 7 2 2 Collect Vital System Information The following information is necessary in order to properly analyze data or images being reported as a malfunction or being returned to the manufacturer Product Name LOGIQ V5 LOGIQ V3 From the Utility System General About screen Applications Softw...

Страница 125: ...s Crash Log Power Supply Temperature NOTE Power Supply and Temperature logs are not currently being updated by the LOGIQ V5 LOGIQ V3 This Alt D function is available at all times When Alt D is pressed a menu box appears that allows for A place to enter a description of the problem A choice to store to a pre formatted CD R RD Removable Disk or to the Export directory D drive The subsequent file is ...

Страница 126: ...be displayed as shown in Figure 7 2 on page 7 4 If Store key is not set to Whole Screen as shown in Figure 7 2 on page 7 4 proceed to step 5 to record the customer s customized settings 5 In the Destinations section record the service that is displayed 6 In the Physical Print Buttons section record the parameters related to the service 7 3 2 Setting the Store Key to Screen Capture If the Store Key...

Страница 127: ...avigate to and display the image screen to be captured 2 Press Store This will place a snapshot of the screen on the clipboard displayed at the bottom of the scan image display 3 Press Freeze to unfreeze the image to view the image screen and the snapshots displayed on the bottom 4 Highlight the snapshot to be stored 5 Select the save as icon on the right side of the image screen Figure 7 3 Select...

Страница 128: ... 7 3 2 Setting the Store Key to Screen Capture on page 7 4 Refer to Figure 7 2 1 Click Utility on the keyboard 2 Select Connectivity from the Utilities Menu 3 Select the Buttons tab on the Connectivity screen 4 In the Physical Print Button field select Store 5 In the Destinations list select the service s recorded in step 5 Section 7 3 1 6 In the Physical Print Buttons section select the parameter...

Страница 129: ...lections 7 4 1 1 Disruptive Mode Allows you to enable or disable disruptive mode troubleshooting 7 4 1 2 System Shutdown Allows for system shutdown from the diagnostic menu Select to Restart System or Shutdown System Also select to retain Disruptive Mode or Not After submitting to restart or shutdown a confirmation screen gives one last chance to confirm or cancel the request ...

Страница 130: ...with network 2 Enter Utility Connectivity TCP IP in IP settings window check Enable DHCP and select the proper network speed in Network Speed NOTE If user wants to setup static IP address uncheck Enable DHCP option input static address in IP Address box Subnet Mask and Default Gateway box In Network Speed choose the proper speed available Figure 7 5 Enable DHCP Figure 7 6 Input static address ...

Страница 131: ...rouble Data 7 9 7 5 1 Network Configuration cont d 3 Select Save and a popup window displays Select OK to restart the system and activate the changes 4 After the system restarts the network icon at the left bottom of screen turns green Figure 7 7 System Restart inquiry dialog Figure 7 8 Network icon ...

Страница 132: ...GE LOGIQ V5 LOGIQ V3 DIRECTION 5496012 100 REVISION 3 BASIC SERVICE MANUAL 7 10 Section 7 2 Gathering Trouble Data This page was intentionally left blank ...

Страница 133: ... 8 1 1 Purpose of Chapter 8 This chapter describes replacement procedures for the following modules and subsystems Table 8 1 Contents in Chapter 8 Section Description Page Number 8 1 Overview 8 1 8 2 DISASSEMBLY RE ASSEMBLY 8 2 8 2 1 Warning and Caution 8 2 8 2 2 Returning Shipping for repairs 8 2 8 3 Loading Base Image Software 8 4 ...

Страница 134: ...isk Storage Device In case that any patient information is still residing on the LOGIQ V5 LOGIQ V3 GE will contact the customer and request for urgent collection of that patient information GE will keep this patient information in a secure environment for a maximum period of 1 month All patient information will be permanently deleted at that point If PHI Patient Healthcare Information data needs t...

Страница 135: ...ewdrivers 8 2 3 2 Preparations Shut Down the System and disconnect the power cord 8 2 3 3 Removal procedure 1 Unscrew 4 screws at the bottom side and remove the footrest refer to Figure 8 9 on page 8 3 8 2 3 4 Mounting procedure Install the new parts in the reverse order of removal Figure 8 9 Footrest Cover Disassembly 1 2 3 4 ...

Страница 136: ...s connected during system upgrade 1 Insert the USB disk labeled System Application Software in the USB port of the system 2 Properly turn off the scanner by momentarily pressing the Power On Off Switch Select Shut Down from the System Exit menu 3 If the system will not shutdown normally hold down the Power On Off Switch until the light turns from green to amber 4 Turn on the system System will det...

Страница 137: ...lect one of the options for loading the system Select choice 1 to load the complete disk 7 Press any key to continue when below message display as shown below Figure 8 11 Selection for loading the system WARNING WARNING While the software install procedure is designed to preserve data you should select choice 2 to format disk C only Figure 8 12 Upgrade continue message ...

Страница 138: ...ase Image Software Section 8 3 Loading Base Image Software cont d 8 System will be loaded as shown in the screen below 9 System updating finished refer to Figure 8 14 on page 8 6 10 Remove the USB stick then press power key to restart system Figure 8 13 System Load Figure 8 14 System upgrade complete ...

Страница 139: ... Assembly Ctrl Control FRU 1 Replacement part available in part hub FRU 2 Replacement part available from the manufacturer lead time involved Int Internal I O Input Output LCD Liquid Crystal Display MON Monitor PAT Patient PC Personal Computer Back End Processor Table 9 1 Contents in Chapter 9 Section Description Page Number 9 1 Overview 9 1 9 2 List of Abbreviations 9 1 9 3 Renewal Parts Lists 9 ...

Страница 140: ...6304 2 Power cord China Class 1 1 AC Power Cord 5176773 2 Power cord India Class 1 1 AC Power Cord 5177195 2 Power cord Argentina Class 1 1 AC Power Cord 5176907 2 Power cord UK Class 1 1 AC Power Cord 5177153 2 Power cord Denmark Class 1 1 AC Power Cord 5177154 2 Power cord Switzerland Class 1 1 AC Power Cord 5177187 3 Power cord Australia Class 1 1 AC Power Cord 5177146 2 Power cord USA Class 1 ...

Страница 141: ...GE LOGIQ V5 LOGIQ V3 DIRECTION 5496012 100 REVISION 3 BASIC SERVICE MANUAL Chapter 9 Renewal Parts 9 3 Section 9 4 Operator Console Assy Figure 9 1Operator Console Assy ...

Страница 142: ...5177123 2 Power cord Europe Class 1 1 Power cord China Class 5176304 2 Power cord China Class 1 1 Power cord India Class 5176773 2 Power cord India Class 1 1 Power cord Argentina Class 5177195 2 Power cord Argentina Class 1 1 Power cord UK Class 5176907 2 Power cord UK Class 1 1 Power cord Denmark Class 5177153 2 Power cord Denmark Class 1 1 Power cord Switzerland Class 5177154 2 Power cord Switze...

Страница 143: ...5 LOGIQ V3 User Guide Swedish 1 N 7013 5475843 144 LOGIQ V5 LOGIQ V3 User Guide Korean 1 N 7014 5475843 145 LOGIQ V5 LOGIQ V3 User Guide Russian 1 N 7015 5475843 150 LOGIQ V5 LOGIQ V3 User Guide Polish 1 N 7016 5475843 151 LOGIQ V5 LOGIQ V3 User Guide Greek 1 N 7017 5475843 153 LOGIQ V5 LOGIQ V3 User Guide Hungarian 1 N 7018 5475843 154 LOGIQ V5 LOGIQ V3 User Guide Slovakian 1 N 7019 5475843 155 L...

Страница 144: ... 100 REVISION 3 BASIC SERVICE MANUAL 9 6 Section 9 3 Renewal Parts Lists 7032 5498971 141 LOGIQ V3 User Guide Chinese 1 N 7033 5498972 141 LOGIQ V5 User Guide Chinese 1 N Table 9 4 LOGIQ V Series Manuals Item Part Number Description Qty FRU ...

Страница 145: ......

Страница 146: ... 12 RS biopsy kit 5176499 1 N 8018 3Sc RS biopsy kit 5329137 1 N System and Application Software USB 8019 LOGIQ V Series R1 0 0 System and Application Software USB 5501727 1 Y 8020 LOGIQ V Series R1 0 1 System and Application Software USB 5501727 2S 1 Y 8021 LOGIQ V Series R1 0 2 System and Application Software USB 5501727 3S 1 Y 8022 LOGIQ V Series R1 0 3 System and Application Software USB 55017...

Страница 147: ... LOGIQV3 Item Part Name Part Number Description Quantity FRU 9000 4C RS 5451471 Probe Center Frequency 3 10MHz 1 1 9001 3Sc RS 47237516 Probe Center Frequency 2 75MHz 1 1 9002 L6 12 RS 5454332 Probe Center Frequency 7 75MHz 1 1 9003 E8C RS 5409293 Probe Center Frequency 6 5MHz 1 1 NOTICE All the spare parts should be disposed according to local laws ...

Страница 148: ...GE LOGIQ V5 LOGIQ V3 DIRECTION 5496012 100 REVISION 3 BASIC SERVICE MANUAL 9 10 Section 9 8 Probes This page was intentionally left blank ...

Страница 149: ...liarize yourself with the procedures before performing a task Table 10 1 Contents in Chapter 10 Section Description Page Number 10 1 Overview 10 1 10 2 Why do Maintenance 10 2 10 3 Maintenance Task Schedule 10 2 10 4 Tools Required 10 4 Section 10 5 When There s Too Much Leakage Current 10 15 CAUTION Practice good ESD prevention Wear an anti static strap when handling electronic parts and even whe...

Страница 150: ...ion must be documented and maintained on the site Your GE service representative can help you with establishing performing and maintaining records for a quality assurance program Please contact us for coverage information and or price for service Section 10 3 Maintenance Task Schedule 10 3 1 How often should care maintenance tasks be performed The Care Maintenance Task Schedule provided on page 10...

Страница 151: ...les and Connectors Clean Console Inspect Wheels Casters brakes and Swivel Locks Mobile Unit Check Daily Check Control Panel Movement Mobile Unit Check Daily Console Leakage Current Checks also after corrective maintenance Peripheral Leakage Current Checks also after corrective maintenance Surface Probe Leakage Current Checks also after corrective maintenance Endocavity Probe Leakage Current Checks...

Страница 152: ...151 Screwdriver Blade Stubby 9 41322 Pickup Tool Claw type 9 41421 Screwdriver Blade Pocket clip 9 6757 6 pc Needle File Set 9 41594 Screwdriver Blade 1 8 in x 4 in 9 9487 Utility Knife 9 41581 Screwdriver Blade 3 16 in x 4 in 9 45341 Pliers Vice Grip 10 inch 9 39451 20 Steel Tape locking Spring load 9 3001 Xacto Pen Knife 9 GH807 Ratchet Offset Slotted 9 HT62002 Solder Aid Fork and Hook 68 412 Ra...

Страница 153: ...on 9 45381 Pliers Arc Joint 9 1 2 inch 9 44067 Socket 1 1 16 in for 1 2 in drive 9 45092 Pliers Linesman 8 1 2 inch 9 42679 Socket 10MM Hex for 1 2 in drive 2273333 9 42882 Punch Pin 3 32 inch 9 44262 Extension 10 inch for 1 2 in drive 2273405 9 42884 Punch Pin 5 32 inch 9 4258 3 8 inch to 1 2 inch Adapter 9 42886 Punch Pin 1 4 inch 9 34374 3 8 inch Metric Socket Set 12 PT 9 42973 Cold Chisel 1 2 ...

Страница 154: ...ve ground cord Anti Static Vacuum Cleaner 46 194427P278 46 194427P279 120V 230V Air Filter air intake Safety Analyzer The Safety Analyzer tool should be calibrated and compliant with AAMI ESI 1993 or IEC 60601 or AS NZS 3551 SVHS VCR Cassette E7010GG E7010GF 60 minute 120 minute SVHS VCR Head Cleaner See VCR user manual for requirements 3 5 MOD MEDIA E8381AA E8381AB blank 128 M disk blank 230 M di...

Страница 155: ...s they may need to be soaked to remove excess gel Table 10 8 Physical Checks Step Item Description 1 Labeling Verify that all system labeling is present and in readable condition refer to the LOGIQ V5 LOGIQ V3 User Manual for details 2 Scratches Dents Inspect the console for dents scratches or cracks 3 Wheels Brakes Check all wheels and casters for wear and verify operation of foot brake to stop t...

Страница 156: ...ng the combination of lights that are illuminated Any problems found should be reported to the hospital immediately and the receptacle should not be used NOTE No outlet tester can detect the condition where the Neutral grounded supply conductor and the Grounding protective earth conductor are reversed If later tests indicate high leakage currents this should be suspected as a possible cause and th...

Страница 157: ...ound wire resistance 1 Turn the LOGIQ V5 LOGIQ V3 unit OFF 2 Plug the unit into the meter and the meter into the tested AC wall outlet 3 Plug the black chassis cable into the meter s CHASSIS connector and attach the black chassis cable clamp to an exposed metal part of the LOGIQ V5 LOGIQ V3 unit 4 Set the meter s FUNCTION switch to the RESISTANCE position 5 Set the meter s POLARITY switch to the O...

Страница 158: ...he unit ON and OFF with the power line polarity Normal and Reversed Record the highest reading of current When using the Microguard or a similar test instrument its power plug may be inserted into the wall outlet and the equipment under test is plugged into the receptacle on the panel of the meter This places the meter in the grounding conductor and the current flowing from the case to ground will...

Страница 159: ...highest leakage current measured 10 4 10 Isolated Patient Lead Sink Leakage Isolation Test reference the procedure in the IEC 60601 1 Select the ALL position on the lead selector Depress the rocker switch to ISO TEST to test lead isolation NOTE It is not necessary to test each lead individually or power condition combinations as required in previous tests CAUTION Line voltage is applied to the ECG...

Страница 160: ...imit GROUND OPEN GROUND CLOSED Patient Lead to Ground Leakage Current Test and Patient Lead to Lead Leakage Current Test 115V 10uA 10uA 220 240V 500uA 10uA Table 10 10 Maximum Allowance Limit for ECG Leakage Current AC Power Source Maximum Allowance Limit Patient Lead Isolation Current Test 115V 20uA 220 240V 5mA Table 10 11 Typical Data Sheet for ECG Leakage Current ECG Power Tester Polarity Swit...

Страница 161: ... dependent on its design Small variations in probe leakage currents are normal from probe to probe Other variations will result from differences in line voltage and test lead placement 10 4 11 3 Meter Procedure Using Probe Adapter Follow the Safety Analyzer tool instruction to test each transducer for leakage current The electrical Safety Analyzer tool should be calibrated and compliant with AMMI ...

Страница 162: ...bility Never switch the Polarity and the status of Neutral when the unit is powered ON Be sure to turn the unit power OFF before switching them using the POLARITY switch and or the NEUTRAL switch Otherwise the unit may be damaged Table 10 12 Typical Data Sheet For Transducer Source Leakage Current Transducer Tested Unit Power Tester Power Polarity Switch Tester GROUND or NEUTRAL Switch Measurement...

Страница 163: ...t lies with the probe or the scanner NOTE Each probe will have some amount of leakage dependent on its design Small variations in probe leakage currents are normal from probe to probe Other variations will result from differences in line voltage and test lead placement The maximum allowable leakage current for body surface contact probe differs from inter cavity probe Be sure to enter the correct ...

Страница 164: ...cy Scan Format Model Number Serial Number Probe 2 Frequency Scan Format Model Number Serial Number Probe 3 Frequency Scan Format Model Number Serial Number Probe 4 Frequency Scan Format Model Number Serial Number Probe 5 Frequency Scan Format Model Number Serial Number Probe 6 Frequency Scan Format Model Number Serial Number Probe 7 Frequency Scan Format Model Number Serial Number Probe 8 Frequenc...

Страница 165: ...Chassis Source Leakage Current Probe Chassis Source Leakage Current Caster Chassis Source Leakage Current CRT Patient Lead Source Leakage Lead to Ground Patient Lead Source Leakage Lead to Lead Patient Lead Source Leakage Isolation Peripheral 1 Leakage Current Peripheral 1Ground Continuity Peripheral 2 Leakage Current Peripheral 2Ground Continuity Peripheral 3 Leakage Current Peripheral 3Ground Co...

Страница 166: ...GE LOGIQ V5 LOGIQ V3 DIRECTION 5496012 100 REVISION 3 BASIC SERVICE MANUAL 10 18 Section 10 5 When There s Too Much Leakage Current This page was intentionally left blank ...

Страница 167: ...an scanner and EchoPAC in same room 2 10 floor plan suggestion scanner and EchoPAC in same room 2 10 Functional Checks 4 1 Basic Measurements 4 22 Control Panel 4 7 Monitor Display 4 9 Peripherals 4 32 Probes Connector Usage 4 23 G Gathering Trouble Data 7 2 General Cleaning 10 7 H Hazard Icons 1 6 Human Safety 1 10 L LOTO 1 14 M Mechanical Safety 1 10 Models Covered 1 2 Monitor Display Functioanl...

Страница 168: ...C SERVICE MANUAL II Index Touch Panel Functional Checks 4 7 Trouble Image with Logs 7 3 Troubleshooting Gathering Trouble Data 7 2 Screen Captures 7 4 Trouble Image with Logs 7 3 Vital System Information 7 2 V Voltage Settings 3 10 W Warnings and Cautions 1 10 ...

Страница 169: ......

Страница 170: ... 2014 General Electric Company GE GEMedical Systems Ultrasound 9900 Innovation Drive Wawautosa Wisconsin 53226 USA ...

Отзывы: