4-22
D30 LINE DISTANCE PROTECTION SYSTEM – INSTRUCTION MANUAL
FRONT PANEL INTERFACE
CHAPTER 4: INTERFACES
4
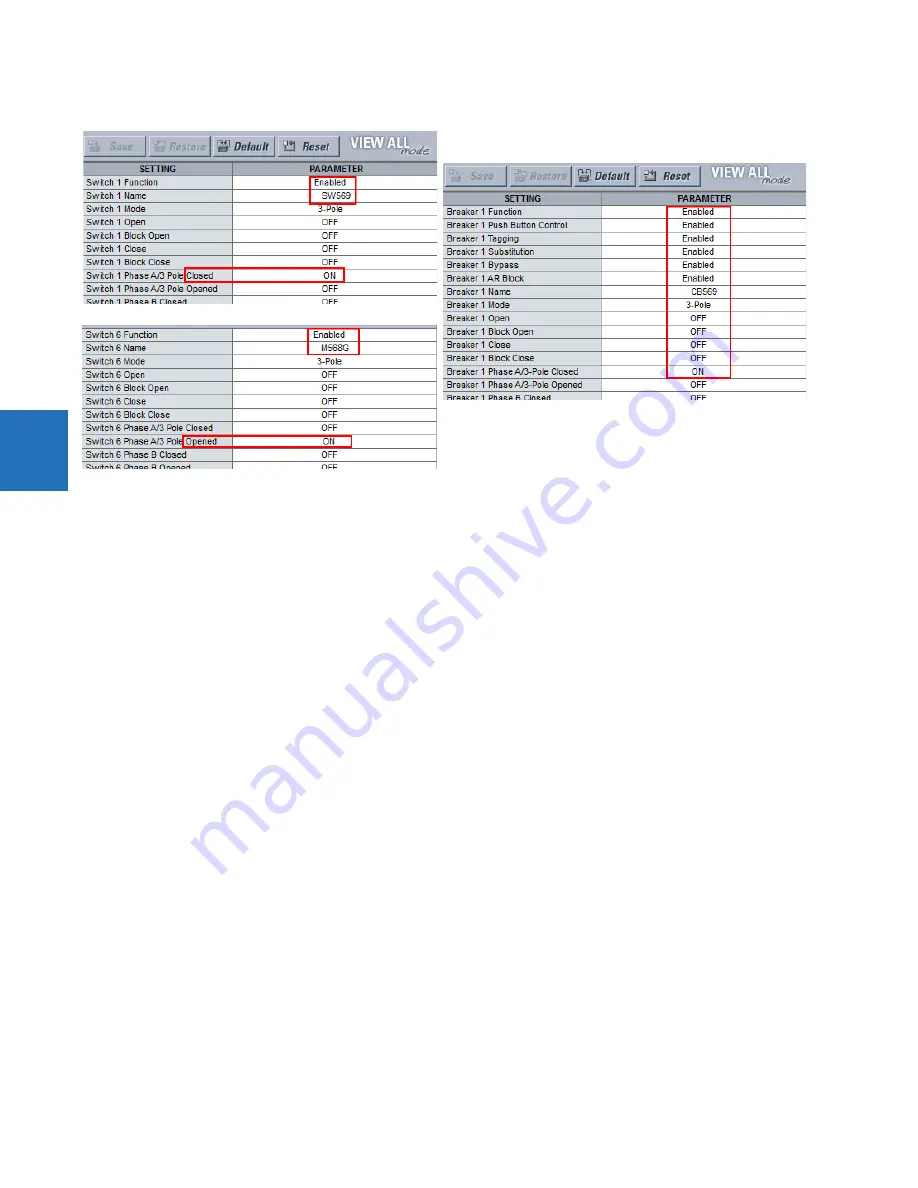
Figure 4-26: Configure Breaker and Switch settings
In the EnerVista software, open the single-line diagram editor under
Settings > Product Setup > Graphical Panel > Single
Line Diagram Editor
.
Add the four switches for the top line by clicking the GE switch symbol in the toolbar, then clicking in the window. (If the UR
device is not online, the software attempts to connect.) Right-click to edit properties. Rotate switches SW569 and SW5682
to 270 degrees. Rotate switches 5681 and SW523 to 90 degrees. Ignore the TSB text.
Add the two lower switches. Leave rotation at 0 degrees.
Add the two breakers by clicking the GE breaker symbol in the toolbar, then click in the window. Right-click to edit
properties, rotating 90 degrees and setting the color to red (open).
Draw lines to fill in the gaps between the switches and breakers by clicking the line symbol in the toolbar, then clicking and
dragging on the canvas to draw a line. Do not draw a single line for the top line, but instead draw several small lines.
Add the feeder arrow head by clicking the symbol in the toolbar, then clicking the end of the line.
Add the ground symbol by clicking the symbol in the toolbar, then clicking the end of the line.
Add three metered values by clicking the M symbol in the toolbar, then clicking near the feeder arrow. Double-click to edit.
The three metered values are SRC1 Vag Mag, SRC 1 P, and SRC 1 Q.
Name the page by right-clicking the bottom tab. Here, page 1 is renamed "Milton line M568M."
Note that active symbols in the toolbar display and those that are inactive are greyed-out.
The diagram has been created. Save it by clicking the
Save
button.
Next is to close circuit breaker CB523. This circuit breaker is shown at the top right of the figure. A vertical line means that
it is open, and the color can be set as red or green.
On the graphical front panel, press the
Home
pushbutton, then press the
SLDs
pushbutton to activate the first single-line
diagram page.
Содержание D30 series
Страница 10: ...x D30 LINE DISTANCE PROTECTION SYSTEM INSTRUCTION MANUAL TABLE OF CONTENTS ...
Страница 14: ...1 4 D30 LINE DISTANCE PROTECTION SYSTEM INSTRUCTION MANUAL FOR FURTHER ASSISTANCE CHAPTER 1 INTRODUCTION 1 ...
Страница 52: ...2 38 D30 LINE DISTANCE PROTECTION SYSTEM INSTRUCTION MANUAL SPECIFICATIONS CHAPTER 2 PRODUCT DESCRIPTION 2 ...
Страница 534: ...5 324 D30 LINE DISTANCE PROTECTION SYSTEM INSTRUCTION MANUAL TESTING CHAPTER 5 SETTINGS 5 ...
Страница 564: ...6 30 D30 LINE DISTANCE PROTECTION SYSTEM INSTRUCTION MANUAL PRODUCT INFORMATION CHAPTER 6 ACTUAL VALUES 6 ...
Страница 578: ...7 14 D30 LINE DISTANCE PROTECTION SYSTEM INSTRUCTION MANUAL TARGETS MENU CHAPTER 7 COMMANDS AND TARGETS 7 ...
Страница 614: ...9 26 D30 LINE DISTANCE PROTECTION SYSTEM INSTRUCTION MANUAL FAULT LOCATOR CHAPTER 9 THEORY OF OPERATION 9 ...
Страница 654: ...A 10 D30 LINE DISTANCE PROTECTION SYSTEM INSTRUCTION MANUAL FLEXANALOG ITEMS APPENDIX A FLEXANALOG OPERANDS A ...
Страница 662: ...C 6 D30 LINE DISTANCE PROTECTION SYSTEM INSTRUCTION MANUAL COMMAND LINE INTERFACE APPENDIX C COMMAND LINE INTERFACE C ...
Страница 670: ...iv D30 LINE DISTANCE PROTECTION SYSTEM INSTRUCTION MANUAL ABBREVIATIONS ...
Страница 686: ...xvi D30 LINE DISTANCE PROTECTION SYSTEM INSTRUCTION MANUAL INDEX ...


