Puma III User Manual
Installation 2-15
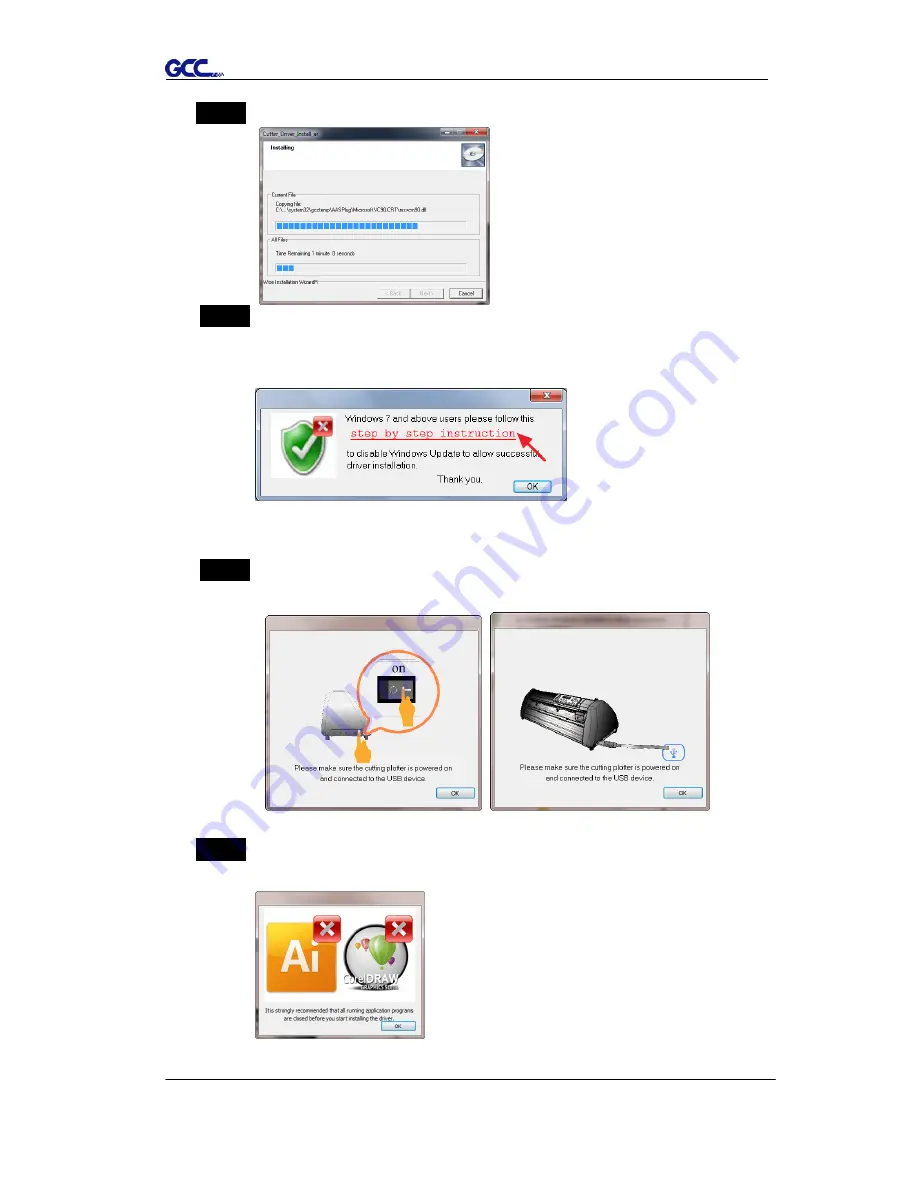
Step 3
Click “Next” to start the driver installation.
Step 4
If you were Windows 7and above, please click on the
red words
to
instruct you how to disable Windows Update to allow success driver
installation. And then click OK to next step.
Step 5
Please make sure the cutting plotter is powered on and connected to
theUSB device, and then click OK to next step.
Step 6
Confirm to close all running application programs before you start
installing the driver, and then click OK.
Содержание P3-60
Страница 1: ...V 22 2016 Dec Puma III Series User Manual http www GCCworld com...
Страница 30: ...Puma III User Manual Installation 2 19 Step 3 Select Driver page Step 4 Select the model and click on Remove...
Страница 48: ...Puma III User Manual Installation 2 37...
Страница 123: ...Puma III User Manual GreatCut Plug In A 5 Step 5 Click output and the object will be sent to GCC Cutting Plotter...
Страница 138: ...Puma III User Manual GreatCut Plug In A 5 Step 5 Click output and the object will be sent to GCC Cutting Plotter...
Страница 143: ...Puma III User Manual GreatCut Plug In A 5 Step 4 Click Multi Copy on GreatCut under File...
Страница 158: ...Puma III User Manual SignPal 12 Instruction A 6...
Страница 159: ...Puma III User Manual SignPal 12 Instruction A 6 3 Select File Print Setup in SignPal Software and select the printer...
Страница 160: ...Puma III User Manual SignPal 12 Instruction A 6 4 Select File Document Setup in SignPal and select paper size...
Страница 165: ...Puma III User Manual SignPal 12 Instruction A 6...


