Puma III
User Manual
Sure Cuts A Lot A-7
Step 5
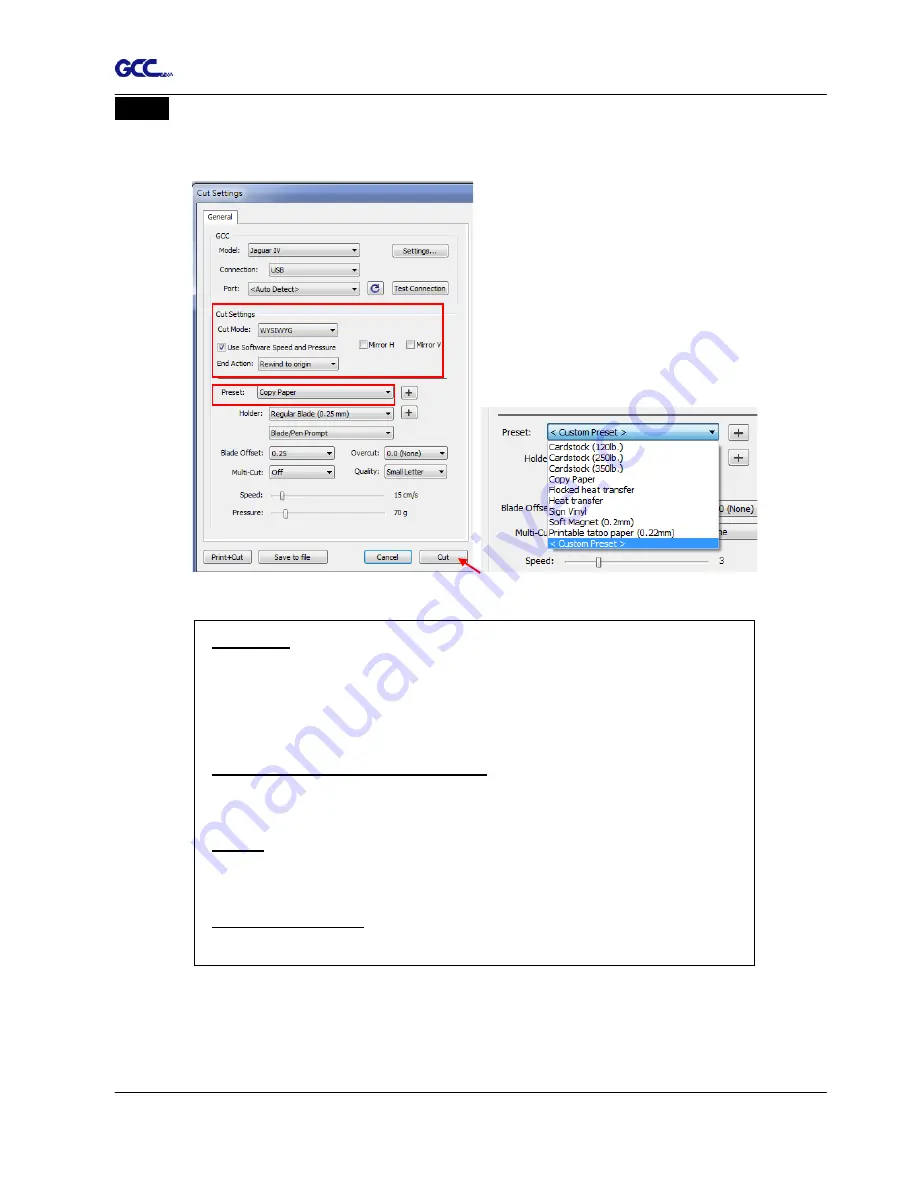
Under “Cut Settings” section, there are some useful functions. After setting the
parameters, click on “Cut” to send the data to the GCC cutter and the GCC cutter will
start the cutting job.
*Cut Mode:
there are “WSIWYG” and “Origin Point” options, WSIWYG
means what you see is what you get, the cutter will output the graphic
at same position in preview window. While with Origin Point mode, the
cutter will cut the graphic from bottom right origin point of the material.
*Use Software Speed and Pressure:
tick this section, and you can set
the values of speed and pressure manually.
*Preset:
select a proper material to apply the preset speed and
pressure parameter automatically.
*Speed & Pressure:
you may adjust values of speed and pressure
manually to get quality results.
Содержание P3-60
Страница 1: ...V 22 2016 Dec Puma III Series User Manual http www GCCworld com...
Страница 30: ...Puma III User Manual Installation 2 19 Step 3 Select Driver page Step 4 Select the model and click on Remove...
Страница 48: ...Puma III User Manual Installation 2 37...
Страница 123: ...Puma III User Manual GreatCut Plug In A 5 Step 5 Click output and the object will be sent to GCC Cutting Plotter...
Страница 138: ...Puma III User Manual GreatCut Plug In A 5 Step 5 Click output and the object will be sent to GCC Cutting Plotter...
Страница 143: ...Puma III User Manual GreatCut Plug In A 5 Step 4 Click Multi Copy on GreatCut under File...
Страница 158: ...Puma III User Manual SignPal 12 Instruction A 6...
Страница 159: ...Puma III User Manual SignPal 12 Instruction A 6 3 Select File Print Setup in SignPal Software and select the printer...
Страница 160: ...Puma III User Manual SignPal 12 Instruction A 6 4 Select File Document Setup in SignPal and select paper size...
Страница 165: ...Puma III User Manual SignPal 12 Instruction A 6...


