Puma III User Manual
GreatCut Plug-In A-5
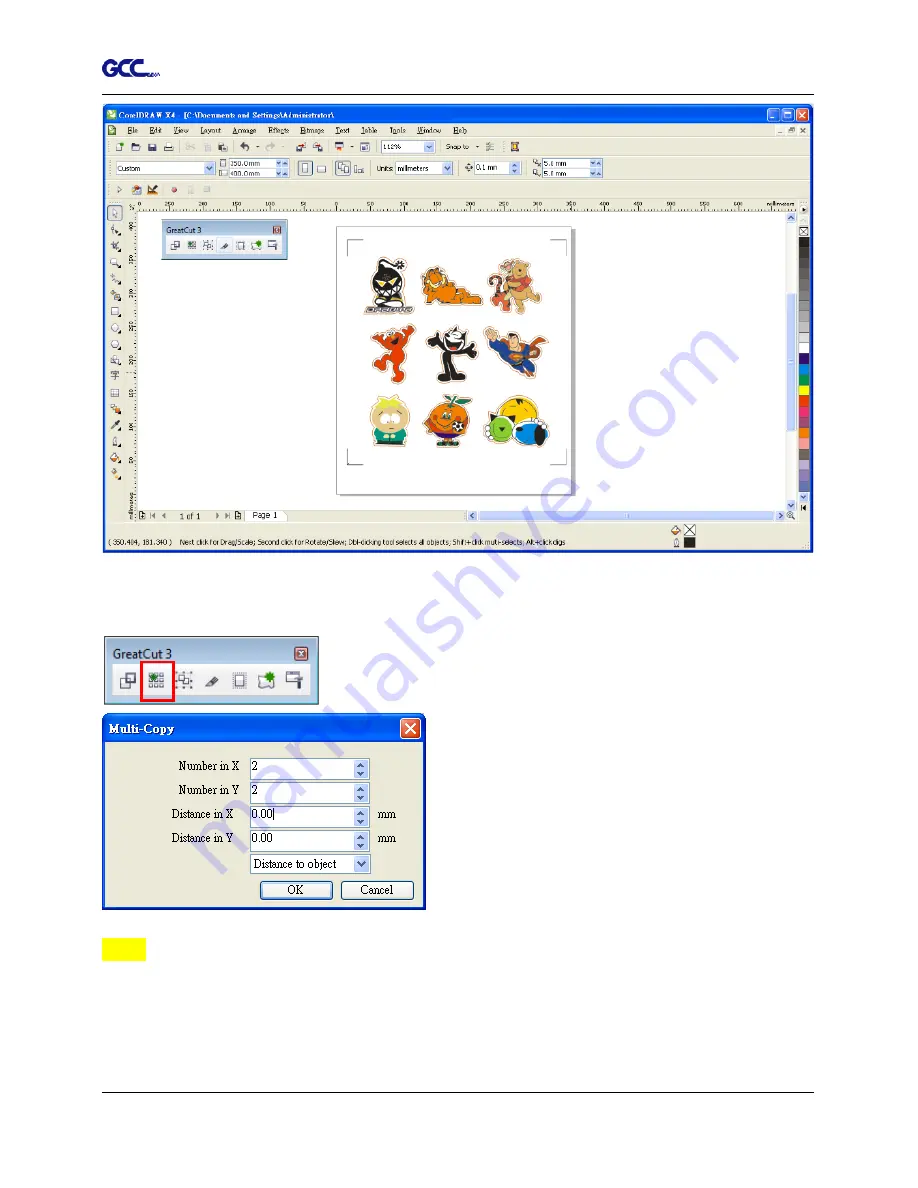
Click on the Multi-copy Icon on the GreatCut toolbar and complete the Number in X/Y (the
number of copies desired on the X/Y axis) and Distance in X/Y (distance between each copy)
settings then click OK.
Note:
The spacing of vertical & horizontal (Offset X & Y) should be ≥ 20mm or = 0mm; Users are
advised to set the Distance in X/Y as 0 mm to remove the space between each copy to avoid the
waste of materials.
Содержание P3-60
Страница 1: ...V 22 2016 Dec Puma III Series User Manual http www GCCworld com...
Страница 30: ...Puma III User Manual Installation 2 19 Step 3 Select Driver page Step 4 Select the model and click on Remove...
Страница 48: ...Puma III User Manual Installation 2 37...
Страница 123: ...Puma III User Manual GreatCut Plug In A 5 Step 5 Click output and the object will be sent to GCC Cutting Plotter...
Страница 138: ...Puma III User Manual GreatCut Plug In A 5 Step 5 Click output and the object will be sent to GCC Cutting Plotter...
Страница 143: ...Puma III User Manual GreatCut Plug In A 5 Step 4 Click Multi Copy on GreatCut under File...
Страница 158: ...Puma III User Manual SignPal 12 Instruction A 6...
Страница 159: ...Puma III User Manual SignPal 12 Instruction A 6 3 Select File Print Setup in SignPal Software and select the printer...
Страница 160: ...Puma III User Manual SignPal 12 Instruction A 6 4 Select File Document Setup in SignPal and select paper size...
Страница 165: ...Puma III User Manual SignPal 12 Instruction A 6...


