Puma III User Manual
Installation 2-3
the holes and tighten them as Figure 2-2. Then the complete picture of
stand will be like Figure 2-1.
Step 4
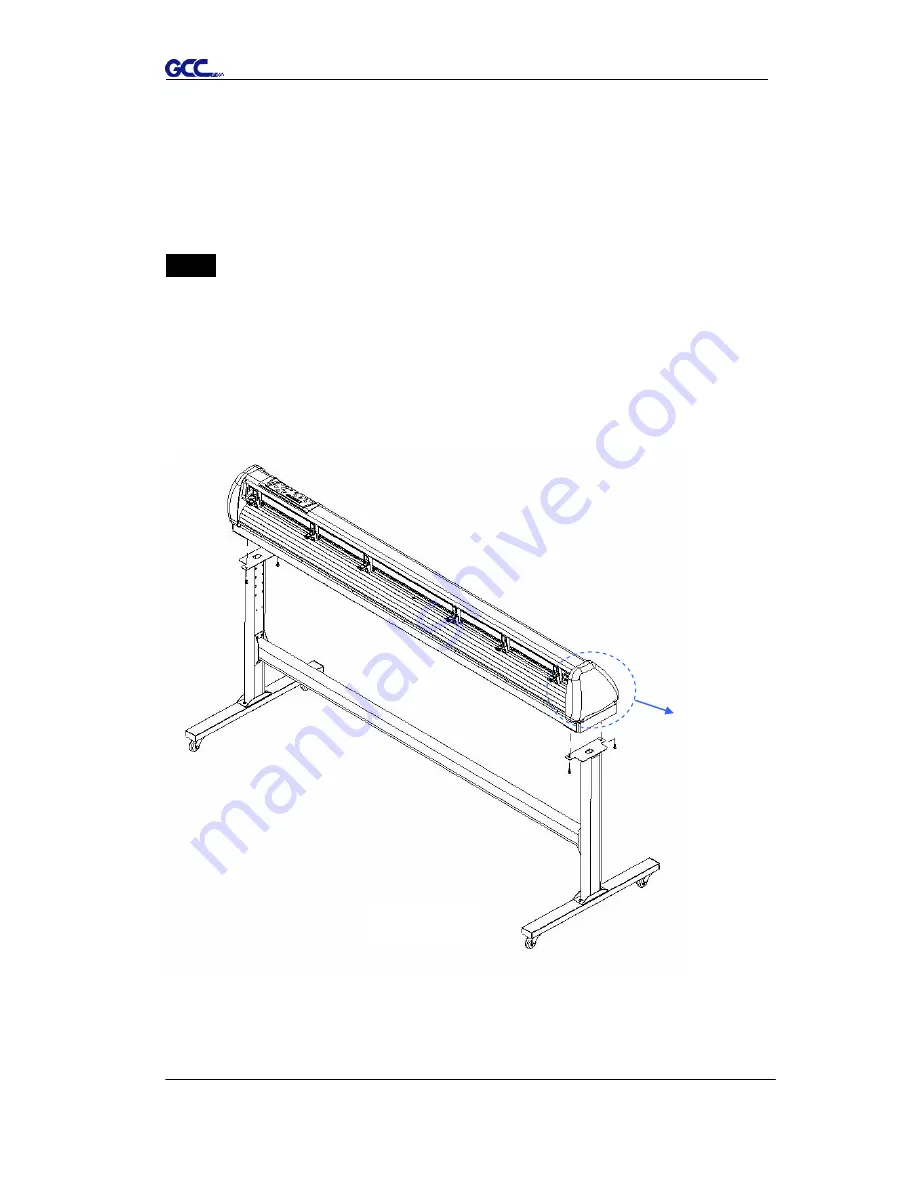
Remove the cutting plotter from the carton. Position your stand under the
plotter, on the bottom of the plotter, there is one hole on each side in the
position corresponding to the locating pins, so the locating pins can be
located into the holes. Then insert the screws into the holes on the stand
to fix the plotter and tighten them up as shown in Figure 2-3.
Screws
Figure 2-3
Содержание P3-60
Страница 1: ...V 22 2016 Dec Puma III Series User Manual http www GCCworld com...
Страница 30: ...Puma III User Manual Installation 2 19 Step 3 Select Driver page Step 4 Select the model and click on Remove...
Страница 48: ...Puma III User Manual Installation 2 37...
Страница 123: ...Puma III User Manual GreatCut Plug In A 5 Step 5 Click output and the object will be sent to GCC Cutting Plotter...
Страница 138: ...Puma III User Manual GreatCut Plug In A 5 Step 5 Click output and the object will be sent to GCC Cutting Plotter...
Страница 143: ...Puma III User Manual GreatCut Plug In A 5 Step 4 Click Multi Copy on GreatCut under File...
Страница 158: ...Puma III User Manual SignPal 12 Instruction A 6...
Страница 159: ...Puma III User Manual SignPal 12 Instruction A 6 3 Select File Print Setup in SignPal Software and select the printer...
Страница 160: ...Puma III User Manual SignPal 12 Instruction A 6 4 Select File Document Setup in SignPal and select paper size...
Страница 165: ...Puma III User Manual SignPal 12 Instruction A 6...


