76
232001840G(08)
5.2 The LaserPro C180II Print Driver
With the LaserPro C180II print driver successfully installed, you will need to adjust the printer and page
size default settings before you can begin editing and completing jobs. By doing so, you will be setting the
work area in your graphics software to match the LaserPro C180II’s worktable area.
NOTE
Please make sure the LaserPro C180II is set to the default printer before proceeding to the
page and layout setup.
Ensure that the LaserPro C180II has been selected as the DEFAULT PRINTER. You can do so by going into
your Windows Control Panel → Printers and Faxes.
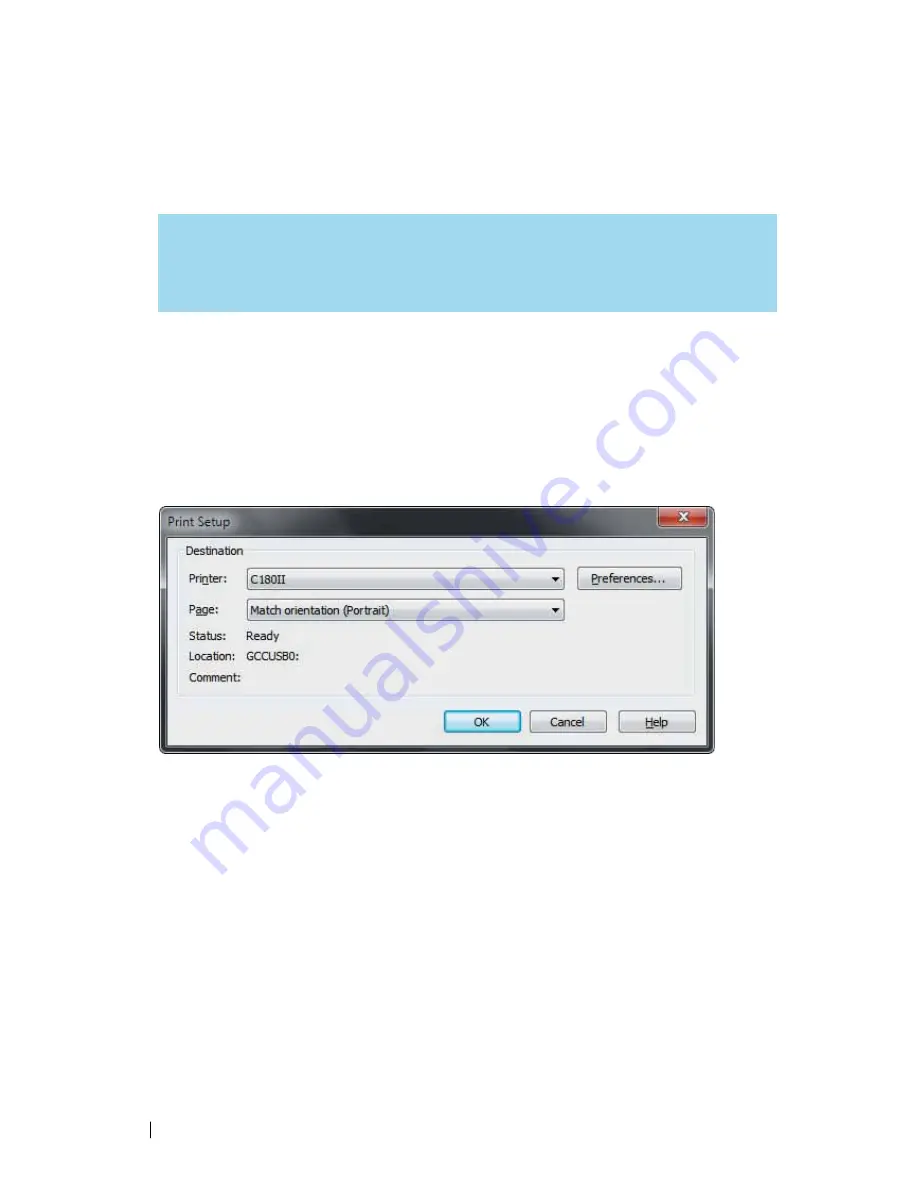
If LaserPro C180II is not selected as DEFAULT PRINTER, you may set it up through the graphics software as
well. The following is taking Corel Draw as example of how to set up LaserPro C180II as the Printer.
1) From the primary menu, click FILE → PRINT SETUP.
2) From the navigation bar Name, click C180II → OK
5.2.1 Page Setup and Orientation
The first thing you must do before working with the LaserPro C180II Print Driver will be to make sure
the page and layout settings are properly configured within your graphics software. You will need to
access and edit the Page Setup or Layout page of your graphics software to set your graphics
software’s page layout to match the LaserPro C180II’s work table’s dimensions and orientation.
From your graphic software’s Page Setup page:
• Set the page orientation in the graphics software to Landscape mode.
• Set page size horizontal length to 458 mm (18 inches) and vertical height to 305 mm (12 inches).
Содержание LaserPro C180II
Страница 1: ...232001840G 08 ...
Страница 15: ...232001840G 08 15 Chapter 2 Unpacking Contents Unloading and Unpacking Contents and Accessories Checklist ...
Страница 20: ...20 4 Place the machine into the package box 5 Cover the lid and tighten by rope ...
Страница 22: ...232001840G 06 Chapter 3 Mechanical Overview Front View Top View Right Profile View Left Profile View Rear View ...
Страница 29: ...232001840G 08 ...
Страница 34: ...232001840G 06 ...
Страница 35: ...232001840G 08 ...
Страница 41: ...41 232001840G 08 11 Select CD ROM drive with the Windows installation CD 12 Enter the Windows OS product key ...
Страница 107: ...107 232001840G 08 ...
Страница 109: ...109 232001840G 08 ...
Страница 114: ...114 232001840G 08 8 Now you are ready to output the modified image by clicking File Print ...
Страница 137: ...137 232001840G 08 Chapter 9 Basic Troubleshooting ...
Страница 139: ...139 232001840G 08 Chapter 10 Appendix Glossary LaserPro C180II Series Specification Sheet ...


