JF-2418UV User Manual
113
The required dimension of braille sign differs according to the regulations in different countries. To
meet various requirements, users can manually define the height of a cell to create the sign that
complies with local regulation.
The formula for the calculation of the height of a cell is (b x 2) + e, where b means “Vertical dot to
dot (mm)” and e means “Dot base diam. (mm)”, as shown in the table above.
Take an example of how to calculate the height of a cell based on American Standard Sign:
According to “American Standard Sign”, the value of b is between 2.3mm to 2.5mm, defines a value
of b as 2.5mm; the value of e is between 1.5mm to 1.6mm and defines a value of e as 1.6mm, then
applies the values of b and e to the formula to get the result:
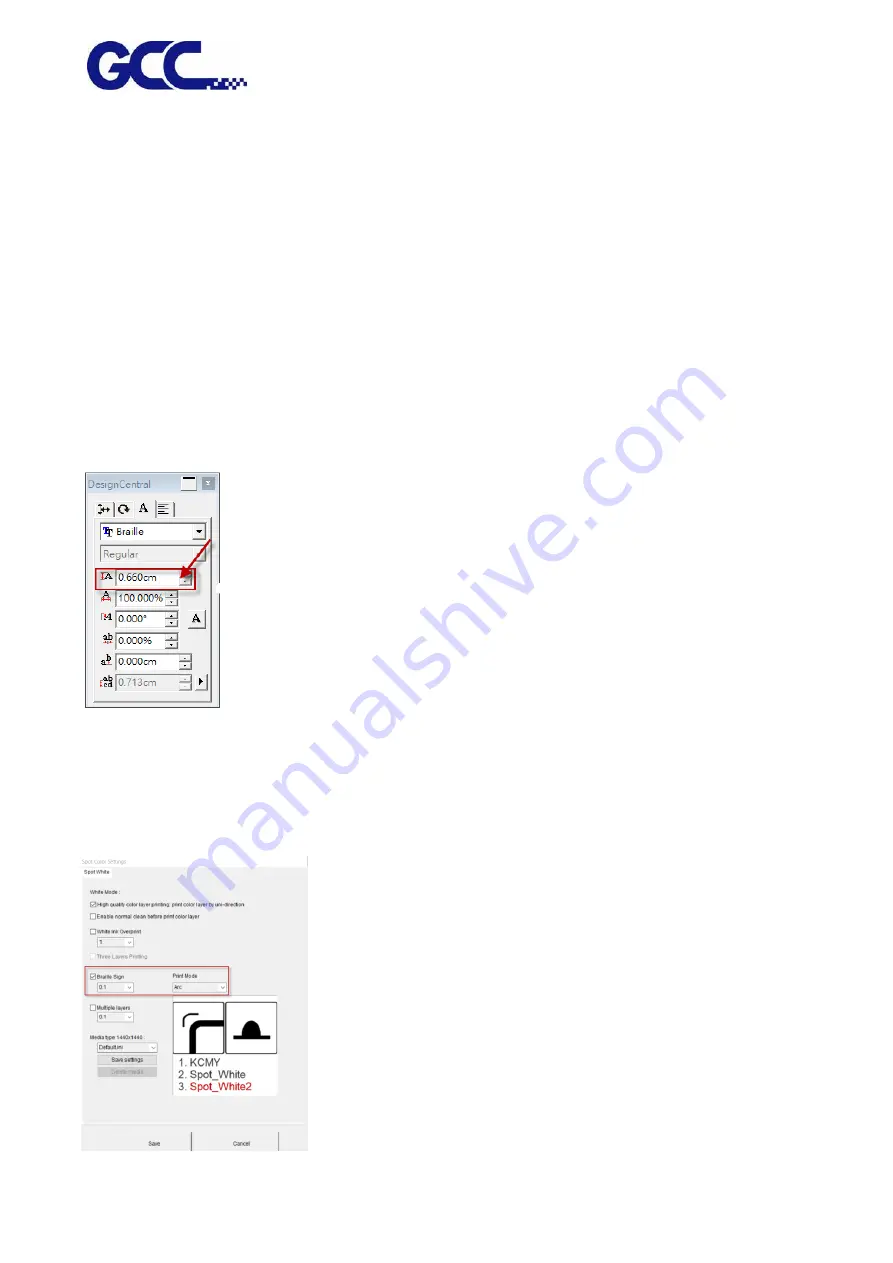
b = 2.5 mm, e = 1.6mm; formula (b x 2) + e = (2.5 x 2) + 1.6 = 6.6 (mm)
Step 1 Set cell height to 6.6mm in DesignCentral window in FlexiPRINT GCC EDITOR.
Step 2 Refer to Chapter 4.7.2 “How to set FlexiPRINT GCC Editor for color-white/white-color/
color-white-color” to complete the settings.
Step 3 Under Spot Colors Settings window, tick “Braille Sign” and select the dot height from the
drop down menu and press Save. The setting is complete.
Содержание JF-2418UV
Страница 1: ...JF 2418UV User Manual http www GCCworld com V 1 2022 Mar GCC GCC Club...
Страница 3: ...JF 2418UV User Manual 2 Release Note Version Change V 1 2021 Nov Add JF 2418UV User Manual...
Страница 24: ...JF 2418UV User Manual 23 Control panel flow...
Страница 25: ...JF 2418UV User Manual 24 Operating work flow...
Страница 27: ...JF 2418UV User Manual 26 Operating work flow...
Страница 28: ...JF 2418UV User Manual 27 Control panel flow O N FRONT REAR O N O N OFF OFF...
Страница 38: ...JF 2418UV User Manual 37 MANUAL CLEANING WHITE CIRCULATION Circulation of white ink print head ON...
Страница 42: ...JF 2418UV User Manual 41 B Set the PH Gap Auto Adjustment to be OFF on the control panel...
Страница 57: ...JF 2418UV User Manual 56 Step 4 The settings is completed and open FlexiPRINT GCC Edition...
Страница 87: ...JF 2418UV User Manual 86 7 Select GCC JF 2418UV from the Printer drop down menu and click Setup...
Страница 88: ...JF 2418UV User Manual 87 8 Select Advanced...
Страница 96: ...JF 2418UV User Manual 95 Step13 Click Finish Step14 Auto Serialization is completed 10 Click Preferences...
Страница 102: ...JF 2418UV User Manual 101 Create a New color Set the name to be Spot_White and the mode to be Spot...
Страница 103: ...JF 2418UV User Manual 102 3 Fill Objects with Spot White Swatch and overprint 4 Select Rip and print...
Страница 129: ...JF 2418UV User Manual 128 Step 8 File Export Step 9 Save the file as eps format Step 10 The process is completed...
Страница 169: ...JF 2418UV User Manual 168 Step 2 Enter the password caldera Step 3 Click Next...
Страница 170: ...JF 2418UV User Manual 169...
Страница 175: ...JF 2418UV User Manual 174 Step 8 Click Add job Step 9 Click Send job and the process is complete...


