JF-2418UV User Manual
111
5.3.5
How To Set ADA Sign (Braille Sign) Printing
Multi-layer printing technology is the best tool for ADA sign (Braille sign) applications.
The thickness of a layer printing in white is around 0.5mm and can reach a maximum of 0.8mm
thick by multi-layer printing. The required thickness of ADA sign (Braille sign) varies according to the
regulation in different countries. Apply proper ink percentage to perform multilayer printing to
reach the wanted thickness and produce ADA compliant signage.
1.
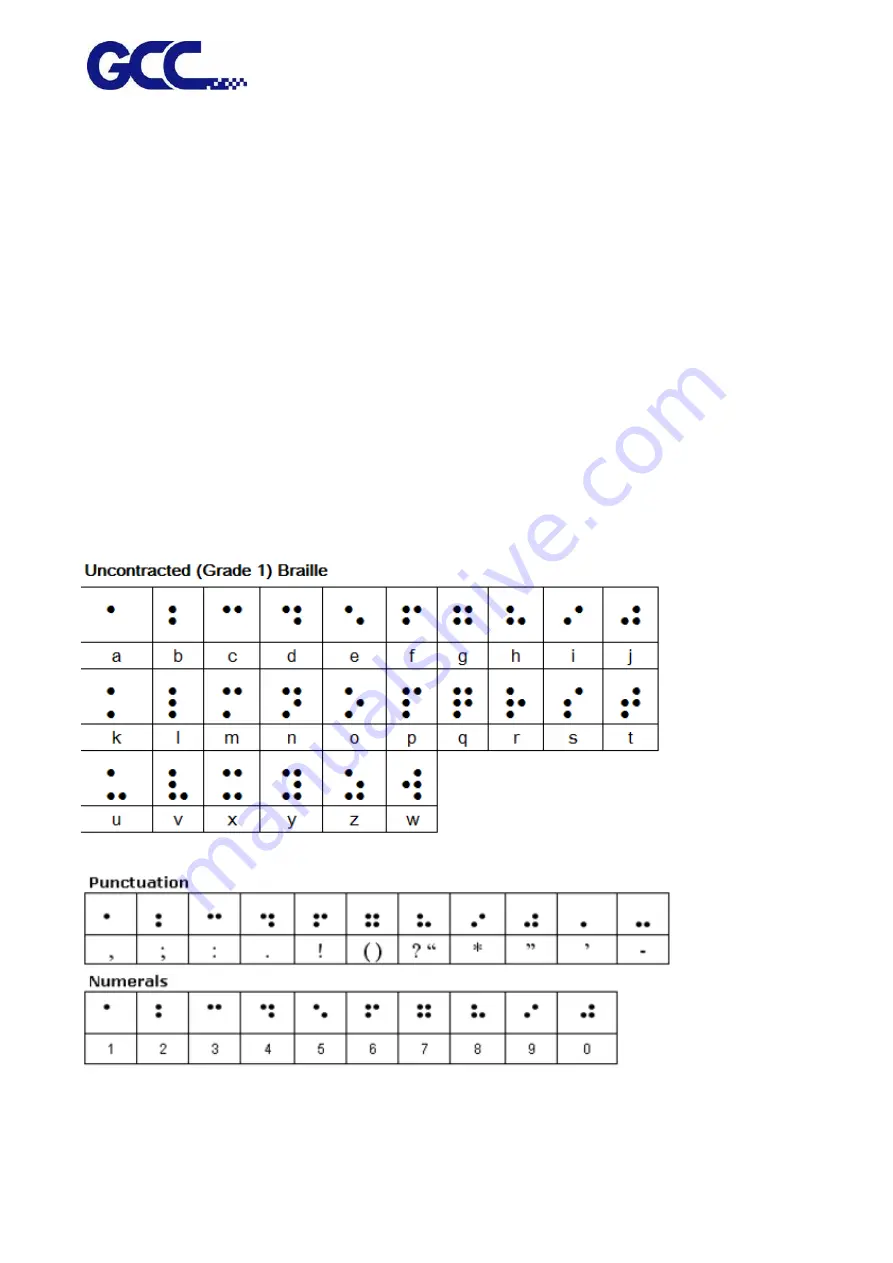
ADA Sign (Braille Sign)
ADA sign (Braille sign) is a system printed as raised dot that can be read with the fingers by visually
impaired people. Braille is not a language, but a code by which many languages—such as English,
Spanish, Arabic, Chinese, and dozens of others—may be written and read. Braille is used by
thousands of people all over the world in their native languages, and provides a means of literacy
for all.
Derivation (colored dots) of the 26 letters of the alphabet from the 10 numeric digits (black dots)
Содержание JF-2418UV
Страница 1: ...JF 2418UV User Manual http www GCCworld com V 1 2022 Mar GCC GCC Club...
Страница 3: ...JF 2418UV User Manual 2 Release Note Version Change V 1 2021 Nov Add JF 2418UV User Manual...
Страница 24: ...JF 2418UV User Manual 23 Control panel flow...
Страница 25: ...JF 2418UV User Manual 24 Operating work flow...
Страница 27: ...JF 2418UV User Manual 26 Operating work flow...
Страница 28: ...JF 2418UV User Manual 27 Control panel flow O N FRONT REAR O N O N OFF OFF...
Страница 38: ...JF 2418UV User Manual 37 MANUAL CLEANING WHITE CIRCULATION Circulation of white ink print head ON...
Страница 42: ...JF 2418UV User Manual 41 B Set the PH Gap Auto Adjustment to be OFF on the control panel...
Страница 57: ...JF 2418UV User Manual 56 Step 4 The settings is completed and open FlexiPRINT GCC Edition...
Страница 87: ...JF 2418UV User Manual 86 7 Select GCC JF 2418UV from the Printer drop down menu and click Setup...
Страница 88: ...JF 2418UV User Manual 87 8 Select Advanced...
Страница 96: ...JF 2418UV User Manual 95 Step13 Click Finish Step14 Auto Serialization is completed 10 Click Preferences...
Страница 102: ...JF 2418UV User Manual 101 Create a New color Set the name to be Spot_White and the mode to be Spot...
Страница 103: ...JF 2418UV User Manual 102 3 Fill Objects with Spot White Swatch and overprint 4 Select Rip and print...
Страница 129: ...JF 2418UV User Manual 128 Step 8 File Export Step 9 Save the file as eps format Step 10 The process is completed...
Страница 169: ...JF 2418UV User Manual 168 Step 2 Enter the password caldera Step 3 Click Next...
Страница 170: ...JF 2418UV User Manual 169...
Страница 175: ...JF 2418UV User Manual 174 Step 8 Click Add job Step 9 Click Send job and the process is complete...


