F - 160 Operation and Maintenance Manual
© GBC Pro - Tech August 1999
Page 6 - 71
Applications
INFORMATION
Twisting the roll of laminate while sliding
makes loading the film onto the unwind
shaft easier.
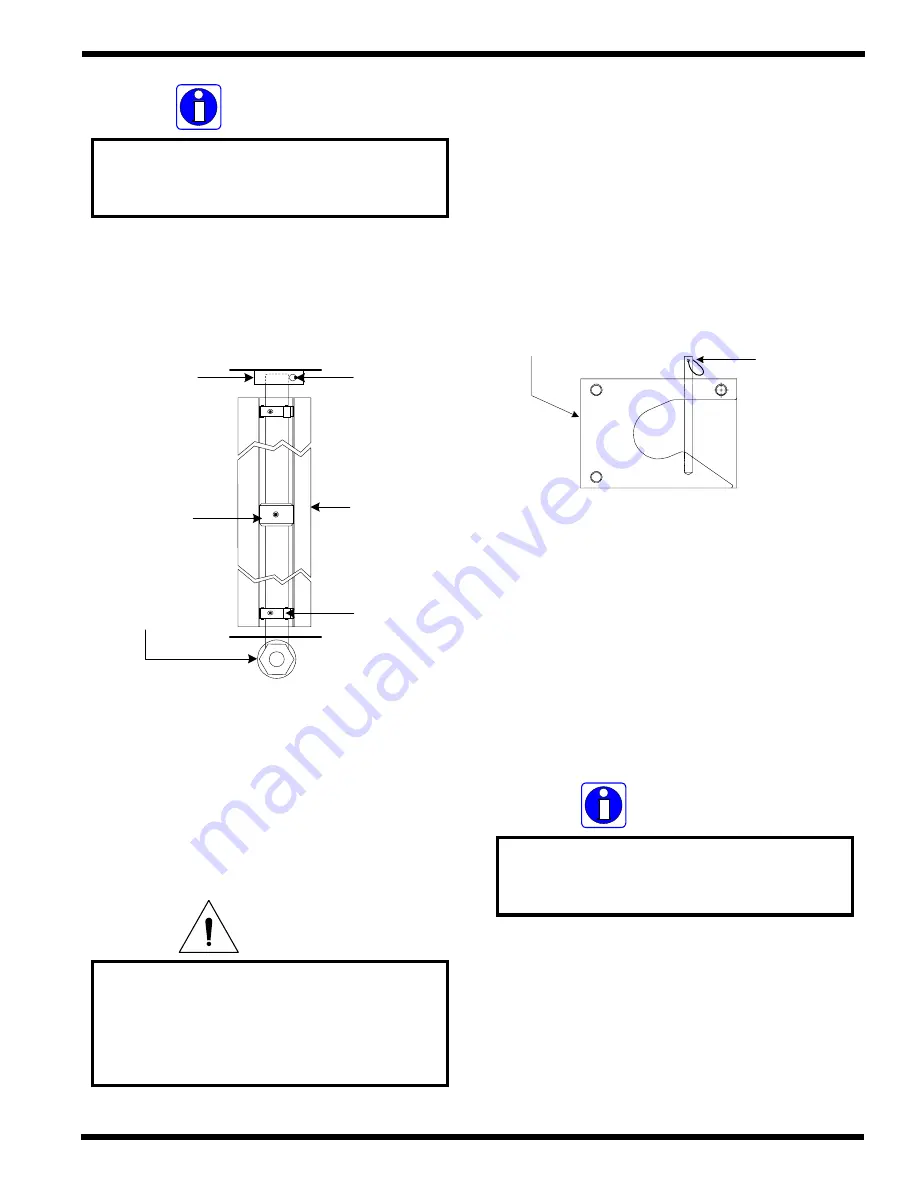
Figure 6.8.2 Unwind shaft
Core chucks
Core support
Clevis pin
Brake adjust
knob
Roll of
laminate
Saddle
g) Once the roll of thermal laminate is on the upper
unwind shaft, swing the upper unwind shaft
back into the saddle.
Ensure the roll of laminate is loaded
properly on the unwind shaft.
Exposed adhesive should be facing
away from the rollers.
This will prevent hours of roll cleaning!
CAUTION
h) Push the clevis pin back down to secure the
unwind shaft in its saddle.
i) Lift the clevis pin located in the saddle of the
lower unwind shaft.
Clevis pin
S a d d l e
j) Swing the lower unwind shaft out enough to
slide the roll of mount adhesive over the core
chucks on the lower unwind shaft. Refer to
Figure 6.8.2
INFORMATION
Twisting the roll of mount adhesive
while sliding makes loading the film
onto the unwind shaft easier.
k) Once the roll of mount adhesive is on the lower
unwind shaft, swing the lower unwind shaft
back into the saddle.


