13–8–612 Page 31
SECTION 7
BELT DRIVE
Proper drive belt tension and alignment are provided at
the factory, however, good practice dictates checking
the drive alignment and tension after shipment and be-
fore initial start–up.
Sheaves should align straight across the front with a
straight edge. The best tension is just enough tension
to keep belts from “squealing” on start–up.
Excessive belt tension can damage
the equipment. Tension the belts as
shown in FIGURE 7–1.
Belts can be changed when necessary by the following
instructions. First, disconnect, tag and lockout power
to the starter. Then remove the wire guard. Then loos-
en, but do not remove, the four motor foot nuts.
Next, use the adjusting screws in the motor base to
loosen belt tension. Remove the belts, and replace with
new belts. Check for correct belt tension and re–attach
the wire guard.
Interference between the fan and the
orifice can damage equipment. Be
certain the orifice has even clearance
around the fan before starting the
unit.
CHECKING BELT TENSION – Using a spring scale,
apply a perpendicular force to each belt at the midpoint
of the span and measure the deflection. Correct deflec-
tion force and deflection are shown in FIGURE 7–1. To
tighten belts, merely increase the center distance.
When a new set of belts is installed on
a drive, the initial deflection force
should be 1/3 greater than shown in
FIGURE 7–1. Recheck tension fre-
quently during the first 24 hours of
operation.
No.
Deflection
Deflection
Motor
Of
Force Pounds
In
H.P.
Belts
(per belt)
Inches
7.5
3
6 – 8.5
5/16
10
3
6 – 7
5/16
15
3
6 – 7
5/16
FIGURE 7–1 – BELT TENSION 3VX BELTS
Содержание EBB BB-7.5 HP
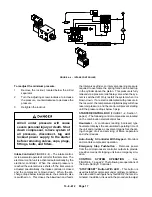
Страница 12: ...13 8 612 Page 2 FIGURE 1 2 PACKAGE COMPRESSOR MOTOR SIDE FIGURE 1 3 PACKAGE BELT GUARD SIDE...
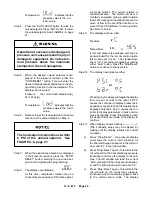
Страница 13: ...13 8 612 Page 3 FIGURE 1 4 PACKAGE CONTROLLER END...
Страница 16: ...13 8 612 Page 6 DECALS 206EAQ077 212EAQ077 218EAQ077 211EAQ077 207EAQ077...
Страница 17: ...13 8 612 Page 7 DECALS 216EAQ077 217EAQ077 222EAQ077 221EAQ077 208EAQ077...
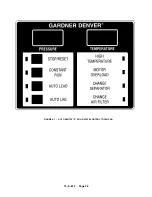
Страница 32: ...13 8 612 Page 22 FIGURE 4 7 AUTO SENTRY S SOLID STATE CONTROL TOUCH PAD...
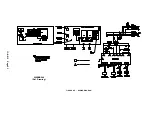
Страница 33: ...13 8 612 Page 23 200EBB546 Ref Drawing FIGURE 4 8 WIRING DIAGRAM...
Страница 53: ...13 8 612 Page 43 PIPING AND MOUNTING GROUP 213EBB810 B Ref Drawing...
Страница 61: ...13 8 612 Page 51 ELECTRICAL GROUP 205EBB810 A Ref Drawing For Parts List Refer to Pages 52 thru 54...
Страница 72: ...13 8 612 Page 62 FIGURE 11 4 REFRIGERATED DRYER FIGURE 11 5 SUCTION PRESSURE GAUGE DRYER INLET AND OUTLET...
Страница 73: ...13 8 612 Page 63 FIGURE 11 6 CONDENSER HEAT EXCHANGER HOT GAS BYPASS FIGURE 11 7 COMPRESSOR REFRIGERATED DRYER...
Страница 77: ...13 8 612 Page 67 INTEGRATED DRYER ASSEMBLY AND PIPING 301EBB810 A Ref Drawing...
Страница 82: ...13 8 612 Page 72 300EBB541 B Ref Drawing...
Страница 84: ......

