


English
|
83
\
\
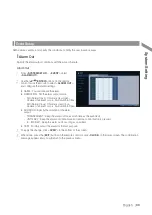
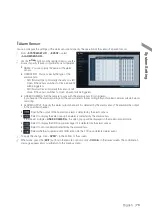
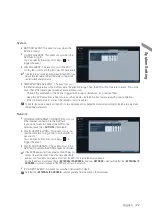
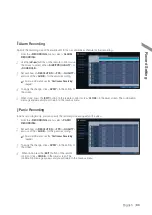
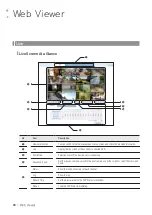
Alarm Recording
Specify the recording size of the alarm event if it occurs and make schedule for that recording.
1.
From the <
RECORDING
> menu, select <
ALARM
RECORDING
>
2.
Use the [
▲▼
◀▶
] buttons on the remote control or use
the mouse to select either <
SIZE/FPS/QUALITY
> or
<
SCHEDULE
>.
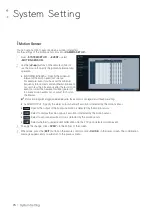
3.
Set each item of <
RESOLUTION
>, <
FPS
>, <
QUALITY
>
and use of the <
AUDIO
> for the alarm recording.
For more information, see the "
Continuous Recording
".
(page 81)
4.
To apply the change, click <
APPLY
> in the bottom of
the screen.
5.
When done, press the [
EXIT
] button on the remote control or click <
CLOSE
> in the lower screen. The confirmation
message appears and you will return to the previous menu.
\
\
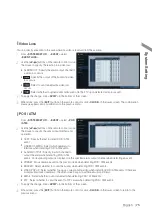
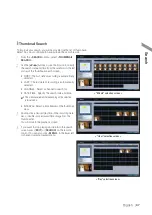
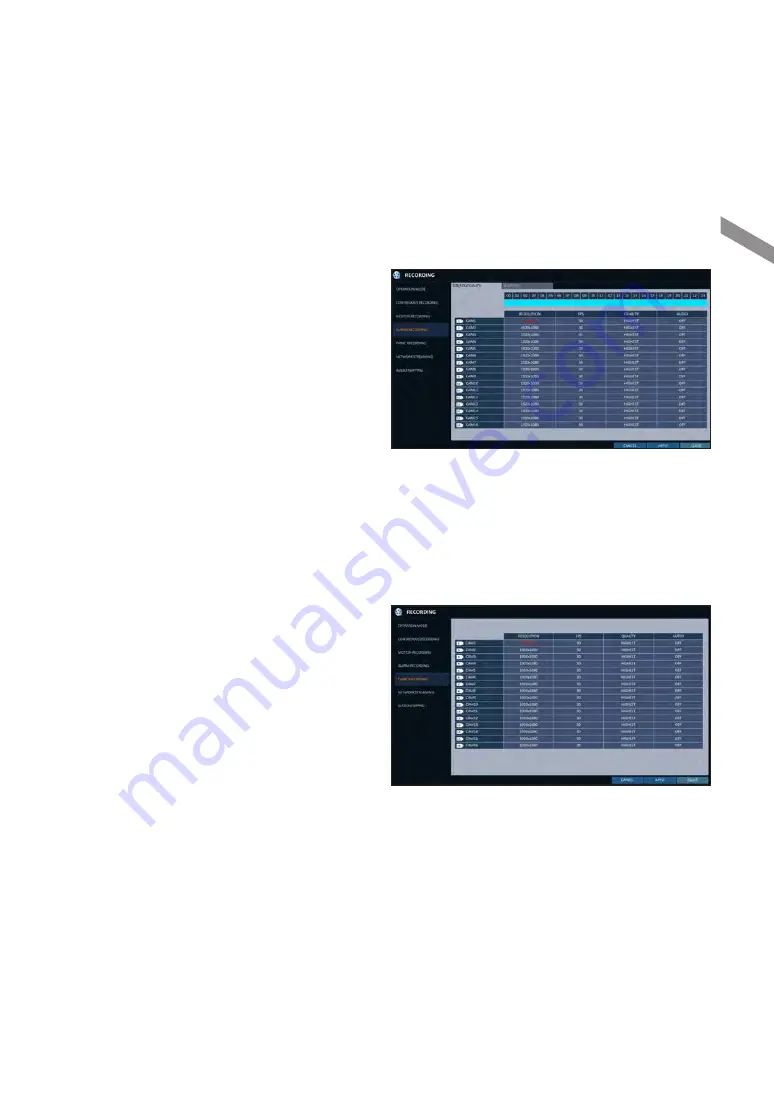
Panic Recording
In panic recording mode, you can specify the recording size and quality of the video.
1.
From the <
RECORDING
> menu, select <
PANIC
RECORDING
>.
2.
Set each item of <
RESOLUTION
>, <
FPS
>, <
QUALITY
>
and use of the <
AUDIO
> for the panic recording.
For more information, see the "
Continuous Recording
".
(page 81)
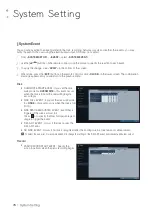
3.
To apply the change, click <
APPLY
> in the bottom of
the screen.
4.
When done, press the [
EXIT
] button on the remote
control or click <
CLOSE
> in the lower screen. The
confirmation message appears and you will return to the previous menu.
Recor
d Setting


