background image

4 Scan

234

Sca

n

4

Store to WSD

This section describes the procedure to select features on the [Store to WSD] screen.

The Store to WSD service allows you to scan documents set on the machine from a network 
computer. It also allows you to save the scanned data to a network computer.

Note

[Store to WSD] may not appear on the Services Home screen for some models. For more 
information, refer to "9 Scanner Environment Settings" > "Configuration of Store to WSD" in the 
Administrator Guide.

This feature requires the scanner driver included as standard in Windows Vista Service Pack 2 or 
later. Thus, this feature is not available for computers with older OS.

Resolution, file format and so on cannot be specified from the control panel of the machine. Specify 
these settings in [Scan Profiles] of Windows. For more information on how to specify the settings, 
refer to Windows Help.

WSD stands for Web Services on Devices.

1

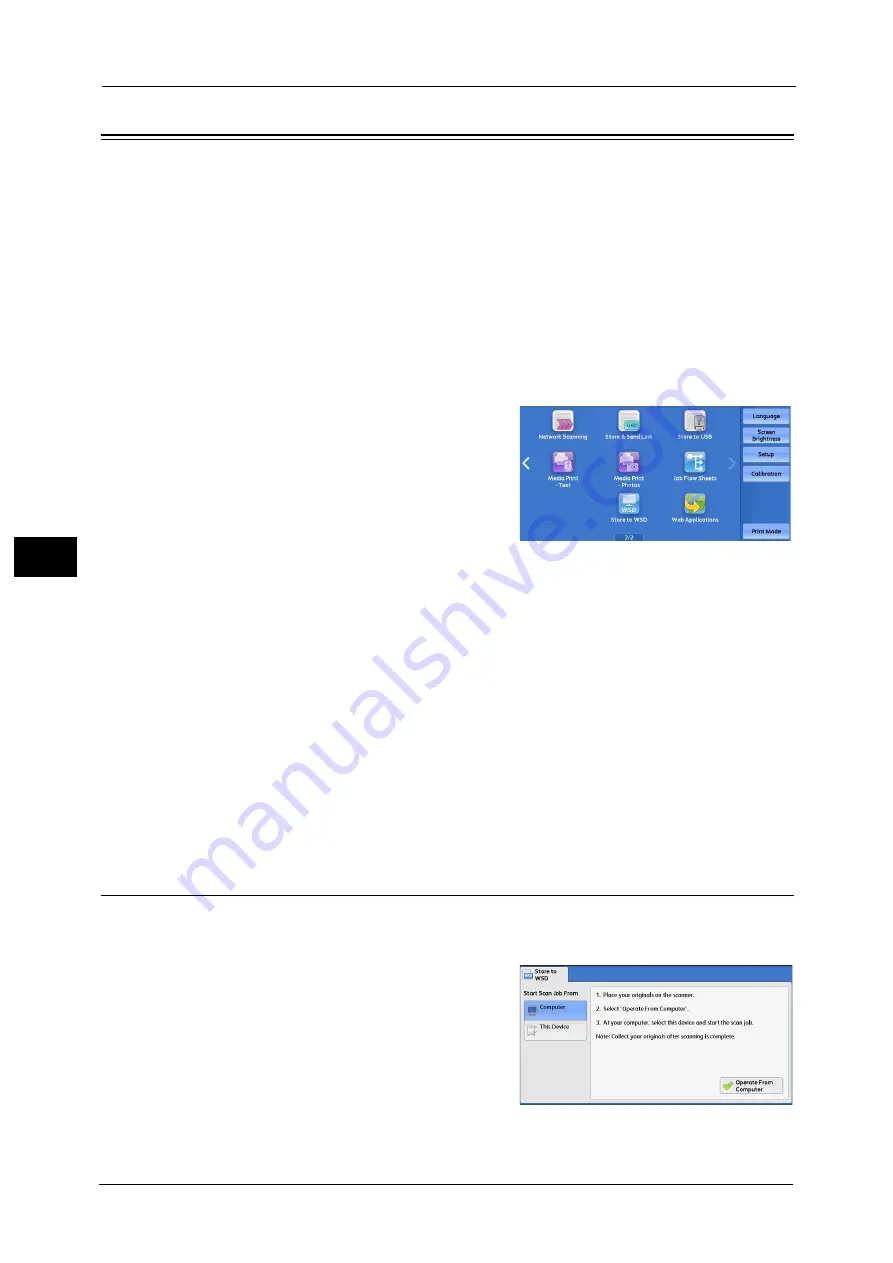
Select [Store to WSD] on the Services Home 
screen.

2

Select a feature on the [Store to WSD] screen.

„

Start Scan Job From

Select from where to start a scan job.

z

Computer

Starts a scan job by sending a request from a network computer.

z

This Device

Starts a scan job with the scan command from the machine, and save the scanned data 
to a network computer.

„

List of Computer

Lists network computers and their scanning methods. Select one from this list as destination.

Computer (Starting a Scan Job via Computer Operation)

You can scan documents set on the machine by sending a request from a network computer.

Note

WSD stands for Web Services on Devices.

1

Select [Computer].

Содержание Color C60

Страница 1: ...User Guide Color C70 Printer Color C60 Printer...

Страница 2: ...nual safety instructions are preceded by the symbol Always read and follow the instructions before performing the required procedures As the copying machine contains a feature designed to prevent forg...

Страница 3: ...cation XPS 22 EDICT and COMPDIC 22 Cyrus SASL 23 Newlib 23 About Qt 37 About Software Applied to LGPL 37 Other Licenses 45 Legal Notice 46 2 Product Overview 47 Machine Components 48 Power Source 57 S...

Страница 4: ...Side Copying Multiple Pages onto One Sheet 100 Lighten Darken Adjusting the Copy Density 100 Image Quality 102 Original Type Selecting the Document Type 102 Image Options Adjusting Copy Density Sharp...

Страница 5: ...s One Job 157 Sample Job Checking the Finished Output of the Copy 161 Combine Original Sets Adding Originals 162 Delete Outside Delete Inside Deleting Outside or Inside of the Selected Area 163 Stored...

Страница 6: ...File Format for Output Data 222 Store to Folder 223 Color Scanning Selecting an Output Color 223 2 Sided Scanning Scanning Both Sides of a Document 224 Original Type Selecting the Document Type 224 Pr...

Страница 7: ...s 248 E mail Options Filing Options 249 Quality File Size Specifying an Image Compression Ratio When Scanning 249 File Format Selecting a File Format for Output Data 250 Read Receipts Specifying Read...

Страница 8: ...ored Programs 287 Calling a Stored Program 288 Calling a Stored Program for Build Job 289 8 Web Applications 291 Web Applications Overview 292 Accessing Web Applications 293 Accessing Using Buttons Re...

Страница 9: ...ions 335 Features Overview 336 Print 337 Print Features 337 Setup 339 Printing 339 E mail Printing 340 Setup 340 Receiving E Mail 340 Importing Scanned Data 341 Importing to a TWAIN Compatible Applica...

Страница 10: ...10...

Страница 11: ...ne This chapter describes how to use this guide as well as safety notes and legal notice you should read before using the machine z Preface 12 z Types of Manuals 14 z Using This Guide 15 z About Licen...

Страница 12: ...al computer operating system and network products For information on how to configure your network environment refer to the Administrator Guide For information on optional components for the print fea...

Страница 13: ...Preface 13 Before Using the Machine 1...

Страница 14: ...daily maintenance and the System Settings procedures Safety Notes Booklet The guide describes precautions you should follow for safe use on operations of the machine Be sure to read the guide Manual...

Страница 15: ...for the Copy service 4 Scan Describes the basic operations and features for the Scan services 5 Send from Folder Describes the basic operations and features to use folders 6 Job Flow Sheets Describes...

Страница 16: ...es of CD ROM features and touch screen messages and input text z Folders files applications button or menu names displayed on the touch screen z Names of menus commands windows or dialog boxes display...

Страница 17: ...17 Before Using the Machine 1 Short Edge Feed SEF Loading documents or paper in landscape orientation when you view the machine from the front LEF Orientation Paper feed direction SEF Orientation Pape...

Страница 18: ...MPLARY OR CONSEQUENTIAL DAMAGES INCLUDING BUT NOT LIMITED TO PROCUREMENT OF SUBSTITUTE GOODS OR SERVICES LOSS OF USE DATA OR PROFITS OR BUSINESS INTERRUPTION HOWEVER CAUSED AND ON ANY THEORY OF LIABIL...

Страница 19: ...BSD codes The FreeBSD Copyright Copyright 1994 2006 The FreeBSD Project All rights reserved Redistribution and use in source and binary forms with or without modification are permitted provided that t...

Страница 20: ...ncerning this software is available at http www umich edu dirsvcs ldap ldap html This work also contains materials derived from public sources Additional information about OpenLDAP can be obtained at...

Страница 21: ...THOR S OR OWNER S OF THE SOFTWARE BE LIABLE FOR ANY DIRECT INDIRECT INCIDENTAL SPECIAL EXEMPLARY OR CONSEQUENTIAL DAMAGES INCLUDING BUT NOT LIMITED TO PROCUREMENT OF SUBSTITUTE GOODS OR SERVICES LOSS...

Страница 22: ...sh dictionary files are licensed to customers under the terms and conditions of a Creative Commons Attribution ShareAlike License Prior to use be sure to check the terms and conditions of this license...

Страница 23: ...om several sources Each file may have its own copyright license that is embedded in the source file Unless otherwise noted in the body of the source file s the following copyright notices will apply t...

Страница 24: ...LITY AND FITNESS FOR A PARTICULAR PURPOSE ARE DISCLAIMED IN NO EVENT SHALL THE COPYRIGHT OWNER OR CONTRIBUTORS BE LIABLE FOR ANY DIRECT INDIRECT INCIDENTAL SPECIAL EXEMPLARY OR CONSEQUENTIAL DAMAGES I...

Страница 25: ...nced Micro Devices Inc 29K Support Products Mail Stop 573 5900 E Ben White Blvd Austin TX 78741 800 292 9263 5 6 7 Sun Microsystems Copyright C 1993 by Sun Microsystems Inc All rights reserved Develop...

Страница 26: ...PARTICULAR PURPOSE ARE DISCLAIMED IN NO EVENT SHALL THE AUTHOR BE LIABLE FOR ANY DIRECT INDIRECT INCIDENTAL SPECIAL EXEMPLARY OR CONSEQUENTIAL DAMAGES INCLUDING BUT NOT LIMITED TO PROCUREMENT OF SUBST...

Страница 27: ...rovided with the distribution THIS SOFTWARE IS PROVIDED BY THE AUTHOR AND CONTRIBUTORS AS IS AND ANY EXPRESS OR IMPLIED WARRANTIES INCLUDING BUT NOT LIMITED TO THE IMPLIED WARRANTIES OF MERCHANTABILIT...

Страница 28: ...ission to use copy modify and distribute this software for any purpose without fee is hereby granted provided that this entire notice is included in all copies of any software which is or includes a c...

Страница 29: ...on and use in source and binary forms is permitted provided that the above copyright notice and following paragraph are duplicated in all such forms This file is distributed WITHOUT ANY WARRANTY witho...

Страница 30: ...IS without any express or implied warranty permission to use copy modify and distribute this file for any purpose is hereby granted without fee provided that the above copyright notice and this notice...

Страница 31: ...HEIMPLIED WARRANTIES OF MERCHANTABILITY AND FITNESS FOR A PARTICULAR PURPOSEARE DISCLAIMED IN NO EVENT SHALL THE AUTHOR OR CONTRIBUTORS BE LIABLE FOR ANY DIRECT INDIRECT INCIDENTAL SPECIAL EXEMPLARY O...

Страница 32: ...BUSINESS INTERRUPTION HOWEVER CAUSED AND ON ANY THEORY OF LIABILITY WHETHER IN CONTRACT STRICT LIABILITY OR TORT INCLUDING NEGLIGENCE OR OTHERWISE ARISING IN ANY WAY OUT OF THE USE OF THIS SOFTWARE E...

Страница 33: ...of conditions and the following disclaimer in the documentation and or other materials provided with the distribution THIS SOFTWARE IS PROVIDED BY THE AUTHOR AS IS AND ANY EXPRESS OR IMPLIED WARRANTIE...

Страница 34: ...35 ARM Ltd arm and thumb variant targets only Copyright c 2009 ARM Ltd All rights reserved Redistribution and use in source and binary forms with or without modification are permitted provided that th...

Страница 35: ...ion and or other materials provided with the distribution Neither the name of Texas Instruments Incorporated nor the names of its contributors may be used to endorse or promote products derived from t...

Страница 36: ...n permission THIS SOFTWARE IS PROVIDED BY THE COPYRIGHT HOLDERS AND CONTRIBUTORS AS IS AND ANY EXPRESS OR IMPLIED WARRANTIES INCLUDING BUT NOT LIMITED TO THE IMPLIED WARRANTIES OF MERCHANTABILITY AND...

Страница 37: ...e the Lesser General Public License applies to some specially designated software packages typically libraries of the Free Software Foundation and other authors who decide to use it You can use it too...

Страница 38: ...hared library the combination of the two is legally speaking a combined work a derivative of the original library The ordinary General Public License therefore permits such linking only if the entire...

Страница 39: ...e for a work means the preferred form of the work for making modifications to it For a library complete source code means all the source code for all modules it contains plus any associated interface...

Страница 40: ...sions for other licensees extend to the entire whole and thus to each and every part regardless of who wrote it Thus it is not the intent of this section to claim rights or contest your rights to work...

Страница 41: ...will still fall under Section 6 Otherwise if the work is a derivative of the Library you may distribute the object code for the work under the terms of Section 6 Any executables containing that work...

Страница 42: ...executable that you distribute 7 You may place library facilities that are a work based on the Library side by side in a single library together with other library facilities not covered by this Licen...

Страница 43: ...e wide range of software distributed through that system in reliance on consistent application of that system it is up to the author donor to decide if he or she is willing to distribute software thro...

Страница 44: ...MAGES END OF TERMS AND CONDITIONS How to Apply These Terms to Your New Libraries If you develop a new library and you want it to be of the greatest possible use to the public we recommend making it fr...

Страница 45: ...Type 2 freetype version 2 3 6 HarfBuzz harfbuzz JavaScriptCore WebCore WebKit Easing Equations by Robert Penner Shift JIS Text Codec ISO 2022 JP JIS Text Codec EUC JP Text Codec EUC KR Text Codec GBK...

Страница 46: ...es of items that may be illegal to copy or print in your country z Currency z Banknotes and checks z Bank and government bonds and securities z Passports and identification cards z Copyright material...

Страница 47: ...uch as machine components how to switch the machine on and off and how to use the touch screen z Machine Components 48 z Power Source 57 z Ground Fault Interrupter 60 z Power Saver Mode 62 z Control P...

Страница 48: ...pen this cover to replace toner cartridges 5 Machine front door Open this door to clear paper jams or replace consumables 6 Tray 1 2 3 4 Load paper here 7 Bottom left door Open this door to clear pape...

Страница 49: ...y Outputs are delivered here Two types of trays are available an optional normal output tray Simple Catch Tray and an optional offset stacking tray Offset Catch Tray When the optional offset stacking...

Страница 50: ...Black K1 and K2 Cyan C Magenta M and Yellow Y toner are installed from the left No Component Function 8 7 1 2 3 5 6 4 9 10 No Component Function 1 Confirmation indicator Lights up when a document is l...

Страница 51: ...tri fold output tray 3 Hole punch waste container Collects punch scraps from the puncher Remove this container when discarding the punch scraps 4 Output tray Outputs are delivered here 5 Finisher tra...

Страница 52: ...encies loaded in this tray 2 De curl button Eliminates curl of paper 3 Output tray Delivers regular copies Also delivers copies or prints when Collated or Uncollated is selected 4 Finisher tray Staple...

Страница 53: ...or when replacing them with new ones 10 Staple waste container Collects waste from the stapler Remove this cartridge to replace the staple waste container 11 Staple cartridge Contains staples Remove t...

Страница 54: ...Outputs are delivered here when Fold only Fold Staple or Booklet Trimming Pressing is selected 5 Square fold setting button Use this button to adjust the amount of pressure applied to the spine of bo...

Страница 55: ...d in Trays 1 to 4 and 6 2 Tray 5 Bypass top cover Open this cover to clear paper jams 3 Front door of the High Capacity Feeder Open this door to clear paper jams This unit conveys paper supplied from...

Страница 56: ...2 Tray 5 Bypass Use this when copying or printing on paper that cannot be loaded in Trays 1 4 such as heavyweight paper or other special media 3 Tray 5 Bypass top cover Open this cover to clear paper...

Страница 57: ...Important Do not switch off the main power immediately after switching on the main power This may damage the hard disk and the memory or cause a machine malfunction 1 Make sure that the power cord is...

Страница 58: ...off in the following situations If the power is switched off the processing data may be erased While data is being received While a job is being printed While a job is being copied While a job is bein...

Страница 59: ...2 Make sure that the touch screen is blank and the Power Saver button does not light up 3 Open the machine front door 4 Press the main power switch to the position to switch the main power off The Mai...

Страница 60: ...fault interrupter TEST button A3 High Capacity Feeder The main unit TEST button Ground fault interrupter Interface module TEST button Ground fault interrupter Finisher D4 Finisher D4 with Booklet Make...

Страница 61: ...y leakage or fire from occurring The ground fault interrupter is normally pressed to the upper side Check that the ground fault interrupter works properly at least once a month If you have any problem...

Страница 62: ...e enters the Power Saver mode by the following instances z Pressing the Power Saver button z The machine is not operated data is not received or a job is not processed until the machine enters the Pow...

Страница 63: ...evices are connected to the machine and a user performs the following operation the Low Power mode can be deactivated without pressing the Power Saver button z Touching the IC card Reader optional wit...

Страница 64: ...chine s memory You can check stored scan files in a Folder List For information on the Folder List refer to 4 Machine Status Machine Information Print Reports Folder List in the Administrator Guide Yo...

Страница 65: ...Administration mode the Authentication mode or the Accounting mode Also press this button to exit these modes 9 Clear All button Returns the settings you made to the default values The machine returns...

Страница 66: ...services to the custom buttons you can switch to the services without returning to the Services Home screen Note By default Copy is assigned to the Custom Button 1 Review is assigned to the Custom Bu...

Страница 67: ...nticated the login information is displayed in this field Note You can also press the Log In Out button on the control panel to enter the Authentication mode To exit the Authentication mode press the...

Страница 68: ...so on For more information refer to Network Scanning P 211 Store Send Link After you scan documents the machine temporarily saves the scanned data and sends you e mail attached with two URLs one is fo...

Страница 69: ...es on Devices Additional Feature Buttons Allows you to set the additional features that are not related to jobs Language You can select the language to be displayed on the touch screen The setting her...

Страница 70: ...trator Guide Setup You can create or update folders job flows and the Address Book For more information refer to 5 Tools Setup in the Administrator Guide Calibration The machine can automatically cali...

Страница 71: ...Button Settings in the Administrator Guide Drag Slide your finger to the position desired with your finger touched the touch screen Drag the touch screen from side to side to switch pages Drag the to...

Страница 72: ...ly To tap the same position of the screen twice is called double tap Tap the touch screen to switch the thumbnail bar to be displayed or not Note The operation of pinch in or pinch out moving two fing...

Страница 73: ...ion Entering alphabets and numerals To enter uppercase letters select Shift To return to the lowercase letters select Shift again Entering symbols Select More Characters Note Depending on the keyboard...

Страница 74: ...2 Product Overview 74 Product Overview 2...

Страница 75: ...ribes the basic operation and features for the Copy service z Copying Procedure 76 z Operations during Copying 81 z Simple Copy 84 z Copy 89 z Image Quality 102 z Layout Adjustment 109 z Output Format...

Страница 76: ...ormation on document sizes that can be detected automatically and how to enter a non standard document size refer to Original Size Specifying the Scan Size for the Document P 114 The standard document...

Страница 77: ...ard size documents enter the size on the Original Size screen Forinformationon the documentsizesthatcan bedetectedautomaticallyandhowto enter anon standarddocumentsize refer to Original Size Specifyin...

Страница 78: ...es on the Copy screen Note The features displayed on the screen depend on the configuration of your machine When the Authentication or Accounting feature is enabled a user ID and passcode may be requi...

Страница 79: ...has been loaded in the document feeder do not hold down the document while it is being conveyed Copies cannot be made if a copy protection code is detected For information on a copy protection code r...

Страница 80: ...there are no more documents You can change the number of copies by selecting Change Quantity that is displayed after selecting Delete 3 Load the next document 4 Press the Start button If you have more...

Страница 81: ...opying Stopping the Copy Job 81 Changing the Number of Copies 82 Interrupting the Copy Job 83 Stopping the Copy Job 1 Press either the Stop button on the control panel or Delete on the touch screen 2...

Страница 82: ...3 Select Delete 4 Select Delete Changing the Number of Copies To change the number of copy sets during scanning or copying use the following procedure 1 Press either the Stop button on the control pan...

Страница 83: ...been scanned The machine does not accept another job while it is scanning the documents or when Next Original has been selected Even when the Interrupt button is pressed the machine may not accept an...

Страница 84: ...Copies 86 Auto Detect Color Black White Selecting the Color for Copying 86 Lighten Darken Adjusting the Copy Density 87 2 Pages per Side Copying Two Pages onto One Sheet 87 1 Staple 88 1 Select Simpl...

Страница 85: ...f paper loaded in the tray Reduce Enlarge Making Enlarged Reduced Copies This feature allows you to select a copy ratio to enlarge or reduce the size of copies 1 Select Reduce Enlarge 2 Select a copy...

Страница 86: ...ded document on one side of the paper 1 J 2 Sided Makes a copy of a 1 sided document on both sides of the paper 2 J 2 Sided Makes a copy of a 2 sided document on both sides of the paper Auto Detect Co...

Страница 87: ...opy two pages of a document together onto one side of a single sheet of paper When you select 2 Pages per Side Auto is automatically selected in Reduce Enlarge The machine automatically sets the copy...

Страница 88: ...e paper type and the number of sheetsthat can be stapled referto 16 Appendix The Paper Typeand the Number of Sheets That Can Be Stapled in the Administrator Guide Note This feature does not appear for...

Страница 89: ...stomizethelayoutofthefeaturesdisplayedonthe Copy screen Formoreinformation referto 5Tools Copy Service Settings Copy Tab Features Allocation in the Administrator Guide 1 Select Copy on the Services Ho...

Страница 90: ...s or can enter a ratio directly 1 Select a copy ratio or specify a value Variable To specify a value use the numeric keypad or and Specifying 100 allows you to make copies at the same image size as th...

Страница 91: ...py the complete image onto the paper Important If you select Slight Reduction Improves Fit and you do not want to erase the edges of the document set the amount of edge erase to 0 mm Note that if the...

Страница 92: ...he values entered in Original Size and Copy Size are used to calculate ratios and do not reflect a scan size for the document or the paper size Be sure to specify a scan size for the document Also sel...

Страница 93: ...rmation on the settings refer to 5 Tools Copy Service Settings Preset Buttons Paper Supply Button 2 5 in the Administrator Guide More Displays the Paper Supply screen For information on the settings o...

Страница 94: ...isplays paper sizes Type Displays paper types Color Displays paper colors For informationon howtoset PaperColor refer to 5 Tools CommonService Settings PaperTray Settings Paper Tray Attributes in the...

Страница 95: ...or When Custom Size is Selected in the Tray 5 Screen P 95 respectively Paper Type Select a paper type When Standard Size is Selected in the Tray 5 Screen Select Standard Size and from the lists displa...

Страница 96: ...five levels which is used for the machine to recognize color For more information refer to 5 Tools Common Service Settings Image Quality Adjustment Image Quality Output Color Recognition in the Admini...

Страница 97: ...lor Displays the Source Color screen on which you can select one or more colors from your document to define them as source colors Refer to Source Color Screen P 97 z Target Area Color Displays the Ta...

Страница 98: ...r more source colors from six preset options Target Area Color Screen This screen allows you to select the target color to be used in place of the source colors specified in Source Color You can selec...

Страница 99: ...six custom options For information on how to set custom colors refer to 5 Tools Copy Service Settings Custom Colors in the Administrator Guide 1 Select Dual Color 2 Select Non target Area Color 3 Sel...

Страница 100: ...Output Specifying Finishing Options This feature is the same as Copy Output on the Output Format screen For more information refer to Copy Output Specifying Finishing Options P 150 Pages per Side Copy...

Страница 101: ...Copy 101 Copy 3 1 Use and to select from seven density levels...

Страница 102: ...e Document 108 1 Select Copy on the Services Home screen 2 Select a feature on the Image Quality screen Note If the color reproduction is unsatisfactory perform calibration For information on calibrat...

Страница 103: ...ption to copy text areas of the document sharply This option is suitable for graphs and illustrations z Normal Text Select this option for printed documents or for documents written with ink z Light T...

Страница 104: ...an upper cell on the bar makes the contours of images sharper and selecting a lower cell makes softer Saturation Selecting an upper cell on the bar makes colors brighter and selecting a lower cell ma...

Страница 105: ...ting an upper cell on the bar makes the difference between light and dark areas greater light areas become lighter and dark areas darker In contrast selecting a lower cell on the bar makes the differe...

Страница 106: ...or balance of the four CMYK toner colors cyan magenta yellow and black You can select from seven levels for each density level Highlights Midtones and Shadows The Color Balance feature finely adjusts...

Страница 107: ...r represents the color tone of the original document and the Copy Color slider represents the color tone of output copies Selecting a button on the screen moves the Original Color slider to adjust the...

Страница 108: ...cy Label and Envelope Setting by a customer engineer is required to apply the effect of this feature to Coated and Postcard To use these options contact our Customer Support Center Note To display Glo...

Страница 109: ...Size Specifying the Scan Size for the Document 114 Mixed Size Originals Scanning Different Size Documents Simultaneously 114 Edge Erase Erasing Edges and Margin Shadows of the Document 116 Image Shift...

Страница 110: ...ption is displayed when you select 2 J 2 Sided or 2 J 1 Sided z Head to Head Select this option when the front and back sides of the document are in the same orientation z Head to Toe Select this opti...

Страница 111: ...Book Copying Copying Facing Pages onto Separate Sheets This feature allows you to copy facing pages of a document on separate sheets of paper in page order This is useful when you need to make separat...

Страница 112: ...ly You can select this option when Top Page then Bottom is selected Binding Edge Erase Erases the shadow from the center section of the document You can set the binding erase width in the range from 0...

Страница 113: ...shadow from the center section of the document You can set the binding erase width in the range from 0 to 50 mm in 1 mm increments Starting Ending Page Screen This screen allows you to set the startin...

Страница 114: ...escreen Forinformationonthesettings referto 5Tools CopyServiceSettings Original Size Defaults in the Administrator Guide Variable Size Enter the desired scan size when scanning a non standard size doc...

Страница 115: ...ect any option Off Select this option when copying documents of the same size On When documents of different sizes are copied the machine automatically detects the size of each document Original Orien...

Страница 116: ...s select 2g2 Sided for 2 Sided Copying operation Even when the edge erase amount is set to 0 mm full page copying cannot be made For information on the areas that can actually be printed refer to 16 A...

Страница 117: ...ation setting differs from the actual document orientation the machine may not detect the top of the document correctly z Upright Images Select this option when placing the top edge of the document ag...

Страница 118: ...box when you want the positioning of Side 2 to match the positioning of Side 1 Original Orientation Allows you to specify the orientation of the document so that the machine can identify the top of t...

Страница 119: ...of paper You can select from 8 shift directions Specify the amounts of the top and bottom and left and right margins in the range from 0 to 50 mm in 1 mm increments Margin Shift Allows you to specify...

Страница 120: ...t to Black White or Single Color the black color on the document is inverted to white and the white color to black When Output Color is set to Color the colors are inverted to their complementary colo...

Страница 121: ...e Rotation Changing the Orientation of Images If the orientation of the paper currently loaded in the tray differs from that of the document loaded the machine automatically rotates the document image...

Страница 122: ...ce position for rotation 1 Select any option Staple Position This option is displayed when the finisher is installed If documents are of mixed orientations the images will be rotated to match the stap...

Страница 123: ...ground of Copies 139 Secure Watermark Managing Document Security 142 Tab Margin Shift Copying on Tab Stock Paper 144 Face Up Down Output Specifying Face Up or Down 145 Folding Outputting Bi Folded Tri...

Страница 124: ...ed in Paper Supply a tray specified in Auto Paper Off is automatically selected Change the setting if necessary For information on Auto Paper Off refer to 5 Tools Copy Service Settings Copy Control in...

Страница 125: ...oklet Creation Fold Staple Screen P 126 Auto Image Positioning This option is displayed if you select Create Left Top Bound Booklet or Create Right Bound Booklet Auto Image Positioning is a feature th...

Страница 126: ...iles them up to form a booklet You can specify the number of sheets in the range from 1 to 50 in 1 sheet increments Note When you specify the folding feature specify the dividing number of sheets in t...

Страница 127: ...ature that trims the fore edge of a booklet which is opposite of the booklet spine in order to finish the edge neatly Book Pressing is a feature that presses the spine of a booklet to flatten the spin...

Страница 128: ...ne will not print the already scanned data In that case follow the instructions of the message displayed on the screen to cancel the job The maximum number of pages that the machine can scan is 999 pa...

Страница 129: ...as front covers Back Cover Quantity This option is displayed when you select Blank Cover in Back Cover Specify the number of blank sheets to be used as back covers Pages per Side Copying Multiple Pag...

Страница 130: ...placing the top edge of the document against the top side of the document glass or document feeder z Sideways Images Select this option when placing the top edge of the document against the left side...

Страница 131: ...s on the Paper Supply screen When Bypass is selected the Tray 5 screen is displayed For more information refer to Tray 5 Screen P 94 When Enlargement is Selected This screen allows you to specify a di...

Страница 132: ...to Paper Off refer to 5 Tools Copy Service Settings Copy Control Auto Paper Off in the Administrator Guide 1 Select Repeat Image 2 Select any option Off Disables this feature Auto Repeat Automatically...

Страница 133: ...Repeat Image or Booklet Creation is set an annotation is added to each copy image If a layout template is specified in Apply Layout Template to Copy Print Jobs under Force Annotation in the System Ad...

Страница 134: ...he System Administration mode Forinformationonhowtoregistertext referto 5Tools CommonServiceSettings Watermark CustomWatermark 1 to 3 in the Administrator Guide Apply To Displays the Apply Comment To...

Страница 135: ...screen You can select whether to add a date onto the first copy page only or onto each copy page Position Displays the Date Position screen You can select a date position from six options For side 2...

Страница 136: ...used z Page 1 N Page 2 N Adds page numbers followed by the total number of pages and the text Page before each page number When you select Page 1 N Page 2 N the value specified in Total Page N is used...

Страница 137: ...numeric keypad to enter the end page number Start End Page Numbers Allows you to specify the start and end pages to add page numbers in the range from 1 to 9999 Note Use and or the numeric keypad to e...

Страница 138: ...e 2 of copy sheets you can select Same as Side 1 or Mirror Side 1 Font Size Displays the Bates Stamp Font Size screen You can select a prefix and page number size from three options or can directly sp...

Страница 139: ...s printed on each page of the first copy set and 2 is printed on each page of the second set To prevent for instance the duplication of confidential documents that are to be distributed at a conferenc...

Страница 140: ...ed the account number will not be printed Note User Account Number is the No User Administration Number registered by users with the Authentication and Accounting feature You can see if a user is auth...

Страница 141: ...3 in the Administrator Guide Watermark Effect Screen If you enable the Watermark Effect feature the text strings specified in Control Number Stored Watermarks User Account Number Date Time and Serial...

Страница 142: ...n used for the document This happens because the machine incorrectly detects a copy protection code from the document In that case ask the system administrator to temporarily disable Secure Watermark...

Страница 143: ...lication Prevents document duplication Protection code and digital code are embedded into copies Important This setting also affects scan operation Stored Secure Watermarks Displays the Stored Secure...

Страница 144: ...ocument against the top side of the document glass or document feeder z Sideways Images Select this option when placing the top edge of the document against the left side of the document glass or docu...

Страница 145: ...ch the image needs to be shifted in the range from 0 to 15 mm in 1 mm increments Add Tab Stock Allows you to specify the number of sheets of tab stock paper Paper Supply Allows you to select a tray to...

Страница 146: ...omponent is required For more information contact our Customer Support Center When the C3 Finisher is installed making the fold assisting crease on a paper is available For more information refer to 5...

Страница 147: ...Does not trim the fore edge of booklets On Trims the fore edge of booklets Paper Supply Displays the Paper Supply screen Select the paper tray to be used Select the tray with paper loaded in landscape...

Страница 148: ...image on a single sheet of paper Transparency Options Inserting Blank Sheets between Transparencies This feature allows you to insert blank separators between output transparency sheets At the same ti...

Страница 149: ...the Tray 5 screen is displayed For more information refer to Tray 5 Screen P 94 Separator Tray Allows you to select the paper tray to be used for the separators Select More to display the Paper Supply...

Страница 150: ...fying Finishing Options This feature allows you to select finishing options Note This feature does not appear for some models An optional component is required For more information contact our Custome...

Страница 151: ...e Important Ensure that the actual orientation of the original document matches the Original Orientation setting on the Layout Adjustment screen In the following cases the actual stapling position dif...

Страница 152: ...ng Offset Stacking screen will appear For more information refer to Offset Stacking screen P 152 Real Time Sample Job This option is displayed if you select Stacker Stacker Cart for the output destina...

Страница 153: ...isher D4 optional Finisher D4 with Booklet Maker optional A4 8 x 10 8 5 x 11 8 5 x 13 8 5 x 14 A3 B4 11 x 17 8K 1 Staple 1 Top Right 2 Staples 2 Top 2 Right 1 Staple 1 Top Right 2 Staples 2 Top 2 Righ...

Страница 154: ...70 mm for 2 holes and 108 mm for 3 holes The distance between the two holes of Finisher D4 or Finisher D4 with Booklet Maker is 80 mm and is 70 mm with the 3 Hole Punch Unit for Finisher D4 z C3 Fini...

Страница 155: ...2 Holes Right A4 B5 7 25 x 10 5 8 x 10 8 5 x 11 16K A4 Cover 9 x 11 A4 A3 B4 215 x 315 mm 8 x 10 8 5 x 11 8 5 x 13 8 5 x 14 11 x 15 11 x 17 8K 3 Holes Left 3 Holes Top 3 Holes Right A4 B5 7 25 x 10 5...

Страница 156: ...image are missing slightly move the card inward on the document glass so that the whole image can be scanned When the reduced size is specified to copy an ID card the machine may copy the ID card in a...

Страница 157: ...side Delete Inside Deleting Outside or Inside of the Selected Area 163 Stored Programming Calling a Stored Program for Build Job 165 1 Select Copy on the Services Home screen 2 Select a feature on the...

Страница 158: ...taching Covers to Copies P 128 Annotations For more information refer to Annotations Adding a Comment a Date Page Numbers to Copies P 133 Segment Separators For more information refer to Segment Separ...

Страница 159: ...ct this button when you have another document This button is always selected when you use the Build Job feature Start After loading the next document select this button to scan the next document Note...

Страница 160: ...r other than a separator When Pages per Side is set the number of pages 2 pages 4 pages or 8 pages that you selected to copy onto one side of a single sheet starting from the first page of the loaded...

Страница 161: ...when you select Blank Separators You can specify the number of separators in the range from 1 to 99 Sample Job Checking the Finished Output of the Copy When making multiple sets of copies you can pri...

Страница 162: ...copy a document that has too many pages to be loaded in the document feeder at one time or when you scan each document page using the document glass and have the machine process the pages as one job...

Страница 163: ...text Copy Screen When Combine Original Sets is in Progress The Copy screen is displayed when copying starts Delete Clears the document data stored with the Combine Original Sets feature and cancels c...

Страница 164: ...rom which side the specified area is to be deleted z Both Sides Applies the settings to both sides of the document z Side 1 Only Applies the settings to Side 1 of the document z Side 2 Only Applies th...

Страница 165: ...will be reduced or enlarged accordingly 1 Select Area 1 Area 2 or Area 3 2 Select the text box for X1 and enter the value for X1 using the numeric keypad 3 Select the text box for Y1 and enter the va...

Страница 166: ...3 Copy 166 Copy 3...

Страница 167: ...er to 9 Scanner Environment Settings in the Administrator Guide z Scanning Procedure 168 z Operations during Scanning 176 z E mail 183 z Network Scanning 211 z Scan to PC 213 z Store to Folder 223 z S...

Страница 168: ...een For information on document sizes that can be detected automatically and how to enter a non standard document size refer to Original Size Specifying a Scan Size P 243 The standard document sizes t...

Страница 169: ...ument glass automatically detects standard size documents For non standard size documents enter the size on the Original Size screen For information on document sizes that can be detected automaticall...

Страница 170: ...te Folder in the Administrator Guide Network Scanning Scans a document using a job template created on CentreWare Internet Services When Scan to My Folder is enabled and the Remote Access feature is a...

Страница 171: ...as an example 1 Press the Services Home button Scan Service File Format can be Selected When File Format PDF Docu Works XPS 1 TIFF JPEG BMP PNG MS Office E mail Using the control panel when scanning O...

Страница 172: ...r P 223 Advanced Settings P 237 Layout Adjustment P 241 E mail Options Filing Options P 249 When you use another Scan service Store to Folder is replaced with E mail Network Scanning Scan to PC Store...

Страница 173: ...nts as a single set of data Up to 999 pages can be stored Note If the number of pages scanned by the machine exceeds the maximum the machine stops scanning Follow the message displayed on the screen a...

Страница 174: ...rop down menu you can select Scan Jobs and display the desired job Step 5 Saving the Scanned Data When you used the Store to Folder service you can use the following methods to import the file stored...

Страница 175: ...Scanning Procedure 175 Scan 4 Import using CentreWare Internet Services Use CentreWare Internet Services Refer to Importing Using CentreWare Internet Services P 346...

Страница 176: ...the Scanned Images during a Scan Job 177 Changing Scan Settings 181 Stopping the Scan Job To cancel scanning a document use the following procedure 1 Press either the Stop button on the control panel...

Страница 177: ...played After the document is read select Preview A preview screen is displayed and the first page of the lastly read document is displayed Note When this screen or the preview screen is displayed and...

Страница 178: ...An entire preview image is displayed In the entire view the page switching buttons and thumbnailed bar are available Feature Operation Switching pages on the preview area Drag or flick the preview are...

Страница 179: ...or XPS is set for File Format when Auto Upright Orientation is set for Searchable Page Orientation and when Searchable is set for Searchable Text Note XPS stands for XML Paper Specifications Forinfor...

Страница 180: ...he preview area except for the slider and thumbnailed bar After switching the page the image is displayed in the entire view Changing the ratio of the image size Double tap a preview image or drag the...

Страница 181: ...ed selecting Send Last Original sends a job Changing Scan Settings You can change scan settings while scanning the document Note For Store to WSD you cannot change scan settings while scanning the doc...

Страница 182: ...4 Scan 182 Scan 4 Original Size Specifying a Scan Size P 243 4 Press the Start button...

Страница 183: ...S MIME To use this feature you need to register certificates of the machine and the recipient s device in advance For information on certificates refer to 13 Encryption and Digital Signature Settings...

Страница 184: ...rmation on howtosetthe AddressBook referto 5Tools Setup AddAddressBook Entry inthe Administrator Guide z To verify the validity of a certificate prior settings are required For information on the sett...

Страница 185: ...Network Entries is Selected P 186 Smart Card E mail Address Displays addresses specified on the certificate in the Smart Card Note This item is displayed when the Smart Card Reader is connected When...

Страница 186: ...the Custom Filters screen using CentreWare Internet Services to search with keywords Simple Search without Name E mail Address or Custom Item For information on how to change a search target refer to...

Страница 187: ...screen Address Book Specifying a Destination Using the Address Book Type 2 The following describes how to specify a destination using the Address Book Type 2 1 Select Address Book 2 Select a recipient...

Страница 188: ...Bcc Go to Enter an address number using the numeric keypad to display the e mail address at the top of the list button Displays detailed information on the selected recipient Show E mail Address Sele...

Страница 189: ...mail address Select any option from Custom Item and then select the box under Keyword to display a screen for entering a keyword You can enter the keyword with up to 60 characters Note You can select...

Страница 190: ...r a recipient New Enter a new recipient using the keyboard Add current recipient Select a recipient to be registered from the current recipients specified on the First Tab screen Note This item cannot...

Страница 191: ...mail Address Book screen select Cancel For more information on the setting items refer to 5 Tools Setup Add Address Book Entry in the Administrator Guide 10 When the settings are completed select Reg...

Страница 192: ...the Address Book selected for Address Book Default Scan Public Entries or Network Entries For more information refer to 5 Tools Address Book Settings in the Administrator Guide To Cc Bcc Allows you t...

Страница 193: ...recipient to be deleted confirmed or edited 2 Select any option from the pop up menu Remove Removes the selected recipient Edit Displays the Edit Recipient screen on which you can confirm or edit the...

Страница 194: ...tal Signature Settings Configuration of E mail Encryption Digital Signature in the Administrator Guide From Setting the Sender s Address Specify a sender s e mail address You can specify only one addr...

Страница 195: ...ct You can specify the e mail subject using the following procedure Auto Set Automatically sets the subject to Scan data from XXX where XXX is the host name of the machine To set a user defined subjec...

Страница 196: ...e menu displayed by selecting Color Scanning select any option Auto Detect The color of the document is determined automatically the machine scans in full color when the document is colored otherwise...

Страница 197: ...that case set 2 Sided Scanning from the Layout Adjustment screen 1 From the menu displayed by selecting 2 Sided Scanning select any option 1 Sided Select this option to scan only one side of the docum...

Страница 198: ...ment glass or the document feeder Always select Sideways Images when the top of the document is placed facing the left side horizontal text Original Type Selecting the Document Type When you select Bl...

Страница 199: ...s selected in Color Scanning PDF Saves scanned data in PDF format Note The version of PDF files is Adobe Acrobat 4 0 PDF 1 3 DocuWorks Saves scanned data in DocuWorks format Note To browse or print Do...

Страница 200: ...or in recognition or loss of graphical information may occur This feature provides the convenience for users who want to directly edit texts or images on the scanned document converted in the Microsof...

Страница 201: ...for XML Paper Specification To browse or print DocuWorks files on a computer one of the following software is required DocuWorks 6 0 or later DocuWorks Viewer Light 5 1 or later DocuWorks Viewer Ligh...

Страница 202: ...heets service files cannot be split PDF Security Displays the File Format PDF Security screen Allows you to configure security on the data saved as a PDF file to prevent unauthorized access Refer to F...

Страница 203: ...figuration and settings in the System Administration mode z Signature Location Select the position where the signature is displayed when you select On in DocuWorks Signature Note The certificate of th...

Страница 204: ...are Internet Services In the following cases the Searchable Text feature may not function properly If the document is not loaded correctly and thus the text is slanted or if the text on the document i...

Страница 205: ...ou can enter a password with up to 32 characters Permissions Displays the PDF Security Permissions screen Refer to PDF Security Permissions Screen P 205 PDF Security Permissions Screen This screen all...

Страница 206: ...ncrypt a DocuWorks file with a password and assign the access privileges for the file operation 1 Select any option Off The file is not encrypted and no access privilege is assigned Password V4 or lat...

Страница 207: ...e screen Note When you select Certificate the Address Book Type1 or Type2 will be displayed depending on the setting of Address Book Type in the System Administration mode For more information refer t...

Страница 208: ...rches by specified keyword for Simple Search or by search entries for Advanced Search Note For Advanced Search you can set multiple search entries z Name E mail Address Displays the list of names regi...

Страница 209: ...icate information such as issuer expiration date and persons to whom the certificate is issued is displayed Name E mail Address DN Lists names and their e mail addresses Add Select this button to add...

Страница 210: ...o identify the text on the original document and a font to be used for the recognized text Language of the Original Select the language of the original document from five available types Japanese Kore...

Страница 211: ...fer to 16 Appendix Notes and Restrictions Notes and Restrictions on the Use of the Machine in the Administrator Guide 1 Select Network Scanning on the Services Home screen Note WSD stands for Web Serv...

Страница 212: ...ning Scanning Both Sides of a Document You can automatically scan both sides of a 2 sided document By setting the binding style both sides are scanned in the same orientation For more information refe...

Страница 213: ...w to configure the FTP service on Mac OS X 10 7 Lion or OS X 10 8 Mountain Lion consult the official website of Apple Inc For information on supported operating systems refer to 16 Appendix Specificat...

Страница 214: ...g describes the Address Book When you select a recipient using the Address Book the following restrictions should be noted z You cannot use address numbers input by the numeric keypad or group numbers...

Страница 215: ...s displayed again List Thumbnail Allows you to switch the number of the recipients displayed from list five items or thumbnail 15 items Lists the speed dial number Name Lists recipient names and proto...

Страница 216: ...cify a destination using the Address Book Type 2 1 Select Address Book 2 Select the destination to store the data in Note To switch the Address Book entry type select List all public entries or Retrie...

Страница 217: ...r system administrator to confirm the settings and the number of recipients 1 Select Add New Address 2 Select a method to register a recipient New Enter a new recipient using the keyboard Add from cur...

Страница 218: ...220 4 Enter each item using the keyboard displayed on the screen and then select Save For more information on the setting items refer to Specifying a Destination Specifying a Destination PC Using the...

Страница 219: ...ecify a save destination by tracing the hierarchy 1 Select Browse 2 Select the destination to save the data in Select Previous or Next to move to another level Important You can specify recipients for...

Страница 220: ...My Folder using CentreWare Internet Services the scanned document can be transferred to a different destination You can select Enabled for Scan to My Folder only when Login to Remote Accounts and SMB...

Страница 221: ...he setting of Save in the Scan to My Folder feature is disabled You can use the Scan to My Folder feature again by selecting Scan to My Folder for Transfer Protocol z For FTP Example mydoc Scan z For...

Страница 222: ...Scan Job P 224 Color Scanning Selecting an Output Color You can set the output color to scan a document For more information refer to Color Scanning Selecting an Output Color P 196 2 Sided Scanning Sc...

Страница 223: ...You can customize the layout of the features displayed on the Store to Folder screen For more information refer to 5 Tools Scan Service Settings Screen Defaults 1st Tab Features Allocation in the Adm...

Страница 224: ...to 2 Sided Scanning Scanning Both Sides of a Document P 197 Original Type Selecting the Document Type You can select the type of the document For more information refer to Original Type Selecting the...

Страница 225: ...t supported A USB 2 0 compliant memory device USB 1 1 is not supported A USB memory device with a storage capacity of up to 128 GB Commercially available Memory Card Reader with single slot 1 can be u...

Страница 226: ...rd Reader If a commercially available Memory Card Reader is used and it is left inserted all the time the machine does not detect media even when they are inserted into the slot of the Memory Card Rea...

Страница 227: ...Print Photos Screen Appears 1 Press the Services Home button 2 Select Store to USB on the Services Home screen The Store to USB screen appears Note WSD stands for Web Services on Devices When the Scre...

Страница 228: ...in 2 Select a folder to save the data in Note You can sort the order of folders displayed in ascending or descending order by selecting Name or Last Updated Up to 900 folder names can be displayed in...

Страница 229: ...ation in the USB Memory Device Selecting Details displays the Details screen Details Screen This screen displays the folder directory in the USB memory device 1 Specify the folder directory and then s...

Страница 230: ...ting the binding style both sides are scanned in the same orientation For more information refer to 2 Sided Scanning Scanning Both Sides of a Document P 197 Original Type Selecting the Document Type Y...

Страница 231: ...Administrator Guide To strengthen security after retrieving the scanned data access the URL to delete the scanned data stored in the machine Note The Store Send Link service does not provide features...

Страница 232: ...using the displayed keyboard For information on how to enter characters refer to Entering Text P 73 Color Scanning Selecting an Output Color You can set the color mode to scan a document For more info...

Страница 233: ...To prevent other parties from viewing your scan data select PDF or DocuWorks in File Format and set a password in PDF Security or DocuWorks Security before scanning the document For more information r...

Страница 234: ...ot be specified from the control panel of the machine Specify these settings in Scan Profiles of Windows For more information on how to specify the settings refer to Windows Help WSD stands for Web Se...

Страница 235: ...file list and then select Document 6 Specify the settings as necessary and then click Scan 4 After being scanned the scanned data is forwarded to the specified computer Store to WSD Remove Your Origin...

Страница 236: ...236 Scan 4 3 Press the Start button 4 The scanned data will be forwarded to the specified destination Note Select Delete to abort scanning 5 Check the forwarded data on the destination computer Start...

Страница 237: ...Services Home screen select E mail Store to Folder Network Scanning Scan to PC Store Send Link or Store to USB Note WSD stands for Web Services on Devices 2 Select a feature on the Advanced Settings...

Страница 238: ...ession features with this feature Note WSD stands for Web Services on Devices 1 Select Photographs 2 Select Enhance Photographs Image Options Adjusting Scan Density and Image Sharpness This feature al...

Страница 239: ...be suppressed When Color Scanning is set to Color the background of a document printed on white color paper will be suppressed Contrast Selecting an upper cell on the bar makes the difference between...

Страница 240: ...nned based on color representation color space that conforms to sYCC Device Color Space Documents are scanned based on the original color representation color space of the machine Recommended for adva...

Страница 241: ...ments Simultaneously 244 Edge Erase Erasing Edges and Margin Shadows in the Document 246 Reduce Enlarge Specifying a Scanning Ratio 247 Original Orientation Specifying the Orientation of the Loaded Do...

Страница 242: ...Document You can automatically scan both sides of a 2 sided document By setting the binding style both sides are scanned in the same orientation This feature is the same as 2 Sided Scanning on the E...

Страница 243: ...this option when Left Page then Right or Right Page then Left is selected Top Page Only Scans the top page only in page order You can select this option when Top Page then Bottom is selected Bottom P...

Страница 244: ...m 15 to 432 mm for the scan width X and a value in the range from 15 to 297 mm for the scan length Y in 1 mm increments The scales attached on the upper and left edges of the document glass are helpfu...

Страница 245: ...nal is loaded and the output size is set to A4 portrait the scanned image is reduced to A5 landscape and printed on A4 portrait paper If the document size cannot be detected automatically a screen to...

Страница 246: ...tom left and right and center of the document 4 Select Original Orientation All Edges The edge width to erase is set to 2 mm for the top and bottom and left and right edges Parallel Edges Allows you t...

Страница 247: ...e left side horizontal text Reduce Enlarge Specifying a Scanning Ratio This feature allows you to set the scanning ratio for the document to be scanned Note When Searchable Text is set to Searchable a...

Страница 248: ...the Loaded Documents Set the orientation of the loaded document to specify the top edge of the document Note If the Original Orientation setting differs from the actual document orientation the machi...

Страница 249: ...Name Conflict 253 File Name Specifying a Name for the File to be Saved 253 Encryption Sending E mail Encrypted by S MIME 254 Digital Signature Sending E mail with a Digital Signature by S MIME 254 Lo...

Страница 250: ...Specifying Read Receipts When using the E mail service you can receive read receipts from e mail recipients This feature is available only when recipients support the MDN feature Note Read Receipts i...

Страница 251: ...for XML Paper Specification Split by Data Size The data is split by a certain data size Note Select this option if your e mail application supports message partial File Name Specifying a Name for the...

Страница 252: ...o PC service Up to 28 characters can be entered as a file name for the E mail service Up to 28 characters can be entered as a file name for the Store Send Link service Up to 40 characters can be enter...

Страница 253: ...the file name by appending a number 0001 9999 to the file name and saves the file Overwrite Existing File Replaces the existing file with the new one File Name Specifying a Name for the File to be Sa...

Страница 254: ...the E mail service you can send e mail with a digital signature by S MIME Digital Signature allows a recipient to confirm whether contents of the e mail are changed or whether the e mail is sent from...

Страница 255: ...oard displayed on the screen For information on how to enter characters refer to Entering Text P 73 Meta Data You can change the values of the DMF if they are specified for a selected job template Not...

Страница 256: ...4 Scan 256 Scan 4...

Страница 257: ...rations and features to use folders z Folder Operating Procedure 258 z Selecting a folder under Scan Other Jobs 260 z Checking Operating Files in a Folder 261 z Checking File Details 263 z Printing Fi...

Страница 258: ...ister private folders and shared folders separately Step 1 Opening the Send from Folder Screen 258 Step 2 Selecting a Folder 259 Step 3 Checking Selecting Files in a Folder 259 Step 4 Operating Files...

Страница 259: ...2 If a passcode is set for the folder enter the passcode and select Confirm Step 3 Checking Selecting Files in a Folder 1 Select the display style from List and Thumbnail 2 Select a file to send by e...

Страница 260: ...tion feature being used refer to 14 Authentication and Accounting Features Authentication for Job Flow Sheets and Folders in the Administrator Guide 1 Select a folder on the Send from Folder screen No...

Страница 261: ...to the left of the icon indicating the order in which it was selected Files are processed in this order 3 Select any option Refresh Displays the updated information List Lists the files stored in the...

Страница 262: ...the Job Flow Settings screen on which you can create link and execute job flows Refer to Configuring Starting Job Flow P 270 Note Files stored in a folder by specifying Store in Remote Folder on a pr...

Страница 263: ...e than expected to preview a file 1 Select a file and File Details Preview on the Folder File List screen Note When you preview multiple files select the files to be displayed 2 Select any option Thum...

Страница 264: ...Drag or flick the preview area except for the information area page switching buttons and thumbnailed bar z Tap or of the page switching buttons Displaying previous and next pages Tap a previous or n...

Страница 265: ...w area side to side Note Drag or flick the preview area except for the slider and thumbnailed bar After switching the page the image is displayed in the entire view Changing the ratio of the image siz...

Страница 266: ...ttings Allows you to change the print settings of the file previewed on the screen Print Prints the selected files Note To set for printing return to the Folder File List screen and select Print For m...

Страница 267: ...ngs specified on the control panel or CentreWare Internet Services will override the settings specified on the print driver except the Pages Per Sheet N Up Skip Blank Page and Print Position settings...

Страница 268: ...Staple Unit 65 Sheets optional is installed the maximum number of sheets that can be stapled is 65 when 90 gsm paper is used and thickness of bundled paper is 5 7mm or less For examples of the setting...

Страница 269: ...the Original Orientation setting in Edge Erase or in 2 Sided Scanning on the Layout Adjustment screen Stapling Position Punching Position Report Report Report Report Original Original Orientation Stap...

Страница 270: ...is disabled a job flow created in Send from Folder can only be used edited duplicated deleted through the folder where the job flow is created This type of job flow is not displayed on the Create Job...

Страница 271: ...Important After executing the job flow confirm the Job Status screen or print a Job History Report to check the result For information on the Job History Report refer to 5 Tools Common Service Setting...

Страница 272: ...low sheet is already linked the link is canceled Note You can sort the list in ascending or descending order by selecting either Name or Updated 2 Select Job Flow Settings 3 Select Create Change Link...

Страница 273: ...d in the System Administration mode to search for job flows Job flows that fully match the entry are searched The machine searches through keywords that were registered upon each job flow creation She...

Страница 274: ...flows that fully match the entry The machine searches through keywords that were registered upon each job flow creation The entry can be up to 12 characters long You can select from preset keywords i...

Страница 275: ...ob flow sheet registered on the machine Job Flow Sheets is a service that allows you to register transfer settings for scanning data such as a transfer method and destination to simplify data transfer...

Страница 276: ...puter Step 1 Opening the Job Flow Sheets Screen 276 Step 2 Selecting a Job Flow Sheet 276 Step 3 Confirming Changing the Job Flow Sheet 277 Step 4 Starting the Job Flow Sheet 277 Note To create a job...

Страница 277: ...to Selecting Changing a Job Flow Sheet P 278 Step 4 Starting the Job Flow Sheet 1 Load a document Note A job flow with an application linked does not require you to load a document 2 Press the Start b...

Страница 278: ...Flow Sheets and Folders Creating Using Job Flow Sheet in the Administrator Guide You can sort the list in ascending or descending order by selecting either Name or Updated Refresh Displays refreshed...

Страница 279: ...each mandatory item 4 Select any option Items Displays the items set for the job flow sheet Current Settings Displays the values set for the job flow sheet Previous Group Displays the items of the pr...

Страница 280: ...et Filtering 2 Select the filtering conditions and select Save Owner Select the owner of job flow sheets to filter Target Select the target of job flow sheets to filter Note Job flow sheets whose Targ...

Страница 281: ...This chapter describes the Stored Programming service that enables you to store customized job settings z Stored Programming Overview 282 z Registering Deleting Renaming Stored Programs 283 z Calling...

Страница 282: ...s For example this service is available when you want to record a procedure starting from pressing the Machine Status button to displaying the screen under Print Reports to print a Job History Report...

Страница 283: ...rvices Home button 2 Select Setup 3 Select Stored Programming 4 Select a feature Store Register a stored program Refer to Registering Stored Programs P 284 Store Build Job Register a stored program fo...

Страница 284: ...a stored program Note Once a job is stored to a button it cannot be overwritten 3 Set the feature you want to register Note The machine sounds an audible tone while a stored program is being registere...

Страница 285: ...operations cannot be registered in Stored Programming Registration and call of a stored program EP Diagnostic Request System Settings The Media Print Text and Media Print Photos buttons on the Servic...

Страница 286: ...ogram is being registered Press the Interrupt button to cancel registration You can change the volume of the sound that notifies that a stored program is being registered For information on the settin...

Страница 287: ...ange the name of a stored program Up to 18 characters are allowed for a stored program s name For information on how to enter characters refer to Entering Text P 73 1 Select Enter Change Name 2 Select...

Страница 288: ...eatures you want to use Note You can only select registered numbers After the stored program has been called the machine sounds an audible tone If a failure occurs the machine sounds a fault tone For...

Страница 289: ...4 Select a number of a stored program containing the features you want to use Note You can only select registered numbers After the stored program has been called the machine sounds an audible tone If...

Страница 290: ...7 Stored Programming 290 Stored Programming 7...

Страница 291: ...ote This service is not available for some models An optional component is required For more information contact our Customer Support Center z Web Applications Overview 292 z Accessing Web Application...

Страница 292: ...isplaying the web application screen on the machine z Storing scanned documents directly in a web application folder z Printing a file directly that is stored on a remote server Important The web appl...

Страница 293: ...nation refer to 5 Tools Web Applications Service Setup Server Setup in the Administrator Guide 1 Press the Services Home button 2 Select Web Applications Note WSD stands for Web Services on Devices 3...

Страница 294: ...n how to assign buttons displayed on the Services Home screen refer to 5 Tools Common Service Settings Screen Button Settings Services Home in the Administrator Guide 1 Press the Services Home button...

Страница 295: ...s when a USB Memory Kit is connected Note This service is not available for some models An optional component is required For more information contact our Customer Support Center z Overview of Media P...

Страница 296: ...Memory Card Reader with single slot 1 can be used for Media Print feature text photo but its safe performance is not guaranteed When a Memory Card Reader with multi slot 2 is used only one particular...

Страница 297: ...ia Print Use media formatted with digital cameras or computers FAT12 FAT16 FAT32 only Use USB 2 0 compliant memory devices with the size up to 128GB only USB 1 1 compliant memory devices are not suppo...

Страница 298: ...ormation on Print Processing Mode refer to 16 Appendix PDF Direct Print in the Administrator Guide z You can use a USB host adapter to print from your USB memory device or via your USB cable as necess...

Страница 299: ...tus will be one of the above even when a USB memory device in which only encrypted data is stored is inserted or USB memory device in unsupported format is inserted In such case a warning message appe...

Страница 300: ...tos screen appears Note WSD stands for Web Services on Devices When the Media Print Text Screen Appears Select a feature on the Media Print Text screen When the Media Print Photos Screen Appears Selec...

Страница 301: ...device before use When disconnecting connecting the USB memory device by methods other than described in this guide When receiving the effect of electrical noise or an electrical discharge When a fau...

Страница 302: ...een Refer to Select From List Screen P 302 Select Range Use and to specify the range of files to be printed in First File and Last File Note Select Select From List to display a list of files and refe...

Страница 303: ...locations an error occurs For more information on characters that the machine supports refer to Entering Text P 73 The machine does not distinguish between upper and lower cases of folder and file nam...

Страница 304: ...some files may not be printed Select From List Displays the Select From List screen Refer to Select From List Screen P 305 Select Range Use and to specify the range of files to be printed in First pic...

Страница 305: ...een Thumbnail Displays a list of the images and names of the files Important The thumbnail view may not be available for some files If a file is not displayed in thumbnail view display it in list view...

Страница 306: ...esired tray is not displayed select More and on the screen displayed select the tray When you select More and then Bypass you can set Paper Size and Paper Type z Paper Size Select the paper size to be...

Страница 307: ...r the tray in which any of the following sizes of paper is loaded A3 B4 A4 A4 B5 B5 A5 A5 8 5 x 11 8 5 x 11 8 5 x 14 11 x 17 When you select Auto Select the machine automatically selects a tray that c...

Страница 308: ...ns the settings you have specified for Media Print Text or Media Print Photos before selecting the Index Print check box will be effective To change these settings deselect the Index Print check box c...

Страница 309: ...o check the status of jobs and operate the jobs z Job Status Overview 310 z Checking Current Pending Jobs 311 z Checking Completed Jobs 313 z Printing and Deleting Stored Jobs 315 z Printing Pending J...

Страница 310: ...o cancel current or pending jobs For more information refer to Checking Current Pending Jobs P 311 Checking completed jobs Displays the status of completed jobs and their details For more information...

Страница 311: ...bs or Time required for single job Note The estimated time for Cumulative time for all jobs is not displayed for the following jobs Jobs that are not spooled on the machine such as a job without using...

Страница 312: ...nts The job is then executed Next Original Select this button when you have another document to scan Start Resumes the suspended job Change Quantity Displays the Change Quantity screen on which you ca...

Страница 313: ...ct a child job from the list to show the details When the Group Parent Jobs check box is selected you can display child jobs by selecting a parent job Then select a child job from the list to show the...

Страница 314: ...10 Job Status 314 Job Status 10 Print this Job Report Prints the Job Report...

Страница 315: ...to print it with the print command from the machine The feature also enables you to set a passcode which is helpful to print confidential documents The following describes how to print or delete jobs...

Страница 316: ...r not to display detailed information in the list screen of the stored files For more information refer to 5 Tools Stored File Settings Display Details of Stored Print Job in the Administrator Guide 5...

Страница 317: ...the first page is displayed for the preview screen A previewed image cannot be rotated on the Secure Print screen Entire view An entire preview image is displayed In the entire view the file name Sto...

Страница 318: ...he Secure Print job For more information refer to When Print is Selected P 318 When Print is Selected 1 Specify how to process the job after printing Note The screen as shown on the right does not app...

Страница 319: ...st Note Select Refresh to display the updated information You can enter a user ID in Go to using the numeric keypad to display the user ID at the top of the list 3 Select the job to be printed or dele...

Страница 320: ...estored Cancel Cancels deleting the job When Preview is Selected 1 Select any option Note Only the first page is displayed for the preview screen A previewed image cannot be rotated on the Sample Set...

Страница 321: ...let Creation is displayed only Print Prints the Sample Set job Refer to When Print is Selected P 321 When Print is Selected 1 Select Yes Note The screen as shown on the right does not appear if Print...

Страница 322: ...rint Job is selected in Receive Control under Charge Private Print Settings jobs will not be saved in Delayed Print under Secure Print Jobs More even if you select Delayed Print on the print driver Fo...

Страница 323: ...e Only the first page is displayed for the preview screen A previewed image cannot be rotated on the Delayed Print screen Entire view An entire preview image is displayed In the entire view the file n...

Страница 324: ...ob After printing the job is deleted If printed manually the job will not be printed at the specified time Refer to When Print is Selected P 324 When Print is Selected 1 Select Yes Note The screen as...

Страница 325: ...procedures in the System Administration mode Select Save as Charge Print Job in Receive Control Select According to Print Auditron in Receive Control and then select Save as Charge Print Job in Job L...

Страница 326: ...in the Administrator Guide 7 Select any option 8 When printing specify the number of print sets using the numeric keypad Delete Deletes the Charge Print job Refer to When Delete is Selected P 326 Prev...

Страница 327: ...view the following operation is available Enlarged view A previewed image is enlarged or reduced In the enlarged view the following operations are available Print Quantity Specifies the number of prin...

Страница 328: ...panel to print the data As the feature enables you to select and print only necessary jobs you can avoid printing unnecessary jobs Furthermore the machine displays only the jobs of authenticated user...

Страница 329: ...rol panel 3 Select Private Charge Print Note If you are authenticated as a system administrator selecting Private Charge Print will display a list of authentication user IDs Select a user ID from the...

Страница 330: ...ncels deleting the job When Preview is Selected 1 Select any option Note A previewed image cannot be rotated on the Private Charge Print screen Entire view An entire preview image is displayed In the...

Страница 331: ...s the Charge Print job After printing the job is deleted Refer to When Print is Selected P 331 When Print is Selected 1 Specify how to process the job after printing Note The screen as shown on the ri...

Страница 332: ...10 Job Status 332 Job Status 10 Print and Save Starts printing the job After printing the job remains undeleted Cancel Cancels printing the job...

Страница 333: ...aiting for this time period to elapse If a job is paused by the Stop button and is waiting to be resumed you can also resume the job If there are multiple jobs subsequent jobs are printed after the pa...

Страница 334: ...in the Administrator Guide For a Scan Job A Transmission Report Job Undelivered is printed For more information on the Transmission Report Job Undelivered refer to 4 Machine Status Machine Informatio...

Страница 335: ...pport the features described in this chapter An optional component is required For more information contact our Customer Support Center The procedures in this chapter may vary depending on the driver...

Страница 336: ...om the machine according to the settings on the machine For more information refer to E mail Printing P 340 Importing Scanned Data Imports files stored in a folder of the machine to a computer For mor...

Страница 337: ...rs Booklet Creation Performs 2 sided printing and page allocation for printing a booklet in the correct page order Transparency Separators Automatically inserts a blank sheet of paper as a separator e...

Страница 338: ...erating print jobs When this feature is enabled the machine prints only the jobs of authenticated users The machine can also be configured to store multiple print jobs temporarily until the user reque...

Страница 339: ...inting procedure depends on the application software you use For more information refer to the documentation provided with the application For more information on print features click Help on the prin...

Страница 340: ...ach a document to the e mail if necessary Important Only plain text is available for the e mail body Change the body text format to plain text on your e mail application Any forwarded e mail that is a...

Страница 341: ...ility 3 is included in the Driver CD Kit Toimportfilesstoredinafolder priorsettingsarerequired suchasenablingports Formoreinformation referto 9Scanner Environment Settings Configuration of Store to Fo...

Страница 342: ...ders Clicking Select Scanner returns to step 5 where you can reselect a scanner 7 Click Confirm 8 Select a file to be imported from the list and click Import Note You can select multiple files Import...

Страница 343: ...the dialog box that appears Importing Using Stored File Manager 3 The following describes how to use Stored File Manager 3 to import files from a machine s folder Stored File Manager 3 is software to...

Страница 344: ...imported In the Passcode field enter a passcode up to 20 digits Note You can also select a folder number from Registered Folders Clicking Select Scanner returns to step 2 where you can reselect a sca...

Страница 345: ...n Fixed Destination under the import settings a file is saved in the specified directory For information on the import settings refer to Import settings for scanned files P 346 Changing Stored File Ma...

Страница 346: ...e to the files when retrieving them For information on an overview of CentreWare Internet Services refer to CentreWare Internet Services P 348 For more information on this operation click Help in the...

Страница 347: ...the Passcode field up to 20 digits 5 Place a check mark next to each file to be imported set the necessary items and then click Retrieve Note When you import files in PDF format from a folder they can...

Страница 348: ...e top frame displays the help for CentreWare Internet Services Top Frame Displays the model of the machine user information and the tabs links to go to each category Logout is displayed on the right o...

Страница 349: ...hine status Displays the status of the paper trays output trays and consumables such as toner cartridges z Usage Counters Displays the total number of pages used for each feature and cumulative number...

Страница 350: ...ties Connectivity Protocols HTTP Usable ports are 1 to 65535 If you set the port to a number other than 80 you must add and the port number after the IP address or the Internet address when entering t...

Страница 351: ...crypted you must specify an address that starts with https instead of http to access CentreWare Internet Services If authentication of the system administrator fails the following message is displayed...

Страница 352: ...11 Computer Operations 352 Computer Operations 11...

Страница 353: ...12 Appendix This chapter contains a glossary of terms used in this guide z Glossary 354...

Страница 354: ...paper B4 364 x 257 mm paper B5 257 x 182 mm paper Binding Shift When creating a booklet this feature adds margins to the center binding area of documents Book Scanning A feature that copies the left...

Страница 355: ...cturers printers This mode is called the Emulation Mode Power Saver Feature A feature that switches the machine status to standby after a period of inactivity The following Power Saver features can be...

Страница 356: ...oduct that is sold separately In addition to the machine s basic configuration various optional features are available as separately sold optional components For more information on optional component...

Страница 357: ...rotocol an agreement governing the way data is transmitted commonly used for sending and receiving e mail Start Reservation In this guide this refers to loading a document selecting features and press...

Страница 358: ...12 Appendix 358 Appendix 12...

Страница 359: ...es 104 adjusting scan density and image sharpness 238 adjusting the color tone 107 adjusting the copy density 100 adjusting the image position 117 Advanced Settings 237 Annotations 133 attaching cover...

Страница 360: ...Printer 69 document cover 48 document feeder 76 168 document feeder tray 50 Document glass 77 169 document glass 48 document guides 50 document output tray 51 document stopper 50 DocuWorks 199 200 Do...

Страница 361: ...copies of facing pages 112 making enlarged copies spread over multiple sheets 130 making enlarged reduced copies 89 making multiple copies on a single sheet 147 making multiple copies on one sheet 132...

Страница 362: ...54 RSA BSAFE 18 S Sample Job 161 Sample Set 319 337 Saturation 104 Save in 221 saving the scanned data 174 scan density 238 Scan To 231 Scan to PC 213 scanning a color photograph 238 scanning both sid...

Страница 363: ...1 starting a scan job via computer operation 234 stopping a scan job 176 Store Send Link 231 Store in Remote Folder 338 Store to Folder 223 Store to USB 225 Store to WSD 234 Stored File Manager 3 174...

Страница 364: ...364 Index X XPS 200 XPS Signature 203...

Страница 365: ...Color C70 Printer Color C60 Printer User Guide ME7221E2 1 Edition 1 September 2014 Fuji Xerox Co Ltd Copyright 2014 by Fuji Xerox Co Ltd...

Отзывы: