FlukeView Forms
Users Manual
10
To begin interactive logging:
1.
Connect the meter to the PC.
2.
Select the form template you want to use by opening
the File menu and selecting New Blank Form.
Highlight the form template in the New Blank Form
dialog box and click OK.
3.
On the meter, choose the meter function and range
you want to use to measure the input.
4.
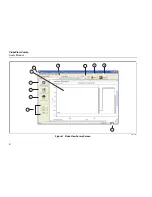
In FlukeView Forms, click the Meter button at the top
right-hand portion of the toolbar. Use the virtual
meter to confirm that the meter readings are correct.
5.
From the Meter menu, select Logging. The Logging
Window appears. You can also press the Logging
button to access the Logging Window.
6.
Set up your logging session using the Setup tab of
the Logging Window (or make no changes to
Setup, and use the default configuration).
7.
Click Start or Stop to start or stop logging.
The Setup, Schedule and Status tabs of the Logging
Window display settings for and provide information
about the logging session. Use them to:
•
Change the default logging settings under Setup.
•
Display Simulation Graph to examine the effects of
your logging settings on example data.
•
Manually Start and Stop a logging session, or set
scheduled Start/Stop times for a logging session
under the Schedule tab.
•
Examine the progress of the active logging session
under Status.


