


Festo — VTSA-F-CB — 2021-06a
Installation
59
7.1.3.2
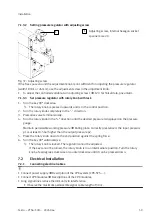
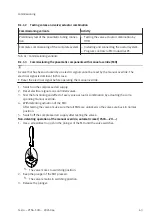
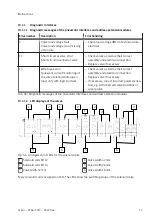
Setting pressure regulator with adjusting screw
1
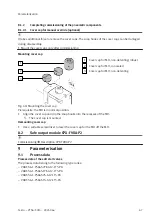
Fig. 37: Adjusting screw
1
Adjusting screw, internal hexagon socket
spanner size 2.0
If the free space around the adjustment knob is not sufficient for adjusting the pressure regulator
(width 18 mm or 26 mm), use the adjustment screw in the adjustment knob.
•
To adjust the controlled variable, turn adjusting screw 1
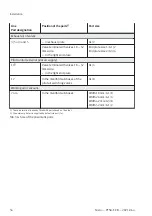
12.3 Technical data, pneumatic.
7.1.3.3
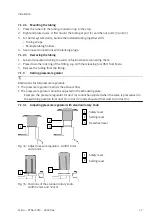
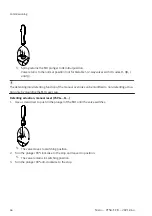
Set pressure regulator with rotary knob with lock
1. Turn the key 90° clockwise.
Ä
The rotary knob is pressed upwards and is in the control position.
2. Turn the rotary knob completely in the "-" direction.
3. Pressurise valve terminal slowly.
4. Turn the rotary knob in the “+” direction until the desired pressure is displayed on the pressure
gauge.
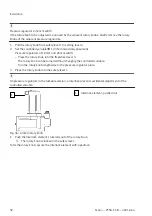
Maintain permissible working pressure
è
Rating plate. Correctly pressurised, the input pressure
p1 is at least 0.5 bar higher than the output pressure p2.
5. Press the rotary knob down to the end position against the spring force.
6. Turn the key 90° anticlockwise.
Ä
The rotary knob is locked. The regulator cannot be adjusted.
If the key cannot be turned, the rotary knob is in an intermediate position. Turn the rotary
knob a few degrees clockwise or counterclockwise until it can be pressed down.
7.2
Electrical Installation
7.2.1
Connecting electrical cables
• Connect power supply
è
Description of the CPX system (CPX-SYS-...).
• Connect CPX modules
è
Descriptions of the CPX modules.
• Long signal lines reduce the immunity to interference.
• Observe the maximum permissible signal cable length of 30 m.