


34
12. OPERATING INSTRUCTIONS
MYOPIA EXPERT 700 is designed to work in stand-alone mode. For this reason, all the software functions
are automatically loaded when the device is turned on, enabling the user to control the device and guiding
him or her through the various phases:
Entering the patient’s data
Different acquisition modes
Measures display and processing
Lens selection
More information for each function and the description of all the settings and other functions available are
provided in the following sections of this chapter, to which you should refer for further details.
To interact with the software, a touchscreen LCD display is used. To activate the button or the desired
function, simply touch the screen at the command. The screen is highly sensitive. Gentle and slight
pressure is required and strongly recommended.
12.1
U
SER
L
OGIN
/L
OGOUT
The user MUST configure the login password to access the device operations and stored data, in order to
ensure confidentiality and integrity of personal data and avoid unauthorized access.
It is recommended to choose a strong password. It is recommended to keep a record of the password
in a safe place.
It is not necessary to disclose the user password to technical support staff. Refer to section 12.1.3
for details.
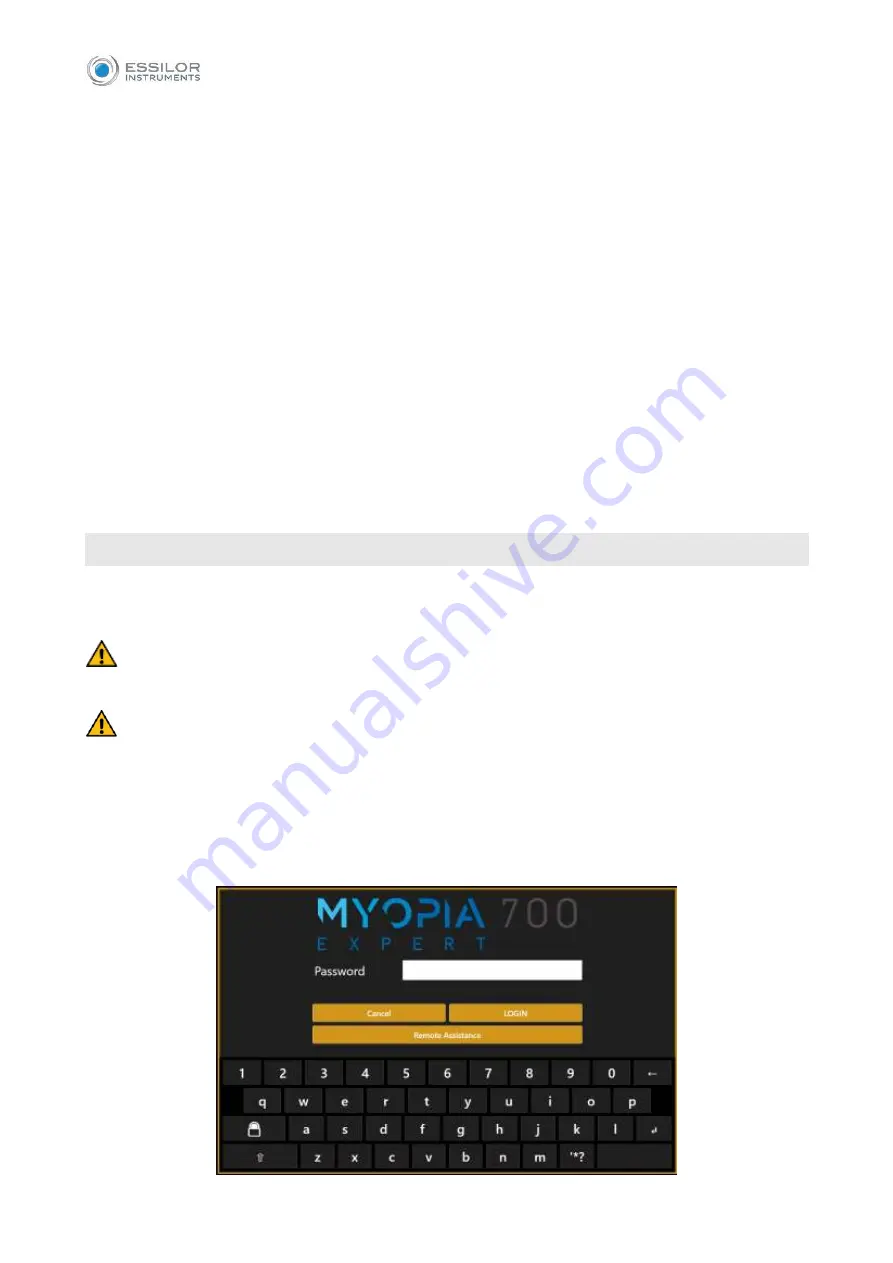
Refer to section 17.8 on how to configure and manage the login access. If the user login password is
configured and enabled, the login screen will be prompted at the start-up of the MYOPIA EXPERT 700 on-
board application. The login screen is also prompted to allow access to the privacy and security settings
Содержание MYOPIA EXPERT 700
Страница 1: ...MYOPIA EXPERT 700 Biometer USER MANUAL Rev 1 07 04 2021...
Страница 15: ...13 3 1 DEVICE SAMPLE LABELING...
Страница 24: ...22...
Страница 60: ...58 RX AL Refraction Axial Length trend Combined trend view with Refraction error S E and Axial Length...
Страница 63: ...61 Delete Button Delete the selected row...
Страница 79: ...77 Fig 43 It is possible to switch between ETDRS and Landolt C Visus simulation view...
Страница 82: ...80 Fig 46 14 4 2 3D Press the 3D button to view the 3D map of the altimetric data Fig 47 Fig 47...
Страница 94: ...92 Fig 59...


