Scanning Documents or Photos
20
SCAN1.FM (A4 size) Rev.C
R4CJ350
User’s Guide
PhotoImpression:
Open the
File
menu and select
Get Photo
, then select
Camera/Scanner
.
4. Select your scanner.
In some programs, you must select the scanner as the “source” first. If you see a
Select
Source
option, choose it and select your scanner there first.
Note for Windows XP users:
Do not choose a
WIA
option for your scanner from the Import or Acquire list; your scanner will
not work correctly.
EPSON Scan starts automatically. For instructions on using it, see "Selecting EPSON
Scan Settings" on page 20.
Selecting EPSON Scan Settings
Overview of the EPSON Scan Modes
EPSON Scan lets you control all aspects of scanning and includes three modes:
❏
Full Auto Mode
lets you scan quickly and easily, without selecting any settings or
previewing your image. This is the default mode in EPSON Scan.
Full Auto Mode is best when you need to scan documents or photos at 100% size and
you do not need to preview the images before scanning. You can restore faded colors
by clicking the
Customize
button.
See "Using Full Auto Mode" on page 23 for instructions on scanning in this mode.
❏
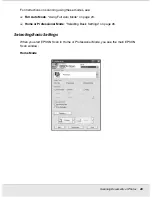
Home Mode
lets you customize some scanning settings and check their effects with a
preview image.
Home Mode is best when you want to preview images of photos before scanning them.
You can size the image as you scan, adjust the scan area, and adjust many image
settings, including color restoration.
See "Changing the Scan Mode" on page 25 for instructions on switching to Home
Mode.
See "Selecting Basic Settings" on page 26 for scanning steps.
❏
Professional Mode
gives you total control of your scanning settings and lets you check
their effects with a preview image.

