Scanning Documents or Photos
17
SCAN1.FM (A4 size) Rev.C
R4CJ350
User’s Guide
6. The scanned image is automatically saved in the specified location.
If the
Open image folder after scanning
checkbox is selected in the File Save
Settings window, Windows Explorer or the Macintosh Finder automatically opens to the
folder where the scanned image was saved.
For more information, see "Using Full Auto Mode" on page 23.
Starting a Scan With the EPSON Creativity Suite
When you scan with the EPSON Creativity Suite, you first scan and save the image file
using EPSON File Manager. Then you use the other project options in the EPSON File
Manager window to print, attach, or import your image files.
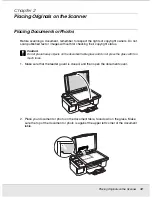
1. Place your document or photo on the scanner. See "Placing Documents or Photos" on
page 12 for instructions.
2. Do one of the following to start EPSON File Manager:
Windows:
Double-click the
EPSON File Manager
icon on your desktop.
Or, select
Start > Programs
or
All Programs > EPSON Creativity Suite > EPSON
File Manager
.
Mac OS X:
Double-click the
EPSON File Manager for X
icon on your desktop.
Or, open the
Applications
>
EPSON
>
Creativity Suite
>
File Manager
folders and
double-click the
EPSON File Manager for X
icon.
You see a window asking if you want to see program instructions.
3. If you want to view the program instructions, click
Next
and follow the on-screen
instructions.
Note:
To turn off display of the program instruction window, click the
Do Not Show Next Time
checkbox.


