P a g e
|
40
3)
Attach the calibration gas to the Static sample port located on the front of the Envision®
gas analyzer and open the regulator valve. Elkins Earthworks® strongly recommends the
use of a Demand Flow regulator.
Warning
–
If using a tunable regulator, use a setting of
.5 LPM and attach the calibration gas only to the Static port. Do not attach the calibration
gas to the Exhaust, Impact or Available ports. Pressures above 200” H20 on any po
rt may
result in a damaged pressure sensor.
4)
Tap the “Start Calibration” button. This action will turn on the sample pump and will
change the handheld computer display.
5)
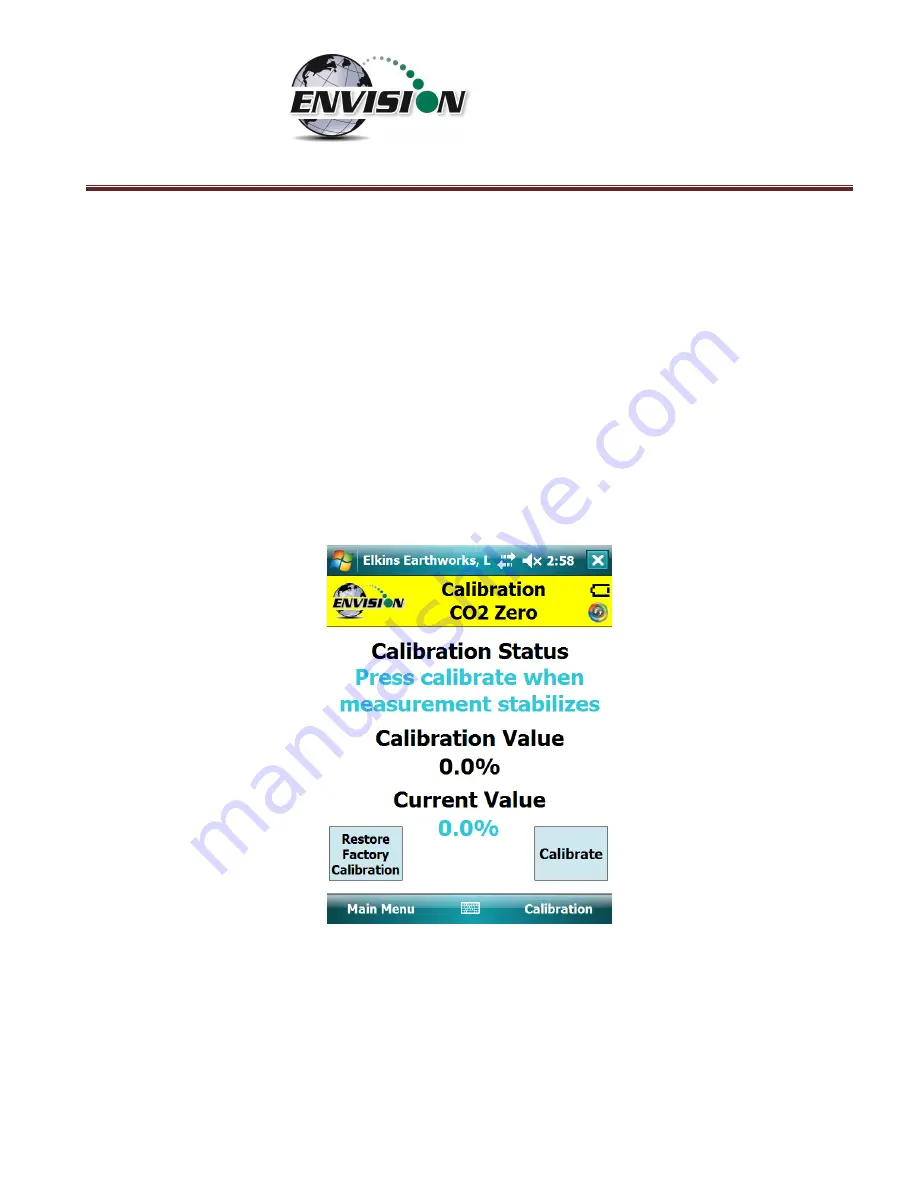
The following image shows the zero calibration screen.
The “Calibration Value” locat
ed in
the middle should be 0.0%.
6)
When the “Current Value” is
less than 1%
the Calibration status will display “
Press
calibrate when measurement stabilizes
”.
This does not mean that the sensor has fully
stabilized but that the unit is within the 1% tolerance allowed when zeroing. Tap the
“Calibrate” button once the current value has stabilized
.
If this button is pressed before
the measurement is fully stabilized, the calibration will be inaccurate and, in some cases,
make the Envision unable to pass a span calibration.
If the measurement continues to fall
Содержание ENV100
Страница 1: ...865 West Liberty Suite 220 Medina Ohio April 2018 Envision Landfill Gas Analyzer...
Страница 15: ...P a g e 15 3 Tap Settings 4 Next tap System 5 Next tap Backlight...
Страница 17: ...P a g e 17 7 Tap on the Brightness tab at the bottom of the screen 8 Increase the brightness to 100...
Страница 18: ...P a g e 18 9 At the bottom of the Brightness screen select Power in the adjust power setting to conserve power...
Страница 20: ...P a g e 20 Next on the Wireless Manager Screen tap the Bluetooth button and Bluetooth will activate...
Страница 22: ...P a g e 22 2 Tap System and then External GPS 3 Verify GPS program port is set to COM 3...
Страница 23: ...P a g e 23 4 GPS Hardware Port is set to COM2 and BAUD rate 9600 5 Verify that this box is checked too...
Страница 36: ...P a g e 36 2 Tap the Disconnect button...
Страница 42: ...P a g e 42...
Страница 57: ...P a g e 57 1 Use the combo boxes labeled Site and ID to locate the monitoring point that is to be monitored...
Страница 84: ...P a g e 84 6 6 4 1 Wellhead Type The following images show screen progressions for non borehole wellhead types...
Страница 104: ...P a g e 104 1 Open the Well ID Maintenance Screen 2 Select the Site that is to be deleted from the dropdown menu...
Страница 105: ...P a g e 105 3 Tap the Clear Site button...
Страница 107: ...P a g e 107 2 Select the ID that is to be deleted from the dropdown menu 3 Tap the Clear ID button...
Страница 139: ...P a g e 139...
Страница 155: ...P a g e 155 5 Name the handheld PC 6 The handheld device will then Sync with the desktop PC...
Страница 166: ...P a g e 166 8 3 2 Copy Files from PC to Handheld Device 1 Right click on the file and click copy...


