


58
eClick installation instructions
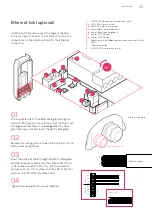
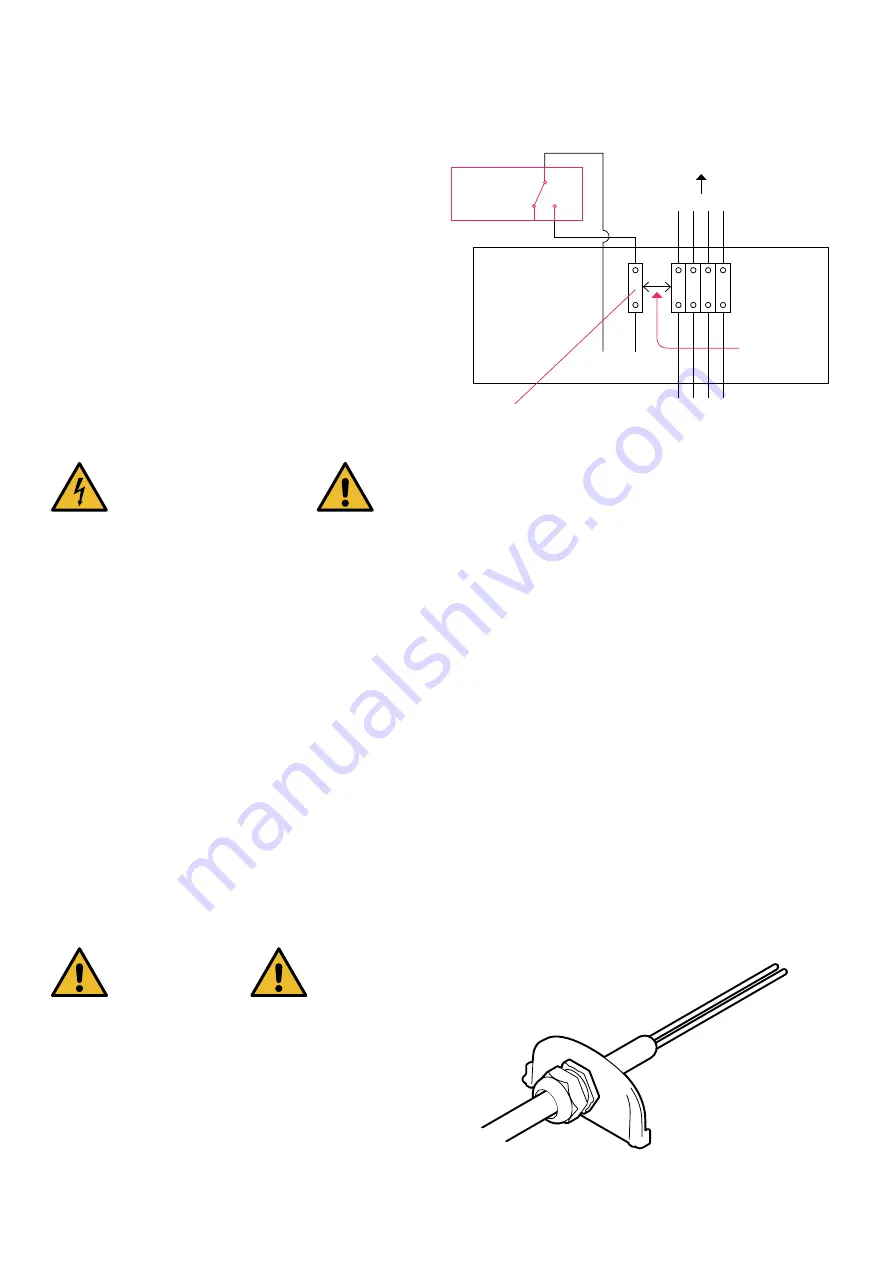
Welding detection
The signal for welded power contacts is connected
to position 7 of the interface board (see fig. p. 53).
A change -over contact (max. 230 V, 1 A) is available, which
can be used according to the installer‘s requirements.
Welding detection is an additional feature that must be
connected as standard under IEC 60364 only.
It is connected to a screw terminal.
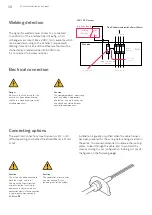
Electrical connection
Connecting options
The electrical connections (see Scenario A, B, C, or D)
differ depending on whether the eSmartMeter is fitted
or not.
12 V / 24 V variant
Interface board
Fuse box
Circuit
breaker
L1
12 V / 24 V DC
2 A max
e.g. ABB F2C-A1
Mechanical
coupling
GND
L2 L3 N
L1 L2 L3 N
40 A
To eClick mains board / eSmartMeter
Welding
indicator
COM
NC
NO
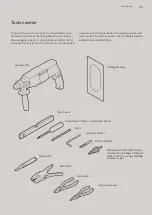
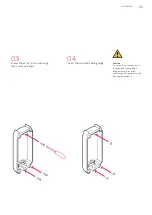
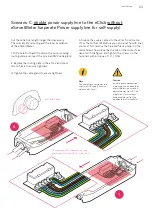
Installation is greatly simplified when the cable harness
has been prepared for the wiring before being inserted in
the eClick. You are recommended to remove the routing
plates, to lead through the cable, and to pre-bend the
cores according to your configuration. In doing so, consult
the figures on the following pages.
übersetzen
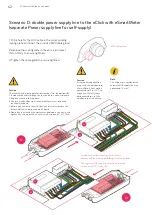
Caution
The complete product – consisting
of eClick, eBox, and possibly
ePoleDuo – has no facilities for
the attachment of additional
ventilation components.
Danger
Make sure that the fusing for the
circuits has been disconnected
and there is no voltage across the
fitted components.
Caution
The conductor cross-section
may not exceed 10 mm²
(bending radii of the cables).
Caution
The eClick can be connected to
both the single- and the
three-phase output from the
sub-distribution. Illustrated,
however, are the three-phase
connections only. If the connection
is single-phase, connect only
L1
,
N
, and
PE
.
Содержание eClick
Страница 2: ...2 Installationsanleitung eClick ...
Страница 36: ...36 ...
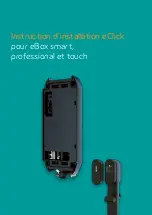
Страница 37: ...eClick installation instructions for eBox smart professional and touch 37 ...
Страница 38: ...38 eClick installation instructions ...
Страница 73: ...Instruction d installation eClick pour eBox smart professional et touch ...
Страница 74: ...2 Instruction d installation eClick ...
Страница 109: ...Instrucciones de instalación eClick para eBox smart professional y touch ...
Страница 110: ...2 Instrucciones de instalación eClick ...
Страница 145: ...Istruzioni per l installazione di eClick per eBox smart professional e touch ...
Страница 146: ...2 Istruzioni per l installazione di eClick ...
Страница 181: ...Installatiehandleiding eClick voor eBox smart professional en touch ...
Страница 182: ...2 Installatiehandleiding eClick ...
Страница 217: ...Installering af eClick Til eBox smart professional og touch ...
Страница 218: ...2 Installering af eClick ...
Страница 253: ...Installasjonsanvisning eClick for eBox smart professional og touch ...
Страница 254: ...2 Installasjonsanvisning eClick ...
Страница 289: ...Installationsanvisning eClick för eBox smart professional och touch ...
Страница 290: ...2 Installationsanvisning eClick ...
Страница 325: ...Οδηγίες εγκατάστασης eClick για eBox smart professional και touch ...
Страница 326: ...2 Οδηγίες εγκατάστασης eClick ...
Страница 361: ...Instalační návod eClick pro eBox smart professional a touch ...
Страница 362: ...2 Instalační návod eClick ...
Страница 397: ...Návod na inštaláciu eClick pre eBox smart professional a touch ...
Страница 398: ...2 Návod na inštaláciu eClick ...
Страница 433: ...eClick telepítési útmutató eBox smart professional és touch készülékekhez ...
Страница 434: ...2 eClick telepítési útmutató ...
Страница 469: ...Instrukcja instalacji modułu eClick do produktu eBox smart professional i touch ...
Страница 470: ...2 Instrukcja instalacji modułu eClick ...
Страница 505: ...Instrucțiuni de instalare pentru eClick pentru eBox smart professional și touch ...
Страница 506: ...2 Instrucțiuni de instalare pentru eClick ...