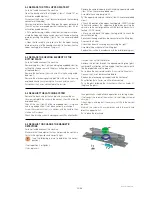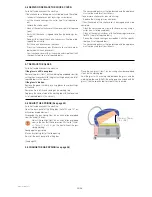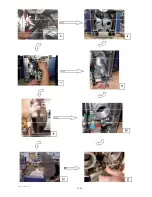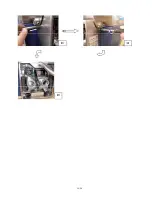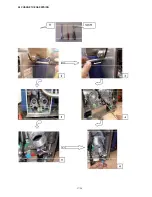
16/38
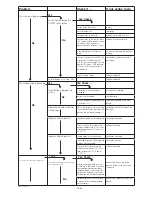
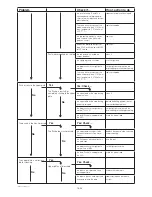
Problem
Check if …
If not, action to do
there is an airfl ow from the exhaust
pipes in the rear of the machine
reconnect the exhaust pipes to the
exhaust pipes support or remove
possible clogging obstacles inside
the pipes
the fan cabling is connected
reconnect the wires of the fan
there is power supply on both
magnetron fans (connector 7 on the
board - from the two left and the two
right contacts)
replace the board
the magnetron fans are working with
an ohmmeter
replace the broken fan
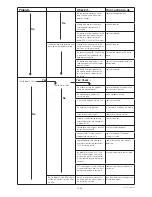
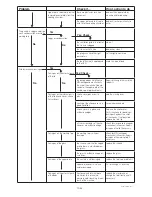
The lid doesn’t open automati-
cally at the end of the cycle
the handle is moving
there is free movement by verifying:
- the opening of the lid
- no friction between lid and working
top
assure free movement
the handle pins are pushing out
try to unblock or replace the handle
lid springs are lifting the lid
adjust the spring tension or replace
them if broken
the handle is blocked
there is free movement between
handle and the lid
assure free movement
electromagnet is releasing the
handle at the end of the cycle
replace the board
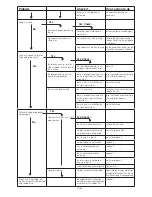
Panino doesn’t reach the
desired core temperature
No Error codes
the right program was chosen
use the right one
the programs have the right para-
meters
set the right parameters
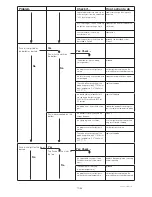
Indicates Error Codes Err4 or
Err5
high voltage wiring from the
secondary of transformer are well
connected and not damaged
reconnect them or replace if
damaged
the magnetron fuses are working
replace them
capacitors are undamaged
replace it
diode and resistor are undamaged
replace them
Result: Magnetron is broken
replace following the error code
Indicates Error Codes Err6
The voltage to inlet is at least 1956V
for 208V machine and 367V for a
400V machine.
problem not related to the unit
the three phases are correctly
connected in the main plug. ( for
EU machines )
Connect the wires to have three
neutral.
If the fuse FS of the board is OK.
replace the fuse FS with the spare part
fuse on the board and before restart
the machine check the adjsutment of
Microswicth S3. => Follow the pro-
cess indicated in the repair section
screw of the washer is tight
readjust the latching system
if the handle magnets are in place
replace the handle
HSPP tech GB 03 09
No
No
No
Yes
Yes: Check ...
No
Yes
Yes: Check ...
No
No
Содержание HSG Panini
Страница 1: ...Service Manual GB 07 2009 HSG Panini Service manual ...
Страница 2: ...2 2 50mm 50mm 7 5 190mm ...
Страница 3: ......
Страница 4: ......
Страница 11: ...7 38 Explanation on software settings EU Version U207 ...
Страница 12: ...8 38 Explanation on software settings US Version U202 U208 ...
Страница 28: ...24 38 HSPP tech GB 03 09 ADJUST THE SPRINGS ...
Страница 29: ...25 38 HSPP tech GB 03 09 ...
Страница 30: ...26 38 ...
Страница 31: ...27 38 5 9 CHANGE THE GAS SPRING ...
Страница 32: ...28 38 ...
Страница 33: ...29 38 ...
Страница 41: ...37 38 ...
Страница 43: ......
Страница 49: ...Vue éclatée Couvercle Cover exploded view Explosionszeichnung Haube F HSPP FR 03 09 ...
Страница 51: ...Esploso coperchio Despiece tapa Sprängskiss lock H HSPP FR 03 09 ...
Страница 53: ...Vue éclatée Articulation Hinge exploded view Explosionszeichnung Gelenk J HSPP FR 06 09 ...
Страница 55: ...Esploso articolazione Despiece articulación Sprängskiss Rotation L HSPP FR 06 09 ...
Страница 59: ...Vue éclatée Electrique Electric exploded view Explosionszeichnung Elektrik P HSPP FR 03 09 ...
Страница 61: ...Esploso elettronica Despiece electricidad Sprängskiss elektronik R HSPP FR 03 09 ...
Страница 63: ...Schéma électrique Triphasé 400V 50Hz Electrical wiring diagram Three phase 400V 50Hz T HSPP FR 03 09 ...
Страница 64: ......


