21/38
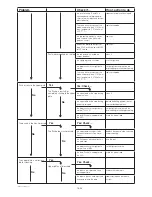
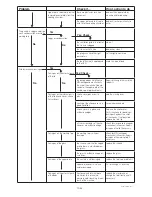
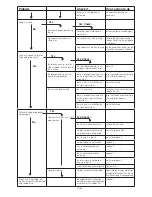
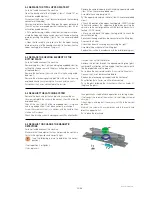
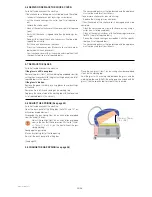
4-1 COOKING RESULT TROUBLE SHOOTING
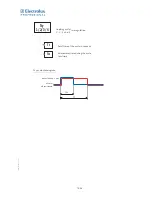
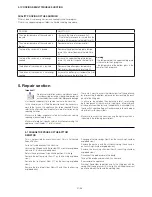
QUALITY COOKING OF THE SANDWICH
If the sandwich is not enough or to much cooked try another program.
If there is no adequate program follow the trouble shooting here above:
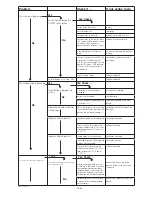
FINDINGS
WHAT TO DO
The core temperature of the sandwich is
too cold
- Increase the time of microwave (tw)
- If the time of microwave tw is more than the
total time (tt), increase also the total time (tt).
The core temperature of the sandwich is
too hot
Decrease the time of microwave (tw)
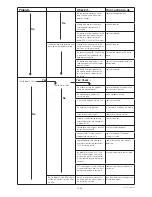
The top of the sandwich is burned
Decrease the upper heating plate tempe-
rature (trt) and (or) decrease the total time
(tt).
warning
:
- the temperature of the upper heating plate
is the same for the 4 programs.
- the temperature of the bottom glass is the
same for the 4 programs.
The top of the sandwich is not enough
cooked
Increase the upper heating plate tempe-
rature (trt) and (or) increase the total time
(tt).
The bottom of the sandwich is burned
Decrease the bottom glass temperature
(trb) and (or) decrease the total time (tt).
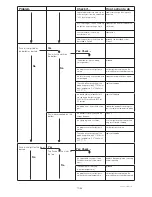
The bottom of the sandwich is not enough
cooked
Increase the bottom glass temperature (trb)
and (or) increase the total time (tt).
Important!
Appliance installation and any maintenance work
must be carried out only by specialized personnel
authorized by the manufacturer. Microwave leakage
must be checked every time you do service to the machine.
In this chapter you will fi nd the description of the necessary
work to do in case the appliance has to be repaired. Please
refer to the after sales dealer policy for more information on the
repairing activities.
Make sure to follow all general safety instructions concerning
repairing electrical appliances.
Make sure to follow all specifi c safety instruction concerning this
appliance (see Chapter 1.1 of this manual).
There are 2 ways to access the internal parts of the appliance:
by dismounting the bottom plate and by dismounting the back
panel of the tilting box.
In any case, do not open the appliance in total, i.e removing
both side panels at the same time. In doing so, all adjustments
of the appliance will be lost and the appliance is unusable. Only
the specifi c Authorized Repair Centres are able to make proper
adjustments with special tools.
Make sure to access the machine using the right way, which is
indicated in the following descriptions.
5. Repair section
5-1 CHANGE THE PROBE OF THE BOTTOM
RESISTOR
This is not possible by every technician! Only in Authorized
Repair Centres.
Switch off and disconnect the machine.
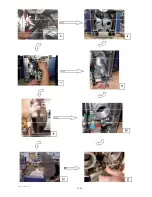
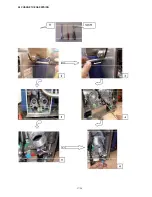
Unscrew the tilting box with the lid (item S30 articulation exploded
view and 47 in cover exploded view).
Return the appliance on its back and position it in the jig.
Remove the bottom plate (Item 27 on the housing exploded
view).
Remove the front panel (Item S11 on the housing exploded
view).
Remove the two lateral sides (Items 20 and 22on the housing
exploded view).
Disengage the two springs (Item 4 on the Launching Chamber
exploded view).
Remove the washers and the cylindrical spring (Items 5 and 6
on Launching Chamber exploded view).
Remove the launching chamber (item 9 launching chamber
exploded view).
Disconnect the probe cable in the board.
Take out the probe and replace with a new one.
Reassemble the appliance.
Warning! Remember to position and fi x the tilting box with the
core part of the appliance still in the jig (this will keep the correct
position between the lid and the working top).
Содержание HSG Panini
Страница 1: ...Service Manual GB 07 2009 HSG Panini Service manual ...
Страница 2: ...2 2 50mm 50mm 7 5 190mm ...
Страница 3: ......
Страница 4: ......
Страница 11: ...7 38 Explanation on software settings EU Version U207 ...
Страница 12: ...8 38 Explanation on software settings US Version U202 U208 ...
Страница 28: ...24 38 HSPP tech GB 03 09 ADJUST THE SPRINGS ...
Страница 29: ...25 38 HSPP tech GB 03 09 ...
Страница 30: ...26 38 ...
Страница 31: ...27 38 5 9 CHANGE THE GAS SPRING ...
Страница 32: ...28 38 ...
Страница 33: ...29 38 ...
Страница 41: ...37 38 ...
Страница 43: ......
Страница 49: ...Vue éclatée Couvercle Cover exploded view Explosionszeichnung Haube F HSPP FR 03 09 ...
Страница 51: ...Esploso coperchio Despiece tapa Sprängskiss lock H HSPP FR 03 09 ...
Страница 53: ...Vue éclatée Articulation Hinge exploded view Explosionszeichnung Gelenk J HSPP FR 06 09 ...
Страница 55: ...Esploso articolazione Despiece articulación Sprängskiss Rotation L HSPP FR 06 09 ...
Страница 59: ...Vue éclatée Electrique Electric exploded view Explosionszeichnung Elektrik P HSPP FR 03 09 ...
Страница 61: ...Esploso elettronica Despiece electricidad Sprängskiss elektronik R HSPP FR 03 09 ...
Страница 63: ...Schéma électrique Triphasé 400V 50Hz Electrical wiring diagram Three phase 400V 50Hz T HSPP FR 03 09 ...
Страница 64: ......


