34
Programming a JOB in Advanced Mode
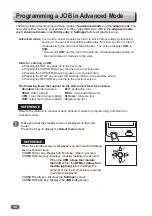
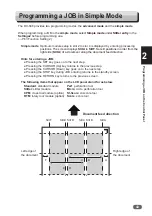
Hints for entering a JOB:
●
Pressing the SET key goes on to the next step.
●
Pressing the CURSOR (Up) key returns to the previous step.
●
Pressing the CURSOR (Down) key goes on to the next step.
●
Pressing the STOP key during JOB entering returns to the standby screen.
●
Pressing the RETURN key returns to the previous screen.
The following items that appear on the LCD panel stand for as below.
Standard
: standard module
Perf
: perforation tool
Slitter
: slitter module
Micro
: micro perforation tool
CPM
: cross tool module
(option)
SI-Score
: slit-score tool
RTM
: rotary tool module
(option)
Score
: score tool
(
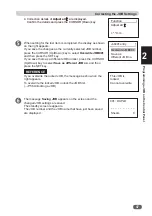
Make sure that the standby screen is displayed on the LCD
panel.
Press the F key to display the
Select menu
screen.
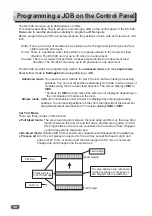
Advanced mode
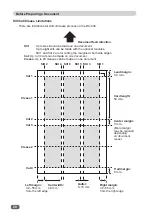
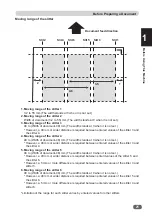
: You need to select modules for slot 2 to slot 4 before entering processing
positions. You can set slit positions alternately from side to side in order of
modules along the document feed direction. The screen displays
Slit1
to
Slit6
.
* Screens for
Slit3
and the rest of the slits are not displayed depending on
the combination of modules in the slots.
REFERENCE
Refer to the instruction manual of each optional module for programming a JOB with an
optional module.
The DC-646 provides two programming modes, the
advanced mode
and the
simple mode
. You
can select either mode by your preference. When programming a JOB in the
advanced mode
,
select
Advanced mode
under
Slitter entry
in
Settings2
before programming one.
REFERENCE
When the standby screen is displayed, you can use the following
keys as shortcut keys.
CURSOR (Up) key: Displays JOB number retrieving screen.
CURSOR (Down) key: Displays modules installed in each slot.
When the
CPM (cross tool module
(option))
and/or the
RTM(s) (rotary tool
module (option))
is/are installed, the
name(s) of the tool(s) that is/are required
to set is/are displayed.
CURSOR (Left) key: Displays the
Settings1
screen.
CURSOR (Right) key: Displays the
JOB entry
screen.
Содержание DC-646
Страница 1: ......
Страница 2: ......
Страница 11: ...ix Notes on Safety Please Read and Observe 4 4 No Part No Name Q ty 4 K9 T139 WARNING LABEL 3 4...
Страница 48: ......
Страница 68: ......
Страница 214: ......
Страница 234: ......
Страница 239: ...219 Appendix Appendix This chapter lists an index Index 220...
Страница 243: ......

