background image

Dryer Master

 A

M

3


Product Manual 


            ©

Dryer Master Inc.                                                        

Page: 38 


5.8.4 Printing 

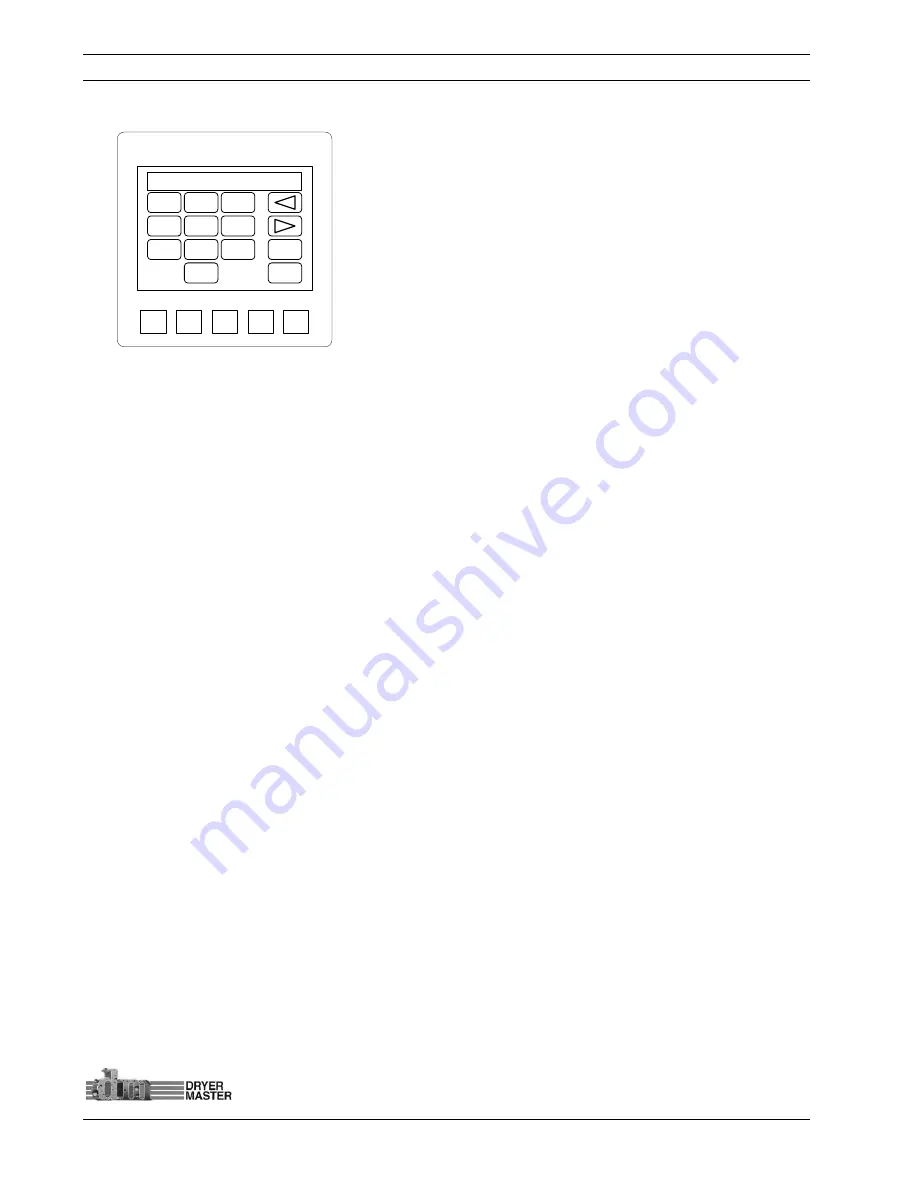
 Set ID number 

 Value entry 


Press the “

Touch area

” 

<keypad>

 to enter the value.  Press the 

Touch area

” 

<Enter>

 to accept the value and return to the 

previous screen.  

Or press the “

Touch area

” 

<Esc>

 to cancel and return to the 

previous screen 


Figure 54. 

 Printing 

 ID Value Entry 


How Printing works: 

The printing function provides a hardcopy of the operation.  This feature can be turned on and off to 
not print information during times when not running. 

1)


The history printout will display Operating information such as the date and time, moisture and 
product temperature, dryer discharge rate while in manual and automatic as well as alarm 
states. 

2)


It is possible to attach a numeric ID to a printed section.  Values of 0 to 99 are possible and can 
represent a bin number or some form of ID to identify a batch.   Just select the 

“Set ID Number” 

and enter a value to have it printed ahead of the information

.  Select “Print Header” to print this 

ID Number header. 

3)


The Column headings are printed with ID header.   


00

_QZ

1

GHI

4

PRS

7

TUV

8

WXY

9

SYSTEM

F1

F2

F3

F4

0

ABC

2

DEF

3

JKL

5

MNO

6

Enter

Esc

Содержание AM3

Страница 1: ......

Страница 2: ...February 2009 Revision 1 3 March 2009 Revision 1 4 September 2013 Revision 1 5 September 2014 Revision 1 6 March 2016 Revision 1 7 June 2017 Prepared by Dryer Master Inc Dryer Master Inc 2008 2009 2013 2014 2016 Dryer Master is a registered trademark of Dryer Master Inc ...

Страница 3: ...ing Mode Select Screen 18 4 1 3 Setting Drying Rate 19 4 2 AUTO SETUP 20 4 2 1 Auto Setup Setting Speed Limits and Delay time 20 4 2 2 Auto Setup Limits and Rate Mode selection 21 4 2 3 Auto Setup Moisture Targets Moisture Limits and Rate Settings selection 22 4 2 4 Auto Setup Rate Selection Mode A 23 4 2 5 Auto Setup Rate Selection Mode B 24 4 2 6 Auto Setup Rate Selection Mode C 25 5 THE MENU TR...

Страница 4: ...ems selection 41 5 10 4 System Settings Screen Saver Timeout 42 5 10 5 System Settings Selecting Date Time 42 5 10 6 System Settings Setting Date 43 5 10 7 System Settings Setting Time 43 5 10 8 System Settings Changing Display Contrast 43 5 11 ENG FUNCTIONS 44 5 11 1 Engineering Functions Menu selection 44 5 11 2 Engineering Functions Password Entry 44 5 11 3 Engineering Functions 1 Slope Offset ...

Страница 5: ...REQUIREMENTS SPECIFICATIONS 67 8 1 BYPASS CHUTE INSTALLATION EXAMPLES 68 8 1 1 Bypass Chute Installation square chute with screw metering 68 8 1 2 Bypass Chute Installation round chute with screw metering 69 8 1 3 Bypass Chute metering screw 70 8 1 4 Bypass Chute screw metering RPM table 71 8 1 5 Bypass Chute Installation rotary valve or airlock metering 72 8 1 6 Bypass Chute rotary valve or airlo...

Страница 6: ...ng rate setting screen 19 Figure 22 Auto Setup Speed limits and delay time 20 Figure 23 Auto Setup Limits and Rate mode selection 21 Figure 24 Auto Setup Moisture targets Moisture Limits and Rate settings selection 22 Figure 28 Menu One 1 26 Figure 29 Menu Two 2 26 Figure 30 Menu Three 3 26 Figure 31 Menu Four 4 27 Figure 32 Menu One 1 Change Product 27 Figure 33 Change Product 27 Figure 34 Calibr...

Страница 7: ...ns 7 Calibration Method screen 49 Figure 76 Engineering Functions 8 Calibration Factor screen 50 Figure 87 Display Dimensions 56 Figure 88 Display Panel cutout 57 Figure 89 Display Electrical connections 58 Figure 90 Electrical connections Field devices 59 Figure 91 AM3 In Panel connection terminal strip 60 Figure 92 Electrical connections Field devices 61 Figure 93 Moisture Sensor 64 Figure 94 Se...

Страница 8: ...s that have at their heart Dryer Master s stainless steel fin type capacitance based moisture sensors These sensors were initially developed to drive Dryer Master s industry leading computerized moisture control systems where they are placed at the inlet and the outlet of the dryer With over 30 years of field proven experience they are now being offered as part of the AM3 moisture monitoring and s...

Страница 9: ...limited to either The sensor s robust construction and conservative installation specifications ensure long product life Moisture control technology The Dryer Master AM3 state control technology employs a 3 state model triggered by user settable moisture targets time delays and speed set points for continues dryers Instead of constantly switching between a high and low discharge speed as used in m...

Страница 10: ...trumentation cables Ground cables 24 vdc time delayed Remote alarm output 24 vdc time delayed alarm output 0 10 Volt Moisture signal output to Automation system 2 System Overview The system is comprised of 2 key elements the industry proven Dryer Master Moisture sensor and a Micro PLC with integrated touch screen information display Figure 1 Typical System with enhanced display and options ...

Страница 11: ...y mounted in Dryer Control panel and options Optional Printer Outlet Moisture Temperature Sensor Optional Moisture Sample Start Button Dryer Control Panel Discharge Speed DRYER 24vdc time delayed Remote alarm output 24vdc time delayed alarm output 0 10 Volt Moisture signal output to Automation system ...

Страница 12: ...hanced system adds an enclosure for the display unit easy to connect terminals and a universal voltage system power supply to power both the Display and Moisture sensor The supply may also be used to activate low voltage low current alarm devices or alarm contacts On systems equipped with a Dryer Master Power supply the unit is capable of supplying 24Volts DC at up to 1 Amp and is current limited ...

Страница 13: ...ings The detailed Engineering and device setup functions will be described in another section 3 1 System displays This is a Touch screen system Throughout this document there may be references to Touch Keys or Touch areas which refer to values or text on the LCD display These Touch Keys or Touch areas will access various functions as you navigate through the screens menus The Display may also be r...

Страница 14: ...oisture so low that reading is not possible Rate Discharge Rate Set point This is the speed signal sent to the Dryers Discharge system This value is displayed when the dryer speed selection is switched to the AM3 Manual or Automatic This is an active touch area Press to change values Rate Targets Indicates top to bottom High rate value triggered by low moisture trip point normal Rate Low rate valu...

Страница 15: ...determines high and low speeds See manual for further info SYSTEM F1 F2 F3 F4 Exit Next F1 Change Product F2 Calibrate Sensor F3 Set Alarms F4 Alarm Log SYSTEM F1 F2 F3 F4 Exit Next F1 Alarm Delay F2 Remote Alm Delay F3 Printing F4 Temp Scale SYSTEM F1 F2 F3 F4 Exit F1 Information F2 Removable Media F3 Auto Setup SYSTEM F1 F2 F3 F4 Exit Next F1 System Settings F2 Eng Functions F3 Languages F4 Tren...

Страница 16: ...n will display Figure 9 Product information display The Main Operations screen displays product moisture product name product temperature and Dryer discharge rate when in Manual or Auto Mode Depending on the system state different information may be displayed Figure 10 Main Display SYSTEM F1 F2 F3 F4 XT105N Self Test Passed SYSTEM F1 F2 F3 F4 AM3 Grain Moisture Control System by Dryer Master SYSTE...

Страница 17: ...Mode Note the Moisture is displayed as well as the product name The system is in Local mode dryer discharge rate is set at the dryer thus there is no rate display Press the Touch Area Rate or the text See Dryer to display the rate entry screen and set a rate value prior to switching modes Figure 12 Main Display Local Mode 3 4 3 Main Display Manual Mode The system is in Manual mode dryer discharge ...

Страница 18: ...he Alarm screen will display when the displayed moisture or product temperature is in alarm The active alarms will flash Press the Touch area Exit to return to the main screen Press the Touch area Alarm Log to view the alarm history See section Alarm settings for additional information Figure 15 Alarm screen 3 4 6 Main Display Active Alarm The Main Operations screen with active Alarm The product l...

Страница 19: ...oisture trending Note trending is an integrated function of the displays firmware The information and display scaling is limited 3 5 1 One Hour Moisture trend display One 1 hour moisture trend Press the Touch area Exit to return to the main screen Figure 17 One 1 hour Moisture Trend 3 5 2 Two Hour Moisture trend display Two 2 hour moisture trend Press the Touch area Exit to return to the main scre...

Страница 20: ...ryer running and discharging product you will see a moisture reading the product temperature and the rate is displayed if in Manual or Automatic mode There is no feed back so we do not know what the rate is in Local mode Press the Touch area Mode to display the Mode change screen Press the Touch area Rate to display dryer discharge speed Rate entry screen Press the Touch area Auto Setup to adjust ...

Страница 21: ...The speed is set from the Dryer Master AM3 This is also a manual mode and the operator still needs to decide what speed needs to be selected The advantage is the speed is now set digitally from the AM3 panel Speeds are recorded and printed if the printer and compact flash option where ordered as part of the system 3 Automatic The normal or primary speed is also set from the Dryer Master AM3 This i...

Страница 22: ...and possibly experimentation to ensure optimum performance 1 Max Safe Speed This is the maximum speed your drying system can operate at Before setting this speed consider the takeaway and feed systems to ensure this setting will not overload the equipment Also look at the real operation If you know your dryer should never operate above 70 for any reason this should be set to 70 or possibly less 2 ...

Страница 23: ...which mode bests suits the operation Automatic modes can de changed at any time 1 Mode A This mode requires input from the operator for all 3 speed settings The normal running speed as well as the high and low default speeds need to be set If the normal speed is adjusted the high and low speed settings must also be reviewed and adjusted if need be 2 Mode B This mode once set up requires input from...

Страница 24: ...e rate setup screen Press the Touch area Exit to return to the Main screen Press the Touch area Back to return to the previous menu screen Figure 24 Auto Setup Moisture targets Moisture Limits and Rate settings selection How to set up Control This section will explain what happens In all Automatic modes it is prudent for the operator to operate the dryer manually to attain the desired moisture bef...

Страница 25: ... seconds 5 minutes The low speed setting is activated d The system will now operate at this slower speed setting until the moisture is once again below the High limit target e When the moisture has been below the High moisture target for the programmed length of time default is 300 seconds 5 minutes system will return to the normal or primary speed f A second event happens and the moisture again d...

Страница 26: ... moisture goes above the High limit target c Once the moisture stays above the High limit target for the programmed length of time default is 300 seconds 5 minutes The low speed setting is activated d The system will now operate at this slower speed setting until the moisture is once again below the High limit target e Only in Mode B the slower as well as the higher speed settings are a fixed valu...

Страница 27: ... it is a percentage of the normal or primary running speed Therefore the amount of change will be smaller at lower speeds and larger for higher speeds thus reducing the input required by the user The system will cycle between the speed settings triggered by the moisture target and limits In Mode C the normal or primary speed is manually set as well as the moisture target and limits and the delay t...

Страница 28: ...2 button to enter the Remote alarm activation delay screen Press the Touch area F3 Printing or the F3 button to enter the Printing setup and enable screen Press the Touch area F4 Temp Scale or the F4 button to enter the screen to switch the temperature display from degrees Fahrenheit to degrees Celsius Press the Touch area Exit to return to the main screen Press the Touch area Back to return to th...

Страница 29: ...e into any of the others This is accomplished by copying the slopes and offset from one product to the others while in the Engineering parameters Refer to the Engineering parameters section for more details 5 2 1 Menu Screen 1 Change Product Press the Touch area F1 Change Product or the F1 button to enter the Product selection screen Figure 32 Menu One 1 Change Product 5 2 2 Change Product Press t...

Страница 30: ... Selection Press the Touch area F2 Calibrate Sensor or the F2 button to enter the Sensor Calibration screen Figure 34 Calibrate Sensor 5 3 2 Calibrate Sensor Standard Method If the Default Standard method is configured this screen will display The displayed moisture is the same live value displayed on the main screen Press and hold the Touch area or to adjust the displayed value to the correct moi...

Страница 31: ...oisture sensor Once the calibration is in progress approximately 30 seconds after the Touch area Start Calibration or the Calibration Button has been pushed The system is ready to accept your manual test result Return to this screen Press the Touch area Enter Calibration to move to the entry screen Press the Touch area Exit to return to the main screen Press the Touch area Back to return to the pr...

Страница 32: ...ster Periodic checks against a manual device ensure both are in approximate agreement Please be sure the product moisture and product temperature are within the specification range for your manual tester Many of the grain moisture testers have specific moisture and temperature ranges Testing product outside of these ranges can severely impact the device accuracy The Dryer Master Moisture sensor is...

Страница 33: ...ples initially to bring the sensor in line a By default this method will only make a maximum change of 0 5 moisture For example if the Online Sample was 14 1 and the Manual Sample was 15 1 or more the change would be the maximum and the displayed moisture reading would increase by 0 5 moisture Thus if the displayed reading is still 14 1 to would increase to 14 6 The change is always retroactive to...

Страница 34: ...e entry screen Press the Touch area Exit to return to the main screen Press the Touch area Back to return to the previous screen Press the Touch area Next to move to the next screen Figure 40 Set Alarms Moisture Alarms values selection 5 4 3 Set Alarms Temperature Alarms values selection Press the Touch area to move to the value entry screen Press the Touch area Exit to return to the main screen P...

Страница 35: ...e alarms log screen Press the Touch area Exit to return to the main screen Press the Touch area Next to move to the next screen Figure 43 Alarm Log 5 5 2 Alarm Log Data screen Press the Touch area Exit to return to the main screen Press the Touch area Back to return to the previous screen Press the Touch area Act Alm to display the active alarms screen Figure 44 Alarm Log Data screen 14 00 _QZ 1 G...

Страница 36: ...rm is activated if so equipped 5 6 1 Alarm Delay Menu selection Press the Touch area F1 Alarm Delay to display the alarm delay screen Press the Touch area Exit to return to the main screen Press the Touch area Back to return to the main screen Press the Touch area Next to move to the next screen Figure 45 Alarm Delay 5 6 2 Alarm Delay Data Entry selection Press the Touch area Time sec 10s to displ...

Страница 37: ...es where repeated alarms can occur in less then a second The repeating alarm may trigger the Alarm Screen at a rate that prevents reaching this Value Entry screen to reset the value 3 In the event that the value has been set to 0 and continuous alarms are occurring momentarily disconnect the Moisture sensor With the sensor disconnected no more alarms will occur Once the Alarm Screen stops reappear...

Страница 38: ... second alarm device or trigger an action in case no one is around to acknowledge an alarm event When enabled a second timer is activated on the unacknowledged alarm If at any time before the timer expires the alarm is acknowledged the timer is reset 1 Values form 0 to 9999 seconds is settable 9999 seconds is 2 hours 46 minutes and 39 seconds 2 Do not set this value to 0 in cases where repeated al...

Страница 39: ...uch area Set ID Number to display the data entry screen Press the Touch area Printing Off or Printing On to switch this feature On or Off Press the Touch area Print Header to print an ID label header Press the Touch area Exit to return to the main screen Press the Touch area Back to return to the main screen Figure 52 Printing Enable Set ID Print Header selection 5 8 3 Printing View ID number Pres...

Страница 40: ...ation during times when not running 1 The history printout will display Operating information such as the date and time moisture and product temperature dryer discharge rate while in manual and automatic as well as alarm states 2 It is possible to attach a numeric ID to a printed section Values of 0 to 99 are possible and can represent a bin number or some form of ID to identify a batch Just selec...

Страница 41: ...word LOCAL is displayed when the speed is set at the dryer Alarm Indicators The letters C and W may be displayed immediately behind the Moisture and Temperature values C indicates a critical high or low alarm W indicates a warning high or low alarm Values can be set changed in the Set Alarms menu Also displayed directly following the rate value will be M for manual speed set point operation and A ...

Страница 42: ...h area Proceed to change the temperature scale Figure 57 Temperature Scale change Warning How Temperature scale change works The purpose is to allow easy switching from the Fahrenheit temperature scale to the Celsius temperature scale 1 Note changing between scales will NOT switch the temperature alarm settings You will need to review the alarm settings and make the necessary changes manually Each...

Страница 43: ...o change settings Press the Touch area Contrast to change settings Press the Touch area Exit to return to the main screen Press the Touch area Back to return to the main screen Figure 59 System Settings Items Selection 5 10 3 System Settings Screen Saver Items selection Press the Touch area Up or down arrow to highlight and select the item Press the Touch area Enter to select the item and Press th...

Страница 44: ... to shut down the back light after the last touch 4 Popup Status When enabled ON turns on a system status information screen A popup message appears when a system event occurs such as a power failure or program fault The default is OFF 5 Update time Is the time delay for either a screen touch or a screen change event to turn on the back light Default is 13 ms 5 10 5 System Settings Selecting Date ...

Страница 45: ...Date Time settings work The Date Time is very important for accurate record keeping Once set verify the time is correct occasionally 1 Only the items Time and Date are selectable 2 Highlight the desired item press the Enter key to display the data change screen Select the item using the left right arrow touch areas use the up down touch arrows to change the value Press the Enter touch button when ...

Страница 46: ...Press the Touch area Next to move to the next screen Figure 66 Engineering Functions 5 11 2 Engineering Functions Password Entry Press the Touch area Password to enter the password entry screen Press the Touch area Exit to return to the main screen Press the Touch area Back to return to the previous screen Figure 67 Engineering Functions Password Press the Touch area keypad to enter the numeric pa...

Страница 47: ... the displayed moisture readings and will change with adjustments and calibration 1 Adjusting the Offset to bring a sensor in line In the event there is a significant difference between the manual moisture test and the displayed value and adjustment to the offset value can bring the displayed value in line There is a direct relationship between the offset and the displayed value Note the manual te...

Страница 48: ...ode 1 Still in voltage mode the Maximum output voltage is 10 volts or 40 mA and the Minimum output voltage is 0 volts or 0 mA 2 For Example Suppose we have the following application a The maximum displayed value 100 and the voltage we need 5 volts 20 mA b The minimum displayed value 0 and the voltage we need 1 volt 4 mA c For a range of 0 to 100 we have a voltage change of 1 to 5 volts or s span o...

Страница 49: ...s the target moisture after returning from either the upper moisture trigger point or the lower moisture trigger point 5 11 4 Engineering Functions 2 Slope Offset entry Press the Touch area values to display the value entry numeric keypad screen Enter the desired value on the Touch keypad Press the Touch area Exit to cancel and return to the main screen Press the Touch area Back to cancel and retu...

Страница 50: ...1 will result in an infinite filter where the value will no longer change 1 A value of 0 85 is the default 2 If the moisture display jumps around significantly increase the value to 0 9 or even 0 95 3 To get a feel for the effect of this filter have someone block the flow of product to the sensor and observe the speed at which the sensor reading drops to Empty 5 11 7 Engineering Functions 5 TC val...

Страница 51: ... area Exit to cancel and return to the main screen Press the Touch area Back to cancel and return to the previous screen Press the Touch area More to move to the next screen Figure 75 Engineering Functions 7 Calibration Method screen How the Calibration Method works Two methods for moisture sensor calibration have been provided Standard and Advanced method Both allow for easy adjustment of the dis...

Страница 52: ...and return to the previous screen Press the Touch area More to move to the next screen Figure 76 Engineering Functions 8 Calibration Factor screen How the Calibration Factor works The Calibration Factor is the amount of change applied with each calibration entry while using the Advanced method The Logic limits the maximum difference between the online reading and the manual sample to 1 The calibra...

Страница 53: ...degrees Fahrenheit Press the Touch area Exit to cancel and return to the main screen Press the Touch area Back to cancel and return to the previous screen Press the Touch area Change to change between degrees F and C Figure 78 Engineering Functions 10 Temperature Display Units selection 5 12 Languages The system is configured to support the displayed test in 3 languages English French and Spanish ...

Страница 54: ...area to toggle between English French and Spanish Press the Touch area Exit to cancel and return to the main screen Press the Touch area Back to cancel and return to the previous screen Press the Touch area Change to change between degrees F and C Figure 80 Languages change language SYSTEM F1 F2 F3 F4 Exit Change Display Language English Back ...

Страница 55: ...the Touch area 2 Hr Trend On to turn the 1 hour trending on of off Press the Touch area Exit to return to the main screen Press the Touch area Back to return to the previous screen Figure 82 Trending Options clearing data 5 13 3 Trending Options Changing Moisture range Press the Touch area Exit to return to the main screen Press the Touch area Back to return to the previous screen Press the Touch ...

Страница 56: ...e 5 14 Information Figure 85 Information Contact info system version information 5 15 Removable Media Figure 86 Removable Media Information and status of the micro SD Compact Flash card SYSTEM F1 F2 F3 F4 Exit Change Trend Time Scale 1 Hour Trend Back SYSTEM F1 F2 F3 F4 Exit Next F1 Information Back SYSTEM F1 F2 F3 F4 Exit Dryer Moisture Systems Inc 519 725 4700 www dryermaster com SW Ver 2 410 Ba...

Страница 57: ...Unknown format 2 No memory card present 3 Memory card present but not supported 4 Memory card swapped before operation complete 5 Unknown error 5 16 Auto Setup This function is available from 2 locations Auto setup from the main display and the last item in Engineering functions Refer to the section Automatic operation and setup for information ...

Страница 58: ...e IMO i3B12Y 13C14 SCHF Operator Control Station in an existing control panel The IMO Start Up Guide is available in Appendix C of this manual You can also refer to the IMOPC documentation on the web at http imopc01 imostatic net technical i3b 20datasheet pdf 6 1 1 Display Dimensions Figure 87 Display Dimensions 3 780 96 mm 3 780 96 mm 2 246 57 5 mm 3 622 92 mm ...

Страница 59: ...Dryer Master AM3 Product Manual Dryer Master Inc Page 57 6 1 2 Display Panel cut out Figure 88 Display Panel cut out Panel Cut Out 3 622 92 mm 3 622 92 mm ...

Страница 60: ... with the display PLC already installed in the Dryer Master provided AM3 panel Figure 89 Display Electrical connections Moisture Sensor AQ 1 AQ 2 0V V1 V2 0V 0V 0V V Q2 Q1 0V Q3 I1 0V J1 J2 J3 Power Shield Drain wires Red Green Black White Calibration Button 2 1 Signal Output 3 Sonalert Local Alarm Remote Alarm Output 4 24 Volt Power Green White Black Black Black Red Red Red Black Green White Eart...

Страница 61: ...tation cable in metal conduit with a ground wire or Tech cable is recommended Moisture Sensor Red Green Black White Calibration Button 2 1 Signal Output 3 Remote Alarm Output 4 24 Volt Power 20mA Calibration Button Switch Lamp Moisture Rate Out to VFD Green White Black Moisture Sensor Moisture 24 V Gnd Temp 200mA Remote Alarm Output Product Moisture Product Temperature Green White Red Black Instru...

Страница 62: ...e Connection Earth Ground Calibration Button Lamp signal 24V Calibration Button Lamp signal 0V Calibration Button Contact Calibration Button Contact Shield Wire Connection Earth Ground 14 15 16 17 18 19 Signal Output 0V Moisture Signal Output 0 10 Volts DC Rate Signal Output 0 10 Volts DC Shield Wire Connection Remote Alarm Output 24 Vdc 200mA Max Remote Alarm Output 0 Vdc Power 24 Vdc 500mA min P...

Страница 63: ...libration Button 2 1 Signal Output 3 Remote Alarm Output 4 10Vdc Calibration Button Signal Outputs Switch Lamp Moisture Rate Output Green White Black Moisture Sensor Moisture 24 V Gnd Temp 200mA Remote Alarm Output Product Moisture Product Temperature Green White Red Black Red Black Moisture Sensor Earth Ground Local Remote Output 5 200mA Red Black 10Vdc Red Local Remote Output ...

Страница 64: ...n options available to the user The printer option kit includes all the components One MJ2 RS232 9pinD adapter One RS232 serial cable One Serial terminal printer c w universal voltage power supply For those wishing to supply their own printer you will need the following One Dryer Master MJ2 Rs232 9pinD adapter Your printer must be a serial printer and you will need to set your printer for Baud 960...

Страница 65: ...of flow will affect moisture sensor accuracy and performance 7 1 1 Moisture Range Temperature range The sensors electronics typical operating temperature range is 10 degrees Celsius 14 degrees Fahrenheit to 70 degrees Celsius 150 degrees Fahrenheit Product temperature can range from 25 to 95 degrees Celsius 13 to 200 degrees Fahrenheit although verification of the actual product moisture at the te...

Страница 66: ...y the existing wire entry location Entry at any other location voids the warranty The Moisture sensor electronics are sensitive to the electromagnetic energy from nearby welding To reduce the risks of damage remove the sensor before welding in the immediate area Under no circumstances may the sensor housing or connecting bolts be used as a ground for welding ...

Страница 67: ...gnostics display a If the value is greater than 0 9 volts either the distance between the sensor and the display unit is too large for the wire size used b There is a ground potential difference which is interfering with the operation c There is potentially high energy electrical noise radiating into the signal wiring To correct this do the following 1 Join the Black signal power lead in the moist...

Страница 68: ...sent at 24 V and 0 V com and Blue LED is not illuminated Device has failed and must be returned for service 4 Signal levels above 5 Vdc at location MOIS OUT and 0 V com with the sensor empty and J4 jumper in the store position Device has failed and must be returned for service 5 Signal levels at 0 5 to 0 8 Vdc at location MOIS OUT and 0 V com with the sensor empty and J4 jumper in the LOW or HIGH ...

Страница 69: ... installation 1 Install the chute so that there will be a continuous flow of product and the chute will remain full 2 Ensure that the product flowing through the chute is a good representative sample of the product flow 3 Locate the sensor so it can be safely accessed for cleaning and taking product samples 4 Install bars across the opening to the sensor in the direction of product flow This will ...

Страница 70: ...1 6 8 7 5 8 5 8 5 7 5 0 5 6 0 8125 4 5 created Dimension to fit need Note This chute design accommodates the standard 2200 series small fin style moisture sensors in a standard 6 by 6 chute This smaller dimension chute will improve product flow by not requiring the hopper bottom of the standard 10 inch square chute to return the product to the metering device The 6 space between the bottom of the ...

Страница 71: ... 6 0 8125 4 5 created Dimension to fit need Note This chute design accommodates the standard 2200 series small fin style moisture sensors in a standard 6 diameter pipe chute This smaller dimension chute will improve product flow by not requiring the hopper bottom of the standard 10 inch square chute to return the product to the metering device The 6 space between the bottom of the sensor and the m...

Страница 72: ... to provide a concept of the construction of screw conveyor required to maintain the product flow through the moisture sensor chute The requirement is for a 15 cm 6 inch screw conveyor The pitch of the screw is to be 7 5 cm 3 inch in the section under the sensor chute This ensures that the screw is only full once the pitch returns to normal and no product binding occurs at the hanger bearing at th...

Страница 73: ...20 88 1 Figure 98 Table of metering device RPM screw conveyor Note When using a screw conveyor as the product metering device it is recommended that the screw section under the moisture sensor chute be made pitch This ensures the conveyor is only full once the screw returns to normal pitch reducing mechanical wear product damage and motor gearbox load requirements Note Placement at the feed end en...

Страница 74: ...tering Device Approximate rpm Gear Reduction for 1750 rpm Motor 6 Rotary valve or metering device 6 280 1 5 Rotary valve or metering device 9 192 1 4 Rotary valve or metering device 14 120 1 Verify the flow and gear box required The table is an approximate guideline Figure 100 Table of metering device RPM rotary airlock or rotary valve Main Product Flow Shut Off Slide Gate Access Moisture Sensor R...

Страница 75: ...bove right There is more information on this chute in Appendix D Caution Placing the sensor in a location where it will not get the full flow may cause an excess of fines or trash to pass through the sensor and will contribute to errors or false readings Dry Product Hopper Below Dryer Rotary Valve Motor and Gear Reducer Rotary Metering Valve Bypass Sensor in Chute Dry Product Chute Dry Sample Retu...

Страница 76: ...Dryer Master AM3 Product Manual Dryer Master Inc Page 74 8 1 7 Bypass Chute Example Figure 102 Bypass Chute Example 8 1 8 Bypass Chute Example Dimensions Figure 103 Bypass Chute Example Dimensions ...

Страница 77: ...ur inch sampling conveyor is recommended Several other options are available see figure below All gear reductions given are based on a chute that is six inches by six inches For the best flow characteristics it is recommended that the auger be opened to the full width of the chute This will also reduce transition complexity Verify the conveyor flow and gear box required The table is an approximate...

Страница 78: ... resulting in voids and irregular product flow resulting in irregular product moisture readings Figure 105 Bypass Chute under Drag with mechanical flow restrictor metering Caution It may seem that this chute design is inexpensive and an easy to design solution that should work for everything In reality Dryer Master in its 25 year life has seen many attempts of mechanical flow control not work This...

Страница 79: ... Product Manual Dryer Master Inc Page 77 8 2 In Line Chute Installation Examples 8 2 1 In Line Chute Example mechanical metering Figure 106 In Line Chute Example Sample Acess Lexan Viewing Port Bypass Fin Mounting Hole ...

Страница 80: ...s seen many attempts of mechanical flow control which do not work This metering method however does work very well for the Corn and Beans and some others natural products What most attempts at mechanical metering do not consider is the low speed 25mm 1 inch per second or slower and the need for constant even product flow If you are considering this chute design for other than the mentioned product...

Страница 81: ...s 24 hour format Moisture xx xxxx Moisture 1 minute averages Moisture_Alarm C or W C Critical alarm W Warning alarm Temperature xxx xxx Temperature 1 minute averages Temperature_Alarm C or W C Critical alarm W Warning alarm Date Time Moisture Moisture_Alarm Temperature Temperature_Alar Moisture_Signal Temperature_Sign Rq_Rate Mode ProdName 24 03 2008 0 00 14 8299 108 604 2 46594 2 56469 45 2 3 24 ...

Страница 82: ...eed set at Dryer 2 Manual Speed set from Dryer Master 3 Automatic Speed set at Dryer master Product 1 2 3 4 Product selection 1 Corn 2 Beans 3 Wheat 4 Canola 9 1 2 Calibration data example Figure 109 Calibration file data format Date Time Online_Sample Manual_Sample T_Voltage Slope Offset Product 23 07 2007 11 57 12 16 3305 16 4 2 13023 3 3 5 1 23 07 2007 13 30 06 16 3741 15 5 2 13023 5 5 1 5 0 23...

Страница 83: ...or labor materials and transportation to repair alter correct or replace said defective property as it shall have previously been approved in writing Seller shall not be liable for any special indirect or consequential damages Seller will use all reasonable means to deliver within the time specified but shall not be held responsible or liable for any loss damage detention or delay caused by accide...

Страница 84: ...Dryer Master AM3 Product Manual Dryer Master Inc Page 82 11 Appendix C IMO Set up Guide ...

Страница 85: ...Dryer Master AM3 Product Manual Dryer Master Inc Page 83 ...

Страница 86: ...Dryer Master AM3 Product Manual Dryer Master Inc Page 84 ...

Страница 87: ...Dryer Master AM3 Product Manual Dryer Master Inc Page 85 ...

Страница 88: ...Dryer Master AM3 Product Manual Dryer Master Inc Page 86 ...

Страница 89: ...tion You can unbolt the four bolts attaching the sensor housing to the rotary feed then rotate the housing to the desired direction and then bolt back together The sensor can also be mounted where the viewing window is located and then move the viewing window to the previous sensor location 2 Ideally the sensor housing and chute assembly should be free of grain when the dryer is not running This a...

Страница 90: ...Dryer Master AM3 Product Manual Dryer Master Inc Page 88 The motor can run either clockwise CW or counter clockwise CCW Move the black wire to change the direction of rotation ...

Страница 91: ...0 10V input Analog Common Existing Speed Potentiometer Generic VFD Analog Ouput 10V X 3 2 1 Note To achieve the most flexibility and still maintain the use of a manual speed potentiometer for the just in case scenario the speed setting signal is wired into the same terminal as the manual speed setting potentiometer The relay serves to connect either the speed potentiometer or the PLC speed signal ...

Отзывы: