background image


VigorIPPBX 3510 Series User’s Guide


146


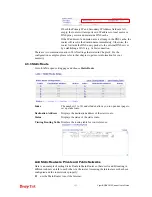
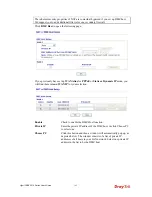
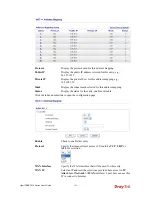
Protocol 

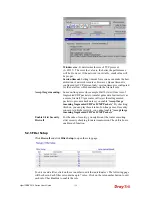
Display the protocol used for this address mapping.


Public IP 

Display the public IP address selected for this entry, e.g., 
86.123.123.2.


Private IP 

Display the private IP set for this address mapping, e.g., 
192.168.1.10 

Mask 

Display the subnet mask selected fro this address mapping.


Status


Display the status for the entry, enable or disable. 

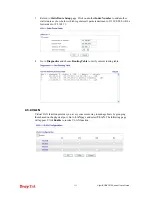
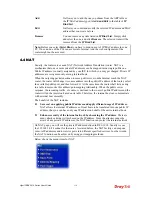
Click the index number link to open the configuration page. 


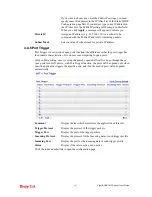
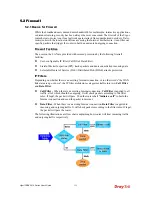
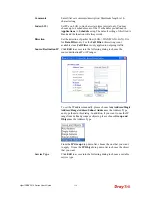
Enable 

Check to enable this entry. 

Protocol 

Specify the transport layer protocol. It could be

 TCP

UDP

, or 

ALL

 for selection.


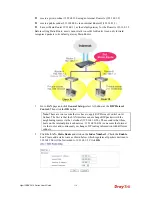
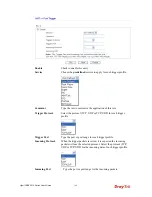
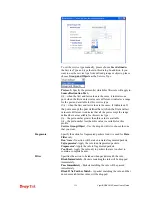
WAN Interface 

Specify the WAN interface that will be used for this entry.


WAN IP 

Select an IP address (the selections provided here are set in 

IP 

Alias List 

of 

Network >>WAN

 interface). Local host can use this 

IP to connect to Internet.   

Содержание VigorIPPBX 3510 Series

Страница 1: ......

Страница 2: ...VigorIPPBX 3510 Series User s Guide ii VigorIPPBX 3510 Series User s Guide Version 2 2 Firmware Version V3 5 5 1 Date 17 03 2011...

Страница 3: ...ations on conservation of the environment Warranty We warrant to the original end user purchaser that the router will be free from any defects in workmanship or materials for a period of two 2 years f...

Страница 4: ...s uses and can radiate radio frequency energy and if not installed and used in accordance with the instructions may cause harmful interference to radio communications However there is no guarantee tha...

Страница 5: ...e PSTN and VoIP Trunk 31 3 2 Cost effective Extendability by Integrated Analog telephone Adapter for 24 Conventional Analog Phones POE switch for IP based phones 33 3 3 ISDN Application via ISDN Trunk...

Страница 6: ...ral Setup 117 4 2 4 Internet Access 119 4 2 5 Load Balance Policy 126 4 3 LAN 128 4 3 1 Basics of LAN 128 4 3 2 General Setup 130 4 3 3 Static Route 133 4 3 4 VLAN 135 4 3 5 Bind IP to MAC 137 4 4 NAT...

Страница 7: ...VPN and Remote Access 207 5 7 1 Remote Access Control 207 5 7 2 PPP General Setup 208 5 7 3 IPSec General Setup 209 5 7 4 IPSec Peer Identity 210 5 7 5 Remote Dial in User 212 5 7 6 LAN to LAN 215 5...

Страница 8: ...ssions Table 247 5 11 6 Ping Diagnosis 248 5 11 7 Data Flow Monitor 249 5 11 8 Traffic Graph 251 5 11 9 Trace Route 251 5 12 Support Area 252 Chapter 6 Trouble Shooting 253 6 1 Checking If the Hardwar...

Страница 9: ...have unlimited free calls through Internet Moreover VigorIPPBX 3510 is able to establish multiple networking architectures corresponding to your current desire and future needs of growing communicati...

Страница 10: ...een installed and is recording CDR Off CDR utility has not been installed or is unable to record On A USB device is connected and active USB Blinking The data is transmitting MSF Blinking Storage NAND...

Страница 11: ...or more than 5 seconds When you see the ACT LED begins to blink rapidly than usual release the button Then the router will restart with the factory default configuration FXS Connecter for telephone se...

Страница 12: ...e RJ 45 into the Ethernet port on your computer 3 Connect the telephone sets with phone lines for using PBX function For the model without phone ports skip this step 4 Connect IP Phone s via VigorSwit...

Страница 13: ...DN applications according to the requirements F FX XS S a an nd d F FX XO O FXS Foreign eXchange Station and FXO Foreign eXchange Office are assembled with a pair A telecommunications line from an FXO...

Страница 14: ...X As for the Private Branch Exchange PBX it is more special because it has both ISDN NT and ISDN TE devices at the same time It can connect to the ISDN line to act as ISDN TE equipment and it can conn...

Страница 15: ...ll the PCs connected this router can print documents via the router The example provided here is made based on Windows XP 2000 For Windows 98 SE please visit www draytek com Before using it please fol...

Страница 16: ...dd a New Computer A welcome dialog will appear Please click Next 4 Click Local printer attached to this computer and click Next 5 In this dialog choose Create a new port Type of port and use the drop...

Страница 17: ...e following dialog type 192 168 1 1 router s LAN IP in the field of Printer Name or IP Address and type IP_192 168 1 1 as the port name Then click Next 7 Click Standard and choose Generic Network Card...

Страница 18: ...ion click Next 10 For the final stage you need to go back to Control Panel Printers and edit the property of the new printer you have added 11 Select LPR on Protocol type p1 number 1 as Queue Name The...

Страница 19: ...ot know whether your printer is supported or not please visit www draytek com to find out the printer list Open Support FAQ find out the link of Printer Server and click it then click the What types o...

Страница 20: ...VigorIPPBX 3510 Series User s Guide 12 This page is left blank...

Страница 21: ...a an ng gi in ng g P Pa as ss sw wo or rd d To change the password for this device you have to access into the web browse with default password first 1 Make sure your computer connects to the router c...

Страница 22: ...ose System Maintenance Administrator Password 5 Enter the login password the default is blank on the field of Old Password Type New Password and Confirm Password Then click OK to continue 6 Now the pa...

Страница 23: ...t W Wi iz za ar rd d If your router can be under an environment with high speed NAT the configuration provide here can help you to deploy and use the router quickly The first screen of Quick Start Wi...

Страница 24: ...cal type for your router Then click Next for next step WAN Interface Specify which interface you use for network connection Display Name Type the name for this router Physical Mode If you choose WAN2...

Страница 25: ...c IP or DHCP The router supports the WAN interface for Internet access 2 2 2 2 1 1 P PP PP Po oE E PPPoE stands for Point to Point Protocol over Ethernet It relies on two widely accepted standards PPP...

Страница 26: ...ge will be shown User Name Assign a specific valid user name provided by the ISP Password Assign a valid password provided by the ISP Confirm Password Retype the password Click Next for viewing summar...

Страница 27: ...ick PPTP L2TP as the protocol Type in all the information that your ISP provides for this protocol PPTP Setting L2TP Setting User Name Assign a specific valid user name provided by the ISP Password As...

Страница 28: ...IP address Subnet Mask Type the subnet mask Gateway Type the gateway of the router Primary DNS Type the primary DNS address Secondary DNS Type the secondary DNS if required PPTP L2TP Server Type the...

Страница 29: ...is protocol WANIP Address Type the IP address Subnet Mask Type the subnet mask Gateway Type the gateway IP address Primary Secondary DNS Type in the primary IP address for the router if you want to us...

Страница 30: ...the protocol Type in all the information that your ISP provides for this protocol Host Name Type the name of the host MAC Some Cable service providers specify a specific MAC address for access authent...

Страница 31: ...3510 Series User s Guide 23 Click Finish A page of Quick Start Wizard Setup OK will appear Then the system status of this protocol will be shown Now the system is ready to access into Internet wheneve...

Страница 32: ...settings also can be configured by using IP PBX menu However the wizard is the most convenient and easy method for users 2 2 3 3 1 1 E Ex xt te en ns si io on n G Gr ro ou up p S Se et tu up p Click I...

Страница 33: ...n this group that need to register to IPPBX respectively must use such password for the registration When you finish the settings of group name group number start number number of extension fields ple...

Страница 34: ...after the domain name to specify that port as the destination of data transmission e g nat draytel org 5065 Account Number Name Enter your account name of SIP Address Password Type the password which...

Страница 35: ...s including starting point ending point on duty day s When do you start working in the morning Use the drop down menu to choose the time as the starting point in the morning When do you have a rest at...

Страница 36: ...us s The online status shows the system status WAN status LAN status and other status related to this router within one page If you select PPPoE as the protocol you will find out a link of Dial PPPoE...

Страница 37: ...ts Display the total transmitted packets at the WAN interface TX Rate Display the speed of transmitted octets at the WAN interface RX Packets Display the total number of received packets at the WAN in...

Страница 38: ...VigorIPPBX 3510 Series User s Guide 30 This page is left blank...

Страница 39: ...FXS module The said VoIP No is 888833 z The PSTN PBX is with PSTN line No 12345678 The remote analog phone line is No 87654321 The remote mobile phone is with No 49 176999661 z The analog phones with...

Страница 40: ...g through you will hear the auto reply from the PBX then press the extension No 605 After getting through you can hear the dial tone then press ext No 201 z The analog phone with ext No 602 made a cal...

Страница 41: ...at a SIP server z The remote IP based phone with ext 201 is registered at remote site z The PSTN PBX is with PSTN line No 12345678 The remote analog phone line is No 87654321 The remote mobile phone i...

Страница 42: ...ly from the PBX then press the extension No 611 After getting through you can hear the dial tone then press ext No 201 z The analog phone with ext No 602 made a call to IP phone with extension No 703...

Страница 43: ...is registered at a SIP server too z The ISDN Phone with ext No 801 802 803 and 804 are connected to ISDN PBX ISDN Phone with extension No 801 ISDN Phone with extension No 802 ISDN Phone with extensio...

Страница 44: ...phone with ext 301 is registered at a SIP server z The ISDN Phone with ext No 801 802 803 and 804 are connected to ISDN PBX ISDN Phone with extension No 801 ISDN Phone with extension No 802 ISDN Phone...

Страница 45: ...tension No 801 ISDN Phone with extension No 802 ISDN Phone with extension No 803 ISDN Phone with extension No 804 z The ISDN phone with ext 905 with MSN No 21 on VigorIPPBX 3510 made a call to the rem...

Страница 46: ...shown in the below illustration you may follow the steps to create a LAN to LAN profile These two networks LANs should NOT have the same network address Settings in Router A in headquarter 1 Go to VP...

Страница 47: ...es User s Guide 39 3 Go to LAN to LAN Click on one index number to edit a profile 4 Set Common Settings as shown below You should enable both of VPN connections because any one of the parties may star...

Страница 48: ...should further specify the remote peer IP Address IKE Authentication Method and IPSec Security Method for this Dial Out connection If a PPP based service is selected you should further specify the re...

Страница 49: ...n Otherwise it will apply the settings defined in IPSec General Setup above If a PPP based service is selected you should further specify the remote peer IP Address Username Password and VJ Compressio...

Страница 50: ...L2TP you have to set general settings in PPP General Setup For using IPSec based service such as IPSec or L2TP with IPSec Policy you have to set general settings in IPSec General Setup such as the pre...

Страница 51: ...connection If a PPP based service is selected you should further specify the remote peer IP Address Username Password PPP Authentication and VJ Compression for this Dial Out connection 6 Set Dial In s...

Страница 52: ...further specify the remote peer IP Address Username Password and VJ Compression for this Dial In connection 7 At last set the remote network IP subnet in TCP IP Network Settings so that Router B can...

Страница 53: ...re as shown in the below illustration you may follow the steps to create a Remote User Profile and install Smart VPN Client on the remote host Settings in VPN Router in the enterprise office 1 Go to V...

Страница 54: ...ction If an IPSec based service is selected you may further specify the remote peer IP Address IKE Authentication Method and IPSec Security Method for this Dial In connection Otherwise it will apply t...

Страница 55: ...t complimentary software to help you create PPTP L2TP and L2TP over IPSec tunnel You can find it in CD ROM in the package or go to www draytek com download center Install as instructed 2 After success...

Страница 56: ...PPP based service is selected you should further specify the remote VPN server IP address Username Password and encryption method The User Name and Password should be consistent with the one set up in...

Страница 57: ...et tt ti in ng g E Ex xa am mp pl le e Assume a teleworker sometimes works at home and takes care of children When working time he would use Vigor router at home to connect to the server in the headq...

Страница 58: ...S Control on the left corner is checked And select BOTH in Direction 3 Return to previous page Enter the Name of Index Class 1 by clicking Edit link Type the name E mail for Class 1 4 For this index t...

Страница 59: ...bandwidth for HTTPS And click OK 6 Click Setup link for WAN1 7 Check Enable UDP Bandwidth Control on the bottom to prevent enormous UDP traffic of VoIP influent other application Click OK 8 If the wor...

Страница 60: ...he will set reserved bandwidth for 1 VPN tunnel 9 Click Edit to open the following window Check the ACT box first 10 Then click Edit of Local Address to set a worker s subnet address Click Edit of Rem...

Страница 61: ...corresponding deployment are shown below The default Vigor router private IP address Subnet Mask is 192 168 1 1 255 255 255 0 The built in DHCP server is enabled so it assigns every local NATed host a...

Страница 62: ...e 54 To use another DHCP server in the network rather than the built in one of Vigor Router you have to change the settings as show below You can just set the settings wrapped inside the red rectangle...

Страница 63: ...do the following 1 Go to www draytek com 2 Access into Support Downloads Please click the model name of VigorIPPBX 3510 and click on it to download the firmware execution file 3 Locate the AutoFwUp_V...

Страница 64: ...choose VigorIPPBX 3510 and click OK 6 In the Confirm Password dialog please type the password that you use to login Vigor router and click OK If there is no password needed click OK directly 7 Next th...

Страница 65: ...P PP PB BX X 3 35 51 10 0 3 3 1 11 1 1 1 B Ba ac ck ku up p t th he e C Co on nf fi ig gu ur ra at ti io on n S Se et tt ti in ng gs s 1 Go to www draytek com 2 Access into Support Downloads Please fi...

Страница 66: ...ck on the FrmUpg icon 5 The Firmware Upgrade Utility will appear as follows 6 Click the browse button of Router IP to search the IP address e g 192 168 1 1 of VigorIPPBX 3510 Click OK Note Do not type...

Страница 67: ...igorIPPBX 3510 Series User s Guide 59 7 Choose Backup Setting as the Operation Mode 8 Next click the browse button of Save Config to for specifying the place that the configuration file stored Click O...

Страница 68: ...0 Series User s Guide 60 9 Next click Fetch 10 When it is finished the following dialog will appear 11 Now the configuration files with the file name like V3510_XXXX V35VoipMoudule_XXXX will be stored...

Страница 69: ...e t th he e C Co on nf fi ig gu ur ra at ti io on n S Se et tt ti in ng gs s 1 Double click on the FrmUpg icon 2 The Firmware Upgrade Utility will appear as follows 3 Click the browse button of Route...

Страница 70: ...VigorIPPBX 3510 Series User s Guide 62 4 Choose Restore as the Operation Mode 5 Click the browse button of Select Router Config to locate the configuration file...

Страница 71: ...gorIPPBX 3510 Series User s Guide 63 6 Next click the browse button of Select VoIP Config to locate the module file for the router Choose the file of V3K52262_XXXXXXX and click Open 7 Next click Impor...

Страница 72: ...VigorIPPBX 3510 Series User s Guide 64 8 When it is finished the following dialog will appear 9 Now the configuration files have been restored to your router...

Страница 73: ...e 65 3 3 1 12 2 R Re eq qu ue es st t a a c ce er rt ti if fi ic ca at te e f fr ro om m a a C CA A s se er rv ve er r o on n W Wi in nd do ow ws s C CA A S Se er rv ve er r 1 Go to Certificate Manage...

Страница 74: ...st Enter the information in the certificate request 3 Copy and save the X509 Local Certificate Requet as a text file and save it for later use 4 Connect to CA server via web browser Follow the instruc...

Страница 75: ...quest using a base64 encoded PKCS 7 file Import the X509 Local Certificate Requet text file Select Router Offline request or IPSec Offline request below Then you have done the request and the server n...

Страница 76: ...ificate Click IMPORT button and browse the file to import the certificate cer file into Vigor router When finished click refresh and you will find the below window showing END CERTIFICATE REQUEST 6 Yo...

Страница 77: ...rt ti if fi ic ca at te e a an nd d S Se et t a as s T Tr ru us st te ed d o on n W Wi in nd do ow ws s C CA A S Se er rv ve er r 1 Use web browser connecting to the CA server that you would like to...

Страница 78: ...sted CA Certificate Click IMPORT button and browse the file to import the certificate cer file into Vigor router When finished click refresh and you will find the below illustration 4 You may review t...

Страница 79: ...igor for getting more information please create an account for MyVigor first 3 3 1 14 4 1 1 C Cr re ea at ti in ng g a an n A Ac cc co ou un nt t v vi ia a V Vi ig go or r R Ro ou ut te er r 1 Click C...

Страница 80: ...VigorIPPBX 3510 Series User s Guide 72 5 Type your personal information in this page and then click Continue 6 Choose proper selection and click Continue...

Страница 81: ...START 8 Check to see the confirmation email with the title of New Account Confirmation Letter from myvigor draytek com 9 Click the Activate my Account link to enable the account that you created The f...

Страница 82: ...click Login Your account has been activated You can access into MyVigor server to activate the service e g WCF that you want 3 3 1 14 4 2 2 C Cr re ea at ti in ng g a an n A Ac cc co ou un nt t v vi...

Страница 83: ...2 Check to confirm that you accept the Agreement and click Accept 3 Type your personal information in this page and then click Continue 4 Choose proper selection and click Continue 5 Now you have crea...

Страница 84: ...unt link to enable the account that you created The following screen will be shown to verify the register process is finished Please click Login 8 When you see the following page please type in the ac...

Страница 85: ...VigorIPPBX 3510 Series User s Guide 77 Now click Login Your account has been activated You can access into MyVigor server to activate the service e g WCF that you want...

Страница 86: ...the extension registered from VPN However if it is required please untick the Disable registration from WAN option then register the extension via VPN tunnel for higher security You can achieve the f...

Страница 87: ...from the IP PBX PBX System SIP Proxy Setting page 2 Then open IP PBX Extension Click any one of the index numbers 3 Now you will get the following setup page for an extension Note that the Allow Regis...

Страница 88: ...VigorIPPBX 3510 Series User s Guide 80 This page is left blank...

Страница 89: ...utside lines for making telephone calls external to the PBX IP PBX integrates the benefits of VoIP PSTN ISDN and transfers the message from IP phone into the data that can be accepted by traditional P...

Страница 90: ...X Extension to get the following pages There are 100 groups of extension numbers that you can configure Please click any number under Index to set detailed configuration Note The items listed under Ou...

Страница 91: ...Number Password Check this box to enable remote user can use this account setting as PPTP remote dial in authentication account E mail Address Type an e mail address to receive media voice file sent b...

Страница 92: ...specify the waiting time and determine the way you want to process Busy then When this extension number is busy you can forward the incoming phone call to other extension number or group or SIP Trunk...

Страница 93: ...ealm Display domain name or IP address of the SIP Registrar server Proxy Display the domain name or IP address of SIP proxy server Account Number Name Display the account name of SIP Address Trunk Num...

Страница 94: ...age for building a session The default value is 5070 Domain Realm Set the domain name or IP address of the SIP Registrar server Proxy Set domain name or IP address of SIP proxy server By the time you...

Страница 95: ...t number and then the real outside line number without waiting for dial tone The short number is defined here as Trunk Number Out going call CLI Determine which phone number will be shown to the remot...

Страница 96: ...e selected answer mode for office hours Non Office Hours Display the selected answer mode for non office hours Active Display current activation status for such account enabled or disabled Trunk Displ...

Страница 97: ...in office time You can specify it with Auto Attendant AA or forward it to any Extension or Group directly Non office hours answer mode Set the answering mode for such outside line in non office time Y...

Страница 98: ...PIN Code Mode Off Net PIN Code ID Click Enable to invoke this setting Type the PIN code number to make off net call to PSTN trunk On Net PIN Code ID Click Enable to invoke this setting Type the PIN c...

Страница 99: ...nged according to the FXS FXO module inserted to VigorIPPBX 3510 4 4 1 1 3 3 D Di ia al l P Pl la an n 4 4 1 1 3 3 1 1 D Di ig gi it t M Ma ap p For the convenience of user this page allows users to e...

Страница 100: ...as an example the prefix number of 03 will be replaced by 8863 For example dial number of 031111111 will be changed to 88631111111 and sent to SIP server OP Number The front number you type here is t...

Страница 101: ...can set your VoIP contacts in the phonebook It can help you to make calls quickly and easily by using Speed Dial Number There are total 20 index entries in the phonebook for you to store all your frie...

Страница 102: ...Ca al ll l B Ba ar rr ri in ng g Call barring is used to block phone calls coming from the one that is not welcomed Click any index number to display the dial plan setup page Enable Click this to enab...

Страница 103: ...drop down list Index 1 15 in Schedule Enter the index of schedule profiles to control the call barring according to the preconfigured schedules Refer to section Advanced Application Schedule for detai...

Страница 104: ...ntrolling also can be done based on preconfigured schedules 4 4 1 1 4 4 P PB BX X S Sy ys st te em m This page allows you to set relational advanced settings for IP PBX device 4 4 1 1 4 4 1 1 S SI IP...

Страница 105: ...xtension pickup press pickup number extension number for group pickup just press pickup number For example pickup number is 1 and 101 105 are set in the same hunt group When an incoming call rings ext...

Страница 106: ...all the extension numbers under such group will ring Index You can set 10 groups for using in different conditions Simply click the number under Index to specify detailed information Group Name Displa...

Страница 107: ...g one by one while receiving incoming calls Timeout Set the timeout for such group The default setting is 60 seconds After timeout the system will execute overflow rule selected below Overflow Rule Wh...

Страница 108: ...all of the items in Available area to Chosen area Remove Click this button to move the selected item in Chosen area to Available area Remove All Click this button to clear all of the selections in Ch...

Страница 109: ...he voice mail to the specified e mail address for the incoming call directly and delete the temporary file in IP PBX if you check this box Days for keeping voice mail Type the days for keeping each vo...

Страница 110: ...rop down menu to choose the time as the starting point Office Hour End Use the drop down menu to choose the time as the ending point Weekdays Check the day s to apply the office hour for that index Da...

Страница 111: ...e en nd da an nt t W Wi iz za ar rd d The first page is configured for phone calls in office hours Click Next The second page is configured for phone calls in non office hours Key 0 9 Key 0 9 can be s...

Страница 112: ...tomatically Ring Hunt Group Only the extension number within the Hunt Group will ring Not Used Nothing will be done for the key Drop down menu 2 contains extension name ex Tom Mike or prompt Prompt 1...

Страница 113: ...s and upload to router or download to PC However the file format of the audio file must follow the rule stated on the web page Users can record the audio files through a phone set connected to the rou...

Страница 114: ...system Upload prompts to your router You can modify and customize the default system prompt by using the following steps Please follow the steps below to upload System Prompt to your router 1 Please...

Страница 115: ...6 user prompts G 729 file has been uploaded successfully will appear 5 Type quit to close FTP client 221 Goodbye Router will be reboot now will appear and the router will reboot Please follow the step...

Страница 116: ...type automatically Or you can adjust tone settings manually if you choose User Defined TOn1 TOff1 TOn2 and TOff2 mean the cadence of the tone pattern TOn1 and TOn2 represent sound on TOff1 and TOff2...

Страница 117: ...when User Defined is selected in the field of Region Select the caller ID type for setting Dial tone Ringing tone Busy tone and Congestion tone respectively 4 4 1 1 4 4 8 8 P Ph ho on ne e S Se et tt...

Страница 118: ...s Codec Select one option to be applied if FAX mode is configured as Bypass mode FAX Bypass Code Rate Select one option 20 or 40 to be applied if FAX mode is configured as Bypass mode The stability fo...

Страница 119: ...as the default for your VoIP calls The codec used for each call will be negotiated with the peer party before each session and so may not be your default choice The default codec is G 729A B it occupi...

Страница 120: ...up it will be processed by keeping forwarding to certain extension Please specify the waiting time and determine the way you want to process Busy then When this extension number is busy you can forwar...

Страница 121: ...ension settings You could give it another name by yourself 3 Click Save button the configuration will download automatically to your computer as a file named v3510pbx_SIPTrunk_Setting_2010XXXX for SIP...

Страница 122: ...l l R Re ec co or rd ds s This page displays call records of IP PBX such as failed call successful call no answer call date of the call and the duration of each call and so on Each page will display 5...

Страница 123: ...ks LANs such as host PCs under the management of a router since they do not need to be accessed by the public Hence the NIC has reserved certain addresses that will never be registered publicly These...

Страница 124: ...tw wo or rk k C Co on nn ne ec ct ti io on n b by y 3 3G G U US SB B M Mo od de em m For 3G mobile communication through Access Point is popular more and more VigorIPPBX 3510 adds the function of 3G n...

Страница 125: ...will be guided and switched to the normal communication port for proper operation Please configure WAN1 and WAN2 settings This webpage allows you to set general setup for WAN1 and WAN respectively Not...

Страница 126: ...ry If you choose Active on demand the Idle Timeout will be available for you to set for PPPoE and PPTP access modes in the Details Page of WAN Internet Access In addition there are three selections fo...

Страница 127: ...connections also varies slightly Index It shows the WAN modes that this router supports WAN1 is the default WAN interface for accessing into the Internet WAN2 is the optional WAN interface for access...

Страница 128: ...sed and all the settings that you adjusted in this page will be invalid ISP Access Setup Enter your allocated username password and authentication parameters according to the information provided by y...

Страница 129: ...ns IP address to you each time you connect to it and request In some case your ISP provides service to always assign you the same IP address whenever you request In this case you can fill in this IP a...

Страница 130: ...nu The following web page will be shown Access Control Click Enable for activating this function If you click Disable this function will be closed and all the settings that you adjusted in this page w...

Страница 131: ...he WAN interface please use WAN IP Alias You can set up to 8 public IP addresses other than the current one you are using Obtain an IP address automatically Click this button to obtain the IP address...

Страница 132: ...enable PPTP L2TP client mode Specify Gateway IP Address Specify the gateway IP address for DHCP server ISP Access Setup Username Type in the username provided by ISP in this field Password Type in the...

Страница 133: ...choose Internet Access from WAN menu Then select PPP mode for WAN2 The following web page will be shown PPP Client Mode Click Enable to activate this mode for WAN2 SIM PIN code Type PIN code of the S...

Страница 134: ...ic host a subnet of hosts and port range to be allocated in WAN1 or WAN2 interface The user can assign traffic category and force it to go to dedicate network interface based on the following web page...

Страница 135: ...nce policy Enable Check this box to enable this policy Protocol Use the drop down menu to choose a proper protocol for the WAN interface Binding WAN interface Choose the WAN interface WAN1 or WAN2 for...

Страница 136: ...and ruled by router The design of network structure is related to what type of public IP addresses coming from your ISP 4 4 3 3 1 1 B Ba as si ic cs s o of f L LA AN N The most generic function of Vi...

Страница 137: ...exchange routing information with neighboring routers using the RIP to accomplish IP routing This allows users to change the information of the router such as IP address and the routers will automatic...

Страница 138: ...s you the general settings for LAN Click LAN to open the LAN settings page and choose General Setup 1st IPAddress Type in private IP address for connecting to a local private network Default 192 168 1...

Страница 139: ...1 the starting IP address must be 220 135 240 2 or greater but smaller than 220 135 240 254 IP Pool Counts Enter the number of IP addresses in the pool The maximum is 10 For example if you type 3 and...

Страница 140: ...ounts Enter the maximum number of PCs that you want the DHCP server to assign IP addresses to The default is 50 and the maximum is 253 Gateway IPAddress Enter a value of the gateway IP address for the...

Страница 141: ...tion for your necessity 4 4 3 3 3 3 S St ta at ti ic c R Ro ou ut te e Go to LAN to open setting page and choose Static Route Index The number 1 to 10 under Index allows you to open next page to set u...

Страница 142: ...et as the RIP Protocol Control Then click the OK button Note There are two reasons that we have to apply RIP Protocol Control on 1st Subnet The first is that the LAN interface can exchange RIP packets...

Страница 143: ...destined to 211 100 88 0 will be forwarded to 192 168 1 3 4 Go to Diagnostics and choose Routing Table to verify current routing table 4 4 3 3 4 4 V VL LA AN N Virtual LAN function provides you a ver...

Страница 144: ...ample 1 If VLAN 0 is consisted of hosts linked to P1 and P2 and VLAN 1 is consisted of hosts linked to P3 and P4 2 After checking the box to enable VLAN function you will check the table according to...

Страница 145: ...to disable this function All the settings on this page will be invalid Strict Bind Click this radio button to block the connection of the IP MAC which is not listed in IP Bind List ARP Table This tab...

Страница 146: ...P address of the router select the available public port and then forward it At the same time the router shall list an entry in a table to memorize this address port mapping relationship When the publ...

Страница 147: ...ally located inside the LAN the network well protected by NAT of the router and identified by its private IP address port the goal of Port Redirection function is to forward all access request with pu...

Страница 148: ...field Simply type the required number on the first box The second one will be assigned automatically later Private IP Specify the private IP address of the internal host providing the service If you...

Страница 149: ...le Protocols 50 ESP and 51 AH do not travel on a fixed port Vigor router provides a facility DMZ Host that maps ALL unsolicited data on any protocol to a single host in the LAN Regular web surfing and...

Страница 150: ...Alias for PPPoE or Static or Dynamic IP mode you will find them in Aux WAN IP for your selection Enable Check to enable the DMZ Host function Private IP Enter the private IP address of the DMZ host o...

Страница 151: ...VigorIPPBX 3510 Series User s Guide 143 When you have selected one private IP from the above dialog the IP address will be shown on the following screen Click OK to save the setting...

Страница 152: ...the relative number for the particular entry that you want to offer service in a local host You should click the appropriate index number to edit or clear the corresponding entry Comment Specify the n...

Страница 153: ...e offered by the local host End Port Specify the ending port number of the service offered by the local host 4 4 4 4 4 4 A Ad dd dr re es ss s M Ma ap pp pi in ng g This page is used to map specific p...

Страница 154: ...ed fro this address mapping Status Display the status for the entry enable or disable Click the index number link to open the configuration page Enable Check to enable this entry Protocol Specify the...

Страница 155: ...he difference is that the port trigger has the dynamic characteristics It is more secure comparing to open ports In Open Ports setting once we setup the ports be opened all traffic can go through thes...

Страница 156: ...ger Protocol Select the protocol TCP UDP or TCP UDP for such trigger profile Trigger Port Type the port or port range for such trigger profile Incoming Protocol When the trigger packets received it is...

Страница 157: ...ou to use trial version or update the license of WCF directly without accessing into the server MyVigor located on http myvigor draytek com For using Web Content Filter Profile please refer to section...

Страница 158: ...ction please click Next 4 Setting confirmation page will be displayed as follows please click Next 5 Wait for a moment till the following page appears When such page appears you can enable or disable...

Страница 159: ...ivated according to your selection The valid time for the free trial of these services is one month Later if you need to extend the license valid time you can also use the Web Filter Activation again...

Страница 160: ...ection SPI tracks packets and denies unsolicited incoming data z Selectable Denial of Service DoS Distributed DoS DDoS attacks protection I IP P F Fi il lt te er rs s Depending on whether there is an...

Страница 161: ...ystem s resource while the vulnerability attacks will try to paralyze the system by offending the vulnerabilities of the protocol or operation system The DoS Defense function enables the Vigor router...

Страница 162: ...a start filter set for the Data Filter Action Profile Select Pass or Block for the packets that do not match with the filter rules APP Enforcement Select one of the APP Enforcement Profile settings c...

Страница 163: ...nformation Syslog For troubleshooting needs you can specify the filter log and or CSM log here by checking the box The log will be displayed on Draytek Syslog window Advance Setting Click Edit to open...

Страница 164: ...router will reject these fragmented packets to prevent attack unless you enable Accept large incoming fragmented UDP or ICMP Packets By checking this box you can play these kinds of on line games If s...

Страница 165: ...Comment Enter filter set comments description Maximum length is 23 character long Move Up Down Use Up or Down link to move the order of the filter rules Next Filter Set Set the link to the next filte...

Страница 166: ...ailable since Call Filter is only applied to outgoing traffic Source Destination IP Click Edit to access into the following dialog to choose the source destination IP or IP ranges To set the IP addres...

Страница 167: ...ports except the range defined here are available for this service type the port number greater than this value is available the port number less than this value is available for this profile Service...

Страница 168: ...e set at least one profile for choosing in CSM URL Content Filter web page first For troubleshooting needs you can specify to record information for URL Content Filter by checking the Log box It will...

Страница 169: ...n make the best utilization of network resources However Queue timeout is configured for TCP protocol only session timeout is configured for the data flow which matched with the firewall rule DrayTek...

Страница 170: ...or all the files transferred via IM P2P E Ex xa am mp pl le e As stated before all the traffic will be separated and arbitrated using on of two IP filters call filter or data filter You may preset 12...

Страница 171: ...s for a period defined in Timeout The goal for this is prevent the TCP SYN packets attempt to exhaust the limited resource of Vigor router By default the threshold and timeout values are set to 50 pac...

Страница 172: ...tion The Vigor router will ignore any broadcasting ICMP echo request Block trace router Check the box to enforce the Vigor router not to forward any trace route packets Block SYN fragment Check the bo...

Страница 173: ...r However the protocol types greater than 100 are reserved and undefined at this time Therefore the router should have ability to detect and reject this kind of packets Warning Messages We provide Sys...

Страница 174: ...them with objects and bind them with groups for using conveniently Later we can select that object group that can apply it For example all the IPs in the same department can be defined with an IP obj...

Страница 175: ...Type Determine the address type for the IP address Select Single Address if this object contains one IP address only Select Range Address if this object contains several IPs within a range Select Subn...

Страница 176: ...s User s Guide 168 5 5 3 3 2 2 I IP P G Gr ro ou up p This page allows you to bind several IP objects into one IP group Set to Factory Default Clear all profiles Click the number under Index column fo...

Страница 177: ...llowed Interface Choose WAN LAN or Any to display all the available IP objects with the specified interface Available IP Objects All the available IP objects with the specified interface chosen above...

Страница 178: ...to Factory Default Clear all profiles Click the number under Index column for settings in detail Name Type a name for this profile Protocol Specify the protocol s which this profile will apply to Sou...

Страница 179: ...nd last values are different it indicates that all the ports except the range defined here are available for this service type the port number greater than this value is available the port number less...

Страница 180: ...ype Object will be shown in this box Selected Service Type Objects Click button to add the selected IP objects in this box 5 5 3 3 5 5 K Ke ey yw wo or rd d O Ob bj je ec ct t You can set 200 keyword...

Страница 181: ...ormation will be watched out and be passed blocked based on the configuration on Firewall settings 5 5 3 3 6 6 K Ke ey yw wo or rd d G Gr ro ou up p This page allows you to bind several keyword object...

Страница 182: ...3 3 7 7 F Fi il le e E Ex xt te en ns si io on n O Ob bj je ec ct t This page allows you to set eight profiles which will be applied in CSM URL Content Filter All the files with the extension names sp...

Страница 183: ...security management A AP PP P E En nf fo or rc ce em me en nt t As the popularity of all kinds of instant messenger application arises communication cannot become much easier Nevertheless while some i...

Страница 184: ...g these types of files from websites you may risk bringing threat to your system For example an ActiveX control object is usually used for providing interactive web feature If malicious code hides ins...

Страница 185: ...forcement Profile will be applied in Default Rule of Firewall General Setup for filtering Set to Factory Default Clear all profiles Profile Display the number of the profile which allows you to click...

Страница 186: ...d Users will not access into related web pages or use the applications Pass All the items selected in this page will not be blocked User can access into related web pages or use the applications Selec...

Страница 187: ...VigorIPPBX 3510 Series User s Guide 179 Below shows the items which are categorized under P2P The items categorized under Protocol...

Страница 188: ...VigorIPPBX 3510 Series User s Guide 180 The items categorized under Misc...

Страница 189: ...e payload of TCP packets while legacy firewall inspects packets based on the fields of TCP IP headers only On the other hand Vigor router can prevent user from accidentally downloading malicious codes...

Страница 190: ...Web Feature will be inactive Either URL Access Control First When all the packages matching with the conditions specified in URL Access Control and Web Feature below such function can determine the pr...

Страница 191: ...u visited before Action This setting is available only when Either URL Access Control First or Either Web Feature First is selected Pass Allow accessing into the corresponding webpage with the keyword...

Страница 192: ...ct accessing into the corresponding webpage with the keywords listed on the box below If the web pages do not match with the specified feature set here it will be processed with reverse action Cookie...

Страница 193: ...vation to activate WCF service you can skip this section WCF adopts the mechanism developed and offered by certain service provider e g DrayTek No matter activating WCF feature or getting a new licens...

Страница 194: ...via WCF precisely however the processing rate is normal Such item can provide the most accurate URL matching L1 the router will check the URL that the user wants to access via WCF If the URL has been...

Страница 195: ...d in Categories will be changed according to the different service providers If you have and activate another web content filter license the items will be changed simultaneously All of the configurati...

Страница 196: ...ed on Group Object Selections If the web pages do not match with the specified feature set here they will be processed with the categories listed on the box below Block restrict accessing into the cor...

Страница 197: ...hey will occupy over resources which might result in important accesses impacted To solve the problem you can use limit session to limit the session procession for specified Hosts In the Bandwidth Man...

Страница 198: ...n the limitation list Index 1 15 in Schedule Setup You can type in four sets of time schedule for your request All the schedules can be set previously in Application Schedule web page and you can use...

Страница 199: ...se the number that you have set in that web page 5 5 5 5 3 3 Q Qu ua al li it ty y o of f S Se er rv vi ic ce e Deploying QoS Quality of Service management to guarantee that all applications receive t...

Страница 200: ...ward traffic from different domains Then each DS node in these domains will perform the priority treatment This is called per hop behavior PHB The definition of PHB includes Expedited Forwarding EF As...

Страница 201: ...quest O On nl li in ne e S St ta at ti is st ti ic cs s Display an online statistics for quality of service for your reference Click the Status link under Online Statistics to show the following scree...

Страница 202: ...the connection supports 1M of downstream and 256K upstream please set 256kbps for this box The default value is 10000kbps Note The rate of outbound inbound must be smaller than the real bandwidth to e...

Страница 203: ...can be adjusted for your necessity To add edit or delete the class rule please click the Edit link of that one After you click the Edit link you will see the following page Now you can define the name...

Страница 204: ...y the system Please assign one of the levels of the data for processing with QoS control Service Type It determines the service type of the data for processing with QoS control It can also be edited Y...

Страница 205: ...or the new service Port Configuration Click Single or Range as the Type If you select Range you have to type in the starting port number and the end porting number on the boxes below Port Number Type...

Страница 206: ...you host a web server FTP server or other server behind the router Before you use the Dynamic DNS feature you have to apply for free DDNS service to the DDNS service providers The router provides up t...

Страница 207: ...in Name block Enable Dynamic DNS Account Check this box to enable the current account If you did check the box you will see a check mark appeared on the Active column of the previous web page in step...

Страница 208: ...e button to set the Vigor router s clock to current time of your PC The clock will reset once if you power down or reset the router There is another way to set up time You can inquiry an NTP server a...

Страница 209: ...er up again during the schedule Idle Timeout Specify the duration or period for the schedule How often Specify how often the schedule will be applied Once The schedule will be applied just once Weekda...

Страница 210: ...uter to assist the remote dial in user and the RADIUS server in performing mutual authentication It enables centralized remote access authentication for network management Enable Check to enable RADIU...

Страница 211: ...N Messenger to allow full use of the voice video and messaging features Enable UPNP Service Accordingly you can enable either the Connection Control Service or Connection Status Service After setting...

Страница 212: ...unction on your network may incur some security threats You should consider carefully these risks before activating the UPnP function Some Microsoft operating systems have found out the UPnP weaknesse...

Страница 213: ...ast will be executed through the selected WAN port In addition such function is available in NAT mode Enable IGMP Snooping Check this box to enable this function The application of multicast will be e...

Страница 214: ...ble on the BIOS setting Wake by Two types provide for you to wake up the binded IP If you choose Wake by MAC Address you have to type the correct MAC address of the host in MAC Address boxes If you ch...

Страница 215: ...ween two computers across a shared or public network in a manner that emulates the properties of a point to point private link Below shows the menu items for VPN and Remote Access 5 5 7 7 1 1 R Re em...

Страница 216: ...transmit no MPPE encrypted packets Otherwise the MPPE encryption scheme will be used to encrypt the data Require MPPE 40 128bits Selecting this option will force the router to encrypt packets by usin...

Страница 217: ...g Authentication Header AH or Encapsulating Security Payload ESP for the following IKE exchange and mutual examination of the secure tunnel establishment There are two encapsulation methods used in IP...

Страница 218: ...ES 5 5 7 7 4 4 I IP PS Se ec c P Pe ee er r I Id de en nt ti it ty y To use digital certificate for peer authentication in either LAN to LAN connection or Remote User Dial In connection here you may e...

Страница 219: ...ure to accept the peer with matching value The field can be IP Address Domain or E mail Address The box under the Type will appear according to the type you select and ask you to fill in corresponding...

Страница 220: ...server through the built in RADIUS client function The following figure shows the summary table Set to Factory Default Click to clear all indexes Index Click the number below Index to access into the...

Страница 221: ...al in user to make a L2TP VPN connection through the Internet You can select to use L2TP alone or with IPSec Select from below None Do not apply the IPSec policy Accordingly the VPN connection employe...

Страница 222: ...IKE Authentication Method This group of fields is applicable for IPSec Tunnels and L2TP with IPSec Policy when you specify the IP address of the remote node The only exception is Digital Signature X...

Страница 223: ...simultaneously The following figure shows the summary table Set to Factory Default Click to clear all indexes Name Indicate the name of the LAN to LAN profile The symbol represents that the profile is...

Страница 224: ...nel for VPN connection If WAN1 fails the router will use another WAN interface instead WAN1 Only While connecting the router will use WAN1 as the only channel for VPN connection WAN2 First While conne...

Страница 225: ...smission of PING packets to a specified IP address PING to the IP Enter the IP address of the remote host that located at the other end of the VPN tunnel Enable PING to Keep Alive is used to handle ab...

Страница 226: ...ed Key Input 1 63 characters as pre shared key Digital Signature X 509 Select one predefined Profiles set in the VPN and Remote Access IPSec Peer Identity IPSec Security Method This group of fields is...

Страница 227: ...o find a match Three combinations are available for both modes We suggest you select the combination that covers the most algorithms IKE phase 1 key lifetime For security reason the lifetime of key sh...

Страница 228: ...be viewed as one pure L2TP connection Nice to Have Apply the IPSec policy first if it is applicable during negotiation Otherwise the dial in VPN connection becomes one pure L2TP connection Must Speci...

Страница 229: ...lgorithm from Data Encryption Standard DES Triple DES 3DES and AES My WAN IP This field is only applicable when you select ISDN PPTP or L2TP with or without IPSec policy above The default value is 0 0...

Страница 230: ...is VPN tunnel Be aware that this setting is available only for WAN interface is enabled 5 5 7 7 7 7 C Co on nn ne ec ct ti io on n M Ma an na ag ge em me en nt t You can find the summary table of all...

Страница 231: ...509 Any entity wants to utilize digital certificates should first request a certificate issued by a CA server It should also retrieve certificates of other trusted CA servers so it can authenticate th...

Страница 232: ...in Import Click this button to import a saved file as the certification information Refresh Click this button to refresh the information listed below View Click this button to view the detailed settin...

Страница 233: ...click IMPORT to open the following window Use Browse to find out the saved text file Then click Import The one you imported will be listed on the Trusted CA Certificate window Then click Import to use...

Страница 234: ...in USB storage disk with different applications After setting the configuration in USB Application you can type the IP address of the Vigor router and username password created in USB Application USB...

Страница 235: ...ctory names choose BIG5 Samba Service Settings Click Enable to invoke samba service via the router Access Mode LAN Only Users coming from internet cannot connect to the samba server of the router LAN...

Страница 236: ...to activate this profile account for FTP service or Samba User service Later the user can use the username specified in this page to login into FTP server Disable Click this button to disable such pr...

Страница 237: ...pes here he she can access into all of the disk folders and files in USB storage disk Note When write protect status for the USB storage disk is ON you cannot type any new folder name in this field On...

Страница 238: ...orage disk connected on Vigor router Refresh Click this icon to refresh files list Back Click this icon to return to the upper directory Create Click this icon to add a new folder Current Path Display...

Страница 239: ...displays the free space of the USB storage disk Click Refresh at any time to get new status for free capacity Index It displays the number of the client which connecting to FTP server Service It disp...

Страница 240: ...the capacity of syslog is full the system will stop recording Always record the new event only the newest events will be recorded by the system Time Display the time of the event occurred Message Disp...

Страница 241: ...Reboot System Firmware Upgrade Below shows the menu items for System Maintenance 5 5 1 10 0 1 1 S Sy ys st te em m S St ta at tu us s The System Status provides basic network settings of Vigor router...

Страница 242: ...nterface DHCP Server Display the current status of DHCP server of the LAN interface DNS Display the assigned IP address of the primary DNS WAN Link Status Display current connection status MAC Address...

Страница 243: ...S Auto Configuration Server you want to link Please refer to Auto Configuration Server user s manual for detailed information CPE Client Such information is useful for Auto Configuration Server Enable...

Страница 244: ...irm Password Type in the new password again When you click OK the login window will appear Please use the new password to access into the web configurator again 5 5 1 10 0 4 4 C Co on nf fi ig gu ur r...

Страница 245: ...ck the bottom right button e g Send in the above figure to perform the operation 5 5 1 10 0 5 5 S Sy ys sl lo og g M Ma ai il l A Al le er rt t SysLog function is provided for users to monitor router...

Страница 246: ...mail address specified in this page Please assign the mail address first and click this button to execute a test for verify the mail address is available or not SMTP Server The IP address of the SMTP...

Страница 247: ...239 3 From the Syslog screen select the router you want to monitor Be reminded that in Network Information select the network adapter used to connect to the router Otherwise you won t succeed in retr...

Страница 248: ...to use the browser time from the remote administrator PC host as router s system time Use Internet Time Select to inquire time information from Time Server on the Internet using assigned protocol Tim...

Страница 249: ...from the Internet There are several servers provided by the system to allow you managing the router from Internet Check the box es to specify Disable PING from the Internet Check the checkbox to rejec...

Страница 250: ...bo oo ot t S Sy ys st te em m The Web Configurator may be used to restart your router Click Reboot System from System Maintenance to open the following page Index 1 15 in Schedule Setup You can type...

Страница 251: ...the setting profiles for WCF refer to the section of Web Content Filter Profile it is the time to activate the mechanism for your computer Click System Maintenance Activation to open the following pag...

Страница 252: ...Status Display the mechanism represented with code number e g CT CF adopted by such router Start Date Display the starting date of WCF license activated successfully Expire Date Display the ending da...

Страница 253: ...Diagnostics 5 5 1 11 1 1 1 D Di ia al l o ou ut t T Tr ri ig gg ge er r Click Diagnostics and click Dial out Trigger to open the web page The internet connection e g ISDN PPPoE PPPoA etc is triggered...

Страница 254: ...to reload the page 5 5 1 11 1 3 3 A AR RP P C Ca ac ch he e T Ta ab bl le e Click Diagnostics and click ARP Cache Table to view the content of the ARP Address Resolution Protocol cache held in the rou...

Страница 255: ...ess assigned by this router for specified PC MAC Address It displays the MAC address for the specified PC that DHCP assigned IP address for it Leased Time It displays the leased time of the specified...

Страница 256: ...d click Ping Diagnosis to pen the web page Ping through Use the drop down list to choose the WAN interface that you want to ping through or choose Unspecified to be determined by the router automatica...

Страница 257: ...Flow Monitor to open the web page You can click IP Address TX rate RX rate or Session link for arranging the data display Enable Data Flow Monitor Check this box to enable this function Refresh Second...

Страница 258: ...five minutes The remaining time will be shown on the session column Current Peak Speed Current means current transmission rate and receiving rate for WAN interface Peak means the highest peak value d...

Страница 259: ...ph at any time 5 5 1 11 1 9 9 T Tr ra ac ce e R Ro ou ut te e Click Diagnostics and click Trace Route to open the web page This page allows you to trace the routes from router to the host Simply type...

Страница 260: ...es the IP address of the host Run Click this button to start route tracing work Clear Click this link to remove the result on the window 5 5 1 12 2 S Su up pp po or rt t A Ar re ea a When you click th...

Страница 261: ...are OK or not z Backing to factory default setting if necessary If all above stages are done and the router still cannot run normally it is the time for you to contact your dealer for advanced help 6...

Страница 262: ...After trying the above section if the link is stilled failed please do the steps listed below to make sure the network connection settings is OK F Fo or r W Wi in nd do ow ws s The example is based on...

Страница 263: ...omatically and Obtain DNS server address automatically F Fo or r M Ma ac c O OS S 1 Double click on the current used Mac OS on the desktop 2 Open the Application folder and get into Network 3 On the N...

Страница 264: ...router correctly F Fo or r W Wi in nd do ow ws s 1 Open the Command Prompt window from Start menu Run 2 Type command for Windows 95 98 ME or cmd for Windows NT 2000 XP Vista The DOS command dialog wil...

Страница 265: ...t ti in ng gs s a ar re e O OK K o or r N No ot t Open Internet Access page and then check whether the ISP settings are set correctly F Fo or r P PP PP Po oE E U Us se er rs s 1 Check if the Enable op...

Страница 266: ...ally for Dynamic IP setting is selected Or check if IP address Subnet Mask and Gateway are entered with correct values for Static IP setting that you got from your ISP F Fo or r P PP PT TP P L L2 2T T...

Страница 267: ...on the web page The following screen will appear Choose Using factory default configuration and click OK After few seconds the router will return all the settings to the factory settings H Ha ar rd d...

Страница 268: ...VigorIPPBX 3510 Series User s Guide 260...

Страница 269: ...nd di ix x H Ha ar rd dw wa ar re e S Sp pe ec ci if fi ic ca at ti io on ns s Operating 0 C 45 C Temperature Storage 25 C 70 C Humidity 10 90 non condensing Max Power Consumption 50 Watt Max Dimensi...

Отзывы: