background image


VigorAP 800 User’s Guide


10

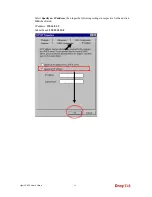
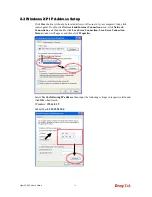
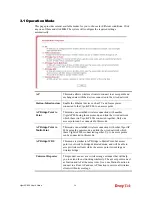
Select 

Specify an IP address

, then input the following settings in respective field and click 

OK

 when finish. 

IP address: 

192.168.1.9 

Subnet Mask: 

255.255.255.0


Содержание VigorAP 800

Страница 1: ...VigorAP 800 User s Guide i ...

Страница 2: ...VigorAP 800 User s Guide ii ...

Страница 3: ...gorAP 800 User s Guide iii V Vi ig go or rA AP P 8 80 00 0 W Wi ir re el le es ss s A Ac cc ce es ss s P Po oi in nt t U Us se er r s s G Gu ui id de e Version 1 1 Firmware Version V1 0 2 Date 21 03 2011 ...

Страница 4: ... on conservation of the environment Warranty We warrant to the original end user purchaser that the modem will be free from any defects in workmanship or materials for a period of one 1 year from the date of purchase from the dealer Please keep your purchase receipt in a safe place as it serves as proof of date of purchase During the warranty period and upon proof of purchase should the product ha...

Страница 5: ...ular installation If this equipment does cause harmful interference to radio or television reception which can be determined by turning the equipment off and on the user is encouraged to try to correct the interference by one of the following measures z Reorient or relocate the receiving antenna z Increase the separation between the equipment and receiver z Connect the equipment into an outlet on ...

Страница 6: ...VigorAP 800 User s Guide vi ...

Страница 7: ...IP Address Setup 13 2 5 Accessing to Web User Interface 14 2 6 Changing Password 15 2 7 Quick Start Wizard 16 2 7 1 Configuring 2 4G Wireless Settings General 16 2 7 2 Configuring 2 4G Wireless Settings based on the Operation Mode 17 2 7 3 Configuring 5G Wireless Settings 20 2 7 4 Finishing the Wireless Settings Wizard 21 2 8 Online Status 22 WebConfiguration 23 3 1 Operation Mode 24 3 2 LAN 25 3 ...

Страница 8: ...r Universal Repeater Mode 65 3 8 1 General Setup 65 3 8 2 Security 69 3 8 3 Access Control 73 3 8 4 WPS 74 3 8 5 AP Discovery 75 3 8 6 Universal Repeater 76 3 8 7 Station List 78 3 9 Wireless LAN 5G Settings for AP Mode 79 3 9 1 General Setup 79 3 9 2 Security 80 3 9 3 Access Control 83 3 9 4 AP Discovery 84 3 9 5 Station List 85 3 10 RADIUS Server 87 3 11 System Maintenance 88 3 11 1 System Statu...

Страница 9: ...king If the Hardware Status Is OK or Not 103 5 2 Checking If the Network Connection Settings on Your Computer Is OK or Not 104 5 3 Pinging the Modem from Your Computer 106 5 4 Backing to Factory Default Setting If Necessary 107 5 5 Contacting Your Dealer 108 ...

Страница 10: ......

Страница 11: ...ich are compatible with 802 11n can connect to existing wired Ethernet network via this VigorAP 800 at the speed of 300Mbps Easy install procedures allows any computer users to setup a network environment in very short time within minutes even inexperienced users Just follow the instructions given in this user manual you can complete the setup procedure and release the power of this access point a...

Страница 12: ...disconnected LAN B Blinking Data is transmitting sending receiving On A normal connection is through its corresponding port LAN A1 A4 Off LAN is disconnected On Wireless function is ready Off Wireless function is not ready WLAN Green LED on WLAN button Blinking Data is transmitting sending receiving Off The WPS is off Blinking Orange Blink with 1 second cycle for 2 minutes WPS is enabled and waiti...

Страница 13: ...PoE A4 Connecter for xDSL Cable modem or router USB Connector for future use Restore the default settings Usage Turn on VigorAP 800 Press the button and keep for more than 10 seconds Then VigorAP 800 will restart with the factory default configuration ON OFF Power switch PWR Connecter for a power adapter ...

Страница 14: ... to ADSL modem router or switch hub in your network through the LAN A port of the access point by Ethernet cable 2 Connect a computer to other available LAN A port Make sure the subnet IP address of the PC is the same as VigorAP 800 management IP e g 192 168 1 X 3 Connect the A C power adapter to the wall socket and then connect it to the PWR connector of the access point 4 Power on VigorAP 800 5 ...

Страница 15: ...e LAN A port of the access point by Ethernet cable 2 Connect the A C power adapter to the wall socket and then connect it to the PWR connector of the access point 3 Power on VigorAP 800 4 Check all LEDs on the front panel ACT LED should be steadily on LAN LEDs should be on if the access point is correctly connected to the ADSL modem or router For the detailed information of LED status please refer...

Страница 16: ...orAP 800 to ADSL modem or router via wireless network 2 Connect the A C power adapter to the wall socket and then connect it to the PWR connector of the access point 3 Power on VigorAP 800 4 Check all LEDs on the front panel ACT LED should be steadily on LAN LEDs should be on if VigorAP 800 is correctly connected to the ADSL modem router or switch hub For the detailed information of LED status ple...

Страница 17: ...supply 1 Connect VigorAP 800 to a switch in your network through the LAN A1 port of the access point by Ethernet cable 2 Connect a computer to LAN A2 A4 Make sure the subnet IP address of the PC is the same as VigorAP 800 management IP e g 192 168 1 X 3 Power on VigorAP 800 4 Check all LEDs on the front panel ACT LED should be steadily on LAN LEDs should be on if the access point is correctly conn...

Страница 18: ...VigorAP 800 User s Guide 8 This page is left blank ...

Страница 19: ...ons to configure your computer to use dynamic IP address For the default IP address of this AP is set 192 168 1 2 we recommend you to use 192 168 1 X except 2 in the field of IP address on this section for your computer If the operating system of your computer is Windows 95 98 Me please go to section 2 1 Windows 2000 please go to section 2 2 Windows XP please go to section 2 3 Windows Vista please...

Страница 20: ...VigorAP 800 User s Guide 10 Select Specify an IP address then input the following settings in respective field and click OK when finish IP address 192 168 1 9 Subnet Mask 255 255 255 0 ...

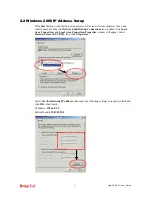
Страница 21: ...puter then click control panel Double click Network and Dial up Connections icon double click Local Area Connection and Local Area Connection Properties window will appear Select Internet Protocol TCP IP then click Properties Select Use the following IP address then input the following settings in respective field and click OK when finish IP address 192 168 1 9 Subnet Mask 255 255 255 0 ...

Страница 22: ...er then click control panel Double click Network and Internet Connections icon click Network Connections and then double click Local Area Connection Local Area Connection Status window will appear and then click Properties Select Use the following IP address then input the following settings in respective field and click OK when finish IP address 192 168 1 9 Subnet Mask 255 255 255 0 ...

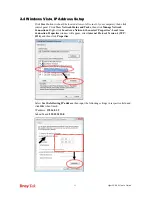
Страница 23: ...anel Click View Network Status and Tasks then click Manage Network Connections Right click Local Area Netwrok then select Properties Local Area Connection Properties window will appear select Internet Protocol Version 4 TCP IPv4 and then click Properties Select Use the following IP address then input the following settings in respective field and click OK when finish IP address 192 168 1 9 Subnet ...

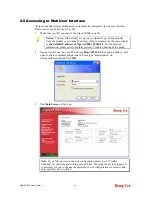
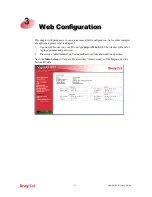
Страница 24: ...to be the same subnet as the default IP address of VigorAP 800 192 168 1 1 For the detailed information please refer to the later section Trouble Shooting of the guide 2 Open a web browser on your PC and type http 192 168 1 2 A pop up window will open to ask for username and password Pease type admin admin on Username Password and click OK 3 The Main Screen will pop up Note If you fail to access t...

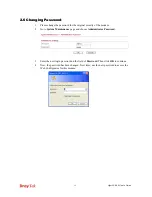
Страница 25: ...password for the original security of the modem 2 Go to System Maintenance page and choose Administrator Password 3 Enter the new login password on the field of Password Then click OK to continue 4 Now the password has been changed Next time use the new password to access the Web Configurator for this modem ...

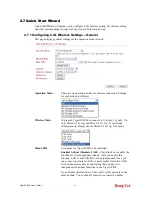
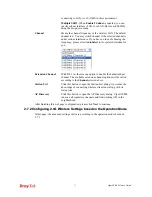
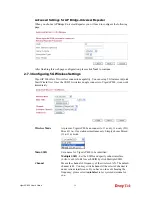
Страница 26: ...ings for each mode are different Wireless Mode At present VigorAP 800 can connect to 11b only 11g only 11n only Mixed 11b 11g and Mixed 11b 11g 11n stations simultaneously Simply choose Mixed 11b 11g 11n mode Main SSID Set a name for VigorAP 800 to be identified Enable 2 Subnet Simulate 2 APs Check the box to enable the function for two independent subnets Once you enable this function LAN A and L...

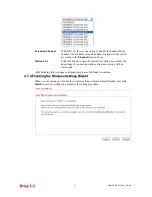
Страница 27: ...r channel The available extension channel options will be varied according to the Channel selected above Station List Click this button to open the Station List dialog It provides the knowledge of connecting wireless clients now along with its status code AP Discovery Click this button to open the AP Discovery dialog VigorAP 800 can scan all regulatory channels and find working APs in the neighbor...

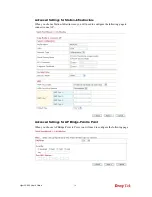
Страница 28: ...u uc ct tu ur re e When you choose Station Infrastructure you will need to configure the following page to connect to one AP A Ad dv va an nc ce ed d S Se et tt ti in ng gs s f fo or r A AP P B Br ri id dg ge e P Po oi in nt t t to o P Po oi in nt t When you choose AP Bridge Point to Point you will need to configure the following page ...

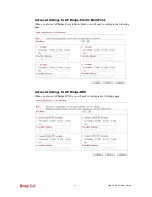
Страница 29: ...Po oi in nt t t to o M Mu ul lt ti i P Po oi in nt t When you choose AP Bridge Point to Multi Point you will need to configure the following page A Ad dv va an nc ce ed d S Se et tt ti in ng gs s f fo or r A AP P B Br ri id dg ge e W WD DS S When you choose AP Bridge WDS you will need to configure the following page ...

Страница 30: ...setup 5G features in Quick Start Wizard first Once the USB 5G wireless dongle connects to VigorAP 800 it can work immediately Wireless Mode At present VigorAP 800 can connect to 11a only 11n only 5G Mixed 11a 11n stations simultaneously Simply choose Mixed 11a 11n mode Main SSID Set a name for VigorAP 800 to be identified Multiple SSID Set the SSIDs and specify subnet interface LAN A or LAN B for ...

Страница 31: ... Station List dialog It provides the knowledge of connecting wireless clients now along with its status code After finishing this web page configuration please click Next to continue 2 2 7 7 4 4 F Fi in ni is sh hi in ng g t th he e W Wi ir re el le es ss s S Se et tt ti in ng gs s W Wi iz za ar rd d When you see this page it means the wireless setting wizard is almost finished Just click Finish t...

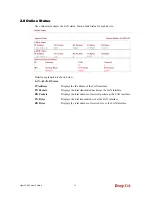
Страница 32: ...shown below LAN A LAN B Status IP Address Displays the IP address of the LAN interface TX Packets Displays the total transmitted packets at the LAN interface RX Packets Displays the total number of received packets at the LAN interface TX Bytes Displays the total transmitted size at the LAN interface RX Bytes Displays the total number of received size at the LAN interface ...

Страница 33: ...As for other examples of application please refer to chapter 5 1 Open a web browser on your PC and type http 192 168 1 2 The window will ask for typing username and password 2 Please type admin admin on Username Password for administration operation Now the Main Screen will appear Be aware that Admin mode will be displayed on the bottom left side ...

Страница 34: ...h these two VigorAP 800s connected together Only one access point can be connected in this mode AP Bridge Point to Multi Point This mode can establish wireless connection with other VigorAP 800s using the same mode and link the wired network which these VigorAP 800s connected together Up to 4 access points can be connected in this mode AP Bridge WDS This mode is similar to AP Bridge to Multi Point...

Страница 35: ...reen is obtained by choosing AP as the operation mode IPAddress Type in private IP address for connecting to a local private network Default 192 168 1 2 Subnet Mask Type in an address code that determines the size of the network Default 255 255 255 0 24 DHCP Server Configuration DHCP stands for Dynamic Host Configuration Protocol DHCP server can automatically dispatch related IP settings to any lo...

Страница 36: ...thly enjoy stream music and video Note The actual data throughput will vary according to the network conditions and environmental factors including volume of network traffic network overhead and building materials In an Infrastructure Mode of wireless network VigorAP 800 plays a role as an Access Point AP connecting to lots of wireless clients or Stations STA All the STAs will share the same Inter...

Страница 37: ...reless client and WPS will connect for client and VigorAP 800 automatically Note Such function is available for the wireless station with WPS supported There are two methods to do network connection through WPS between AP and Stations pressing the Start PBC button or using PIN Code On the side of VigorAP 800 series which served as an AP press WPS button once on the front panel of VigorAP 800 or cl...

Страница 38: ...VigorAP 800 User s Guide 28 ...

Страница 39: ...ude General Setup Security Access Control WPS AP Discovery and Station List Note The Wireless LAN settings will be changed according to the Operation Mode selected in section 3 1 3 3 4 4 1 1 G Ge en ne er ra al l S Se et tu up p By clicking the General Setup a new web page will appear so that you could configure the SSID and the wireless channel Please refer to the following figure for more inform...

Страница 40: ...out VigorAP 800 while site surveying The system allows you to set three sets of SSID for different usage SSID Set a name for VigorAP 800 to be identified Default settings are DrayTek LAN A and DrayTek LAN B When Enable 2 Subnet is enabled you can specify subnet interface LAN A or LAN B for each SSID by using the drop down menu Subnet Choose LAN A or LAN B for each SSID If you choose LAN A the wire...

Страница 41: ...el selected above Configure the extension channel you want Rate If you choose 11g Only 11b Only or 11n Only such feature will be available for you to set data transmission rate Packet OVERDRIVE This feature can enhance the performance in data transmission about 40 more by checking Tx Burst It is active only when both sides of Access Point and Station in wireless client invoke this function at the ...

Страница 42: ...ly one antenna attached please choose 1T1R Tx Power The default setting is the maximum 100 Lower down the value may degrade range and throughput of wireless 3 3 4 4 2 2 S Se ec cu ur ri it ty y This page allows you to set security with different modes for SSID 1 2 3 and 4 respectively After configuring the correct settings please click OK to save and invoke it By clicking the Security Settings a n...

Страница 43: ...h either PSK Pre Shared Key entered manually in this field below or automatically negotiated via 802 1x authentication WEP 802 1x The built in RADIUS client feature enables VigorAP 800 to assist the remote dial in user or a wireless station and the RADIUS server in performing mutual authentication It enables centralized remote access authentication for network management The WPA encrypts each fram...

Страница 44: ... to greater security but lower performance Default is 3600 seconds Set 0 to disable re key Such feature is available for WPA2 802 1 WPA 802 1x WPA PSK or WPA2 PSK or Mixed WPA WPA2 PSK mode PMK Cache Period Set the expire time of WPA2 PMK Pairwise master key cache PMK Cache manages the list from the BSSIDs in the associated SSID with which it has pre authenticated Such feature is available for WPA...

Страница 45: ...ng The default value is 1812 based on RFC 2138 Shared Secret The external RADIUS server and client share a secret that is used to authenticate the messages sent between them Both sides must be configured to use the same shared secret Session Timeout Set the maximum time of service provided before re authentication Set to zero to perform another authentication immediately after the first authentica...

Страница 46: ... WLAN stations from LAN based on the MAC Address list MAC Address Filter Display all MAC addresses that are edited before Client s MAC Address Manually enter the MAC address of wireless client Add Add a new MAC address into the list Delete Delete the selected MAC address in the list Edit Edit the selected MAC address in the list Cancel Give up the access control set up OK Click it to save the acce...

Страница 47: ... AP PIN The number displayed here is used for remote client entering the registrar s PIN code in remote station to make a network connection Configure via Push Button Click Start PBC to invoke Push Button style WPS setup procedure VigorAP 800 will wait for WPS requests from wireless clients about two minutes The WPS LED on VigorAP 800 will blink fast when WPS is in progress It will return to norma...

Страница 48: ...e click Scan to discover all the connected APs SSID Display the SSID of the AP scanned by VigorAP 800 BSSID Display the MAC address of the AP scanned by VigorAP 800 RSSI Display the signal strength of the access point RSSI is the abbreviation of Receive Signal Strength Indication Channel Display the wireless channel used for the AP that is scanned by VigorAP 800 Encryption Display the encryption m...

Страница 49: ...lient uses for connection with such AP Encrypt Display the encryption mode used by the wireless client Refresh Click this button to refresh the status of station list Add to Access Control Client s MAC Address For additional security of wireless access the Access Control facility allows you to restrict the network access right by controlling the wireless LAN MAC address of client Only the valid MA...

Страница 50: ...3 3 5 5 1 1 G Ge en ne er ra al l S Se et tu up p By clicking the General Setup a new web page will appear so that you could configure the wireless profile and choose proper mode Please refer to the following figure for more information Enable Wireless LAN Check the box to enable wireless function Mode At present VigorAP 800 can connect to 11 b only 11 g only 11 n only Mixed 11b 11g Mixed 11b 11g ...

Страница 51: ...ss client invoke this function at the same time That is the wireless client must support this feature and invoke the function too Note Vigor N61 wireless adapter supports this function Therefore you can use and install it into your PC for matching with Packet OVERDRIVE refer to the following picture of Vigor N61 wireless utility window choose Enable for TxBURST on the tab of Option Mac Clone Check...

Страница 52: ...or AP router 802 11 Ad Hoc An ad hoc network is a network where wireless stations can communicate with peer to peer P2P Power Saving Mode Choose the power saving mode for such device CAM Choose this item if it is not necessary to perform power saving job Power Saving Mode Choose this item to get into the power saving status when there is no data passing through the access point RTS Threshold Set t...

Страница 53: ... authentication WEP encryption will be used for authentication If you choose WPA Personal or WPA2 Personal the corresponding WPA settings will be listed as follows You have to choose the WPA algorithms and type the pass phrase for such security mode WPA Algorithms Choose Temporal Key Integrity Protocol TKIP or AES for data encryption Pass Phrase Please type 8 to 63 alphanumerical characters here W...

Страница 54: ...EP key characters here the number of characters must be the same as the number displayed at Key Format field You can use any alphanumerical characters 0 9 a z and A Z if you select ASCII key format and if you select Hex as key format you can use characters 0 9 a f and A F You must enter at least one encryption key here If you entered multiple WEP keys they should not be the same with each other De...

Страница 55: ...oint Encryption Display the encryption setting of the access points If you have selected the access point with security setting you have to go to 2 7 Wireless Security to set the same security with the access point you want to associate Authentication Display the authentication type of the access point Connect Connect to the wireless AP that you choose Scan Search the stations connected to such ac...

Страница 56: ...o use PIN code you have to provide the PIN code of the wireless client you wish to connect to this access point and then switch the wireless client to WPS mode Note WPS function of VigorAP800 will not work for those wireless AP clients do not support WPS To use WPS function to set encrypted connection between VigorAP800 and WPS enabled wireless AP please open Wireless LAN WPS The following informa...

Страница 57: ...entification Number Code 8 digit numbers into Registrar When the wireless station is Enrollee the users can use Renew PIN to re generate a new PIN code Renew PIN Click this button to re generate a new PIN code Note When you re using PBC type WPS setup you must press PBC button hardware or software of wireless client within 2 minutes If you didn t press PBC button of wireless client within this tim...

Страница 58: ...covery and WDS AP Status AP Bridge Point to Point allows VigorAP 800 to connect to another VigorAP 800 which uses the same mode All wired Ethernet clients of both VigorAP 800s will be connected together Point to Multi Point Mode allows AP 800 to connect up to four AP 800s which uses the same mode All wired Ethernet clients of every VigorAP 800 will be connected together 3 3 6 6 1 1 G Ge en ne er r...

Страница 59: ...der serious interference If you have no idea of choosing the frequency please select AutoSelect to let system determine for you Extension Channel With 802 11n there is one option to double the bandwidth per channel The available extension channel options will be varied according to the Channel selected above Rate If you choose 11g Only 11b Only or 11n Only such feature will be available for you to...

Страница 60: ...s the wireless client must support this feature and invoke the function too Note Vigor N61 wireless adapter supports this function Therefore you can use and install it into your PC for matching with Packet OVERDRIVE refer to the following picture of Vigor N61 wireless utility window choose Enable for TxBURST on the tab of Option WMM Capable To apply WMM parameters for wireless data transmission pl...

Страница 61: ...d by VigorAP 800 RSSI Display the signal strength of the access point RSSI is the abbreviation of Receive Signal Strength Indication Channel Display the wireless channel used for the AP that is scanned by VigorAP 800 Encryption Display the encryption mode for the scanned AP Authentication Display the authentication type that the scanned AP applied Scan It is used to discover all the connected AP T...

Страница 62: ...ings page 3 3 6 6 3 3 W WD DS S A AP P S St ta at tu us s VigorAP 800 can display the status such as MAC address physical mode power save and bandwidth for the working AP connected with WDS Click Refresh to get the newest information ...

Страница 63: ...DS as the operation mode the Wireless LAN menu items will include General Setup Security Access Control WPS AP Discovery and Station List 3 3 7 7 1 1 G Ge en ne er ra al l S Se et tu up p By clicking the General Setup a new web page will appear so that you could configure the Phy mode security Tx Burst and choose proper mode Please refer to the following figure for more information ...

Страница 64: ... Enable Wireless LAN Check the box to enable wireless function Mode At present VigorAP 800 can connect to 11b only 11g only 11n only Mixed 11b 11g and Mixed 11b 11g 11n stations simultaneously Simply choose Mixed 11b 11g 11n mode ...

Страница 65: ...en Enable 2 Subnet is enabled you can specify subnet interface LAN A or LAN B for each SSID by using the drop down menu Subnet Choose LAN A or LAN B for each SSID Isolate LAN Check this box to make the wireless clients stations with the same SSID not accessing for wired PC in LAN Isolate Member Check this box to make the wireless clients stations with the same SSID not accessing for each other VLA...

Страница 66: ... Security Select WEP TKIP or AES as the encryption algorithm Peer Mac Address Four peer MAC addresses are allowed to be entered in this page at one time Packet OVERDRIVE This feature can enhance the performance in data transmission about 40 more by checking Tx Burst It is active only when both sides of Access Point and Station in wireless client invoke this function at the same time That is the wi...

Страница 67: ...he Enable radio button Antenna VigorAP 800 can be attached with two antennas to have good data transmission via wireless connection However if you have only one antenna attached please choose 1T1R Tx Power The default setting is the maximum 100 Lower down the value may degrade range and throughput of wireless ...

Страница 68: ...able The encryption mechanism is turned off WEP Accepts only WEP clients and the encryption key should be entered in WEP Key WPA PSK or WPA2 PSK or Mixed WPA WPA2 PSK Accepts only WPA clients and the encryption key should be entered in PSK The WPA encrypts each frame transmitted from the radio using the key which either PSK Pre Shared Key entered manually in this field below or automatically negot...

Страница 69: ...al network operations use a different encryption key that is randomly generated This randomly generated key that is periodically replaced Enter the renewal security time seconds in the column Smaller interval leads to greater security but lower performance Default is 3600 seconds Set 0 to disable re key Such feature is available for WPA2 802 1 WPA 802 1x WPA PSK or WPA2 PSK or Mixed WPA WPA2 PSK m...

Страница 70: ...e UDP port number that the external RADIUS server is using The default value is 1812 based on RFC 2138 Shared Secret The external RADIUS server and client share a secret that is used to authenticate the messages sent between them Both sides must be configured to use the same shared secret Session Timeout Set the maximum time of service provided before re authentication Set to zero to perform anoth...

Страница 71: ... WLAN stations from LAN based on the MAC Address list MAC Address Filter Display all MAC addresses that are edited before Client s MAC Address Manually enter the MAC address of wireless client Add Add a new MAC address into the list Delete Delete the selected MAC address in the list Edit Edit the selected MAC address in the list Cancel Give up the access control set up OK Click it to save the acce...

Страница 72: ...emote station to make a network connection Configure via Push Button Click Start PBC to make a WPS connection within 2 minutes Configure via Client PinCode When using PinCode method it is required to enter PIN Code Personal Identification Number Code 8 digit numbers into Registrar 3 3 7 7 5 5 A AP P D Di is sc co ov ve er ry y VigorAP 800 can scan all regulatory channels and find working APs in th...

Страница 73: ...ay the authentication type that the scanned AP applied Scan It is used to discover all the connected AP The results will be shown on the box above this button Statistics It displays the statistics for the channels used by APs AP s MAC Address If you want the found AP applying the WDS settings please type in the AP s MAC address AP s SSID To specify an AP to be applied with WDS settings you can spe...

Страница 74: ...t SSID Display the SSID that the wireless client connects to Auth Display the authentication that the wireless client uses for connection with such AP Encrypt Display the encryption mode used by the wireless client Refresh Click this button to refresh the status of station list Add to Access Control Client s MAC Address For additional security of wireless access the Access Control facility allows ...

Страница 75: ...se Universal Repeater as the operation mode the Wireless LAN menu items will include General Setup Security WPS AP Discovery Universal Repeater and Station List 3 3 8 8 1 1 G Ge en ne er ra al l S Se et tu up p By clicking the General Setup a new web page will appear so that you could configure the SSID and the wireless channel Please refer to the following figure for more information ...

Страница 76: ...ed 11b 11g 11n stations simultaneously Simply choose Mixed 11b 11g 11n mode Enable 2 Subnet Simulate 2 APs Check the box to enable the function for two independent subnets Once you enable this function LAN A and LAN B would be independent Next you can connect one router in LAN A and another router in LAN B Such mechanism can make you feeling that you have two independent AP subnet ...

Страница 77: ...ly communicate with LAN A Isolate LAN Check this box to make the wireless clients stations with the same SSID not accessing for wired PC in LAN Note If Isolate LAN is checked do not type any value for VLAN ID Isolate Member Check this box to make the wireless clients stations with the same SSID not accessing for each other VLAN ID Type the value for such SSID Packets transferred from such SSID to ...

Страница 78: ...s feature can enhance the performance in data transmission about 40 more by checking Tx Burst It is active only when both sides of Access Point and Station in wireless client invoke this function at the same time That is the wireless client must support this feature and invoke the function too Note Vigor N61 wireless adapter supports this function Therefore you can use and install it into your PC ...

Страница 79: ...se choose 1T1R Tx Power The default setting is the maximum 100 Lower down the value may degrade range and throughput of wireless 3 3 8 8 2 2 S Se ec cu ur ri it ty y This page allows you to set security with different modes for SSID 1 2 3 and 4 respectively After configuring the correct settings please click OK to save and invoke it By clicking the Security Settings a new web page will appear so t...

Страница 80: ...rypts each frame transmitted from the radio using the key which either PSK Pre Shared Key entered manually in this field below or automatically negotiated via 802 1x authentication WPA2 802 1x The WPA encrypts each frame transmitted from the radio using the key which either PSK Pre Shared Key entered manually in this field below or automatically negotiated via 802 1x authentication WPAAlgorithms S...

Страница 81: ...ected at a time The format of WEP Key is restricted to 5 ASCII characters or 10 hexadecimal values in 64 bit encryption level or restricted to 13 ASCII characters or 26 hexadecimal values in 128 bit encryption level The allowed content is the ASCII characters from 33 to 126 except and Such feature is available for WEP mode 802 1x WEP Disable Disable the WEP Encryption Data sent to the AP will not ...

Страница 82: ...red Secret The external RADIUS server and client share a secret that is used to authenticate the messages sent between them Both sides must be configured to use the same shared secret Session Timeout Set the maximum time of service provided before re authentication Set to zero to perform another authentication immediately after the first authentication has successfully completed The unit is second...

Страница 83: ...or allow Policy Select to enable any one of the following policy or disable the policy Choose Activate MAC address filter to type in the MAC addresses for other clients in the network manually Choose Blocked WLAN from LAN will separate all the WLAN stations from LAN based on the MAC Address list MAC Address Filter Display all MAC addresses that are edited before Client s MAC Address Manually enter...

Страница 84: ...PIN The number displayed here is used for remote client entering the registrar s PIN code in remote station to make a network connection Configure via Push Button Click Start PBC to invoke Push Button style WPS setup procedure VigorAP 800 will wait for WPS requests from wireless clients about two minutes The WPS LED on t VigorAP 800 will blink fast when WPS is in progress It will return to normal ...

Страница 85: ... MAC address of the AP scanned by VigorAP 800 RSSI Display the signal strength of the access point RSSI is the abbreviation of Receive Signal Strength Indication Channel Display the wireless channel used for the AP that is scanned by VigorAP 800 Encryption Display the encryption mode for the scanned AP Authentication Display the authentication type that the scanned AP applied Scan It is used to di...

Страница 86: ...dulated and amplified again The output power of this mode is the same as that of WDS and normal AP mode SSID Set the name of access point that VigorAP800 wants to connect to MAC Address Optional Type the MAC address of access point that VigorAP800 wants to connect to Channel Means the channel of frequency of the wireless LAN The default channel is 6 You may switch channel if the selected channel i...

Страница 87: ... format of WEP Key is restricted to 5 ASCII characters or 10 hexadecimal values in 64 bit encryption level or restricted to 13 ASCII characters or 26 hexadecimal values in 128 bit encryption level The allowed content is the ASCII characters from 33 to 126 except and W WP PA A P PS SK K M Mo od de e a an nd d W WP PA A2 2 P PS SK K M Mo od de e Encryption Type Select TKIP or AES as the algorithm fo...

Страница 88: ...lient uses for connection with such AP Encrypt Display the encryption mode used by the wireless client Refresh Click this button to refresh the status of station list Add to Access Control Client s MAC Address For additional security of wireless access the Access Control facility allows you to restrict the network access right by controlling the wireless LAN MAC address of client Only the valid MA...

Страница 89: ...r ra al l S Se et tu up p By clicking the General Setup a new web page will appear so that you could configure the general settings for wireless connection such as specifying SSID selecting the wireless channel isolate LAN connection and so on Enable Wireless LAN Check the box to enable wireless function Mode At present VigorAP 800 can be connected by 11a only 11n only 5G Mixed 11a 11n stations si...

Страница 90: ...ember Check this box to make the wireless clients stations with the same SSID not accessing for each other VLAN ID Type the value for such SSID Packets transferred from such SSID to LAN will be tagged with the number If your network uses VLANs you can assign the SSID to a VLAN on your network Client devices that associate using the SSID are grouped into this VLAN The VLAN ID range is from 3 to 409...

Страница 91: ...h either PSK Pre Shared Key entered manually in this field below or automatically negotiated via 802 1x authentication WEP 802 1x The built in RADIUS client feature enables VigorAP 800 to assist the remote dial in user or a wireless station and the RADIUS server in performing mutual authentication It enables centralized remote access authentication for network management The WPA encrypts each fram...

Страница 92: ... to greater security but lower performance Default is 3600 seconds Set 0 to disable re key Such feature is available for WPA2 802 1 WPA 802 1x WPA PSK or WPA2 PSK or Mixed WPA WPA2 PSK mode PMK Cache Period Set the expire time of WPA2 PMK Pairwise master key cache PMK Cache manages the list from the BSSIDs in the associated SSID with which it has pre authenticated Such feature is available for WPA...

Страница 93: ...ng The default value is 1812 based on RFC 2138 Shared Secret The external RADIUS server and client share a secret that is used to authenticate the messages sent between them Both sides must be configured to use the same shared secret Session Timeout Set the maximum time of service provided before re authentication Set to zero to perform another authentication immediately after the first authentica...

Страница 94: ...Edit Edit the selected MAC address in the list Cancel Give up the access control set up OK Click it to save the access control list Cancel Clean all entries in the MAC address list 3 3 9 9 4 4 A AP P D Di is sc co ov ve er ry y VigorAP 800 can scan all regulatory channels and find working APs in the neighborhood Based on the scanning result users will know which channel is clean for usage Also it ...

Страница 95: ...uthentication type that the scanned AP applied Scan It is used to discover all the connected AP The results will be shown on the box above this button 3 3 9 9 5 5 S St ta at ti io on n L Li is st t Station List provides the knowledge of connecting wireless clients now along with its status code MAC Address Display the MAC Address for the connecting client SSID Display the SSID that the wireless cl...

Страница 96: ...ess access the Access Control facility allows you to restrict the network access right by controlling the wireless LAN MAC address of client Only the valid MAC address that has been configured can access the wireless LAN interface Add Click this button to add current typed MAC address into Access Control ...

Страница 97: ... Clear current settings for user profile Delete Selected Delete the selected user profile s Delete All Delete all of the user profiles Authentication Client This internal RADIUS server of VigorAP 800 can be treated as the external RADIUS server for other users Specify the client IP and secret key to make the wireless client choosing VigorAP 800 as its external RADUIS server Client IP Type the IP a...

Страница 98: ...y ys st te em m S St ta at tu us s The System Status provides basic network settings of Vigor modem It includes LAN and WAN interface information Also you could get the current running firmware version or firmware related information from this presentation Model Name Display the model name of the modem Firmware Version Display the firmware version of the modem Build Date Time Display the date and ...

Страница 99: ...with such device 3 3 1 11 1 2 2 T TR R 0 06 69 9 This device supports TR 069 standard It is very convenient for an administrator to manage a TR 069 device through an Auto Configuration Server e g VigorACS SI ACS Server URL Username Password Such data must be typed according to the ACS Auto Configuration Server you want to link Please refer to Auto Configuration Server user s manual for detailed in...

Страница 100: ...e the port number of the STUN server Minimum Keep Alive Period If STUN is enabled the CPE must send binding request to the server for the purpose of maintaining the binding in the Gateway Please type a number as the minimum period The default setting is 60 seconds Maximum Keep Alive Period If STUN is enabled the CPE must send binding request to the server for the purpose of maintaining the binding...

Страница 101: ...w the steps below to backup your configuration 1 Go to System Maintenance Configuration Backup The following windows will be popped up as shown below 2 Click Backup button to get into the following dialog Click Save button to open another dialog for saving configuration as a file 3 In Save As dialog the default filename is config cfg You could give it another name by yourself ...

Страница 102: ...correct configuration file for uploading to the modem 3 Click Restore button and wait for few seconds the following picture will tell you that the restoration procedure is successful 3 3 1 11 1 5 5 R Re eb bo oo ot t S Sy ys st te em m The Web Configurator may be used to restart your modem Click Reboot System from System Maintenance to open the following page If you want to reboot the modem using ...

Страница 103: ...over Windows OS Operating System Download the newest firmware from DrayTek s web site or FTP site The DrayTek web site is www draytek com or local DrayTek s web site and FTP site is ftp draytek com Click System Maintenance Firmware Upgrade to launch the Firmware Upgrade Utility Click Browse to locate the newest firmware from your hard disk and click Upgrade 3 3 1 12 2 D Di ia ag gn no os st ti ic ...

Страница 104: ... When you click the menu item under Support Area you will be guided to visit www draytek com and open the corresponding pages directly Click Support Area Application Note the following web page will be displayed Click Support Area FAQ the following web page will be displayed ...

Страница 105: ...VigorAP 800 User s Guide 95 Click Support Area Product Registration the following web page will be displayed ...

Страница 106: ...VigorAP 800 User s Guide 96 This page is left blank ...

Страница 107: ...will be asked to copy onto your computer Remember the place of storing the execution file 1 Go to www draytek com 2 Access into Support Downloads Please find out Firmware menu and click it Search the model you have and click on it to download the newly update firmware for your router 3 Access into Support Downloads Please find out Utility menu and click it 4 Click on the link of Router Tools to do...

Страница 108: ...rograms and choose Modem Tools XXX Firmware Upgrade Utility 8 Type in your modem IP usually 192 168 1 1 9 Click the button to the right side of Firmware file typing box Locate the files that you download from the company web sites You will find out two files with different extension names xxxx all keep the old custom settings and xxxx rst reset all the custom settings to default settings Choose an...

Страница 109: ...VigorAP 800 User s Guide 99 10 Click Send 11 Now the firmware update is finished ...

Страница 110: ...ing figure In the above figure VigorAP 800 is used to control the wireless network connection It can separate the wireless traffic between accessing internal server and the usage of video Wireless station connecting to VigorAP 800 with SSID 1 can get the IP address with the network segment of 192 168 1 0 24 LAN A wireless station connecting to VigorAP800 with SSID 2 can get the IP address with the...

Страница 111: ... Setup Choose the subnet LAN A for SSID 1 and choose LAN B for SSID 2 Specify the wireless channel Then click OK to save the configuration 3 Open Wireless LAN Security Settings Set the encryption method and set the password for SSID 1 and SSID 2 respectively ...

Страница 112: ...nt skip this step 5 After finishing the above settings the wireless equipment connecting to VigorAP 800 with SSID 1 can get the IP address assigned by LAN A 192 168 1 0 24 for accessing the internal server The wireless equipment connecting to VigorAP 800 with SSID 2 can get the IP address assigned by LAN B 192 168 2 0 24 for using the video audio uploading and downloading services ...

Страница 113: ...e OK or not z Backing to factory default setting if necessary If all above stages are done and the modem still cannot run normally it is the time for you to contact your dealer for advanced help 5 5 1 1 C Ch he ec ck ki in ng g I If f t th he e H Ha ar rd dw wa ar re e S St ta at tu us s I Is s O OK K o or r N No ot t Follow the steps below to verify the hardware status 1 Check the power line and ...

Страница 114: ... trying the above section if the link is stilled failed please do the steps listed below to make sure the network connection settings is OK F Fo or r W Wi in nd do ow ws s The example is based on Windows XP As to the examples for other operation systems please refer to the similar steps or find support notes in www draytek com 1 Go to Control Panel and then double click on Network Connections 2 Ri...

Страница 115: ...ically and Obtain DNS server address automatically F Fo or r M Ma ac cO Os s 1 Double click on the current used MacOs on the desktop 2 Open the Application folder and get into Network 3 On the Network screen select Using DHCP from the drop down list of Configure IPv4 ...

Страница 116: ...correctly F Fo or r W Wi in nd do ow ws s 1 Open the Command Prompt window from Start menu Run 2 Type command for Windows 95 98 ME or cmd for Windows NT 2000 XP Vista The DOS command dialog will appear 3 Type ping 192 168 1 2 and press Enter If the link is OK the line of Reply from 192 168 1 1 bytes 32 time 1ms TTL 255 will appear 4 If the line does not appear please check the IP address setting o...

Страница 117: ...you pressing The password of factory default is null S So of ft tw wa ar re e R Re es se et t You can reset the modem to factory default via Web page Go to System Maintenance and choose Reboot System on the web page The following screen will appear Choose Using factory default configuration and click OK After few seconds the modem will return all the settings to the factory settings H Ha ar rd dw ...

Страница 118: ...he modem again to fit your personal request 5 5 5 5 C Co on nt ta ac ct ti in ng g Y Yo ou ur r D De ea al le er r If the modem still cannot work correctly after trying many efforts please contact your dealer for further help right away For any questions please feel free to send e mail to support draytek com ...

Отзывы: