


Diver6 User Manual
Section 8: Page 84 of 87
Map Movement
The map can be moved by using the standard touch screen hand gestures. The pinch and pull commands
will zoom the map in and out. You can also zoom using the plus and minus buttons in the upper left-hand
corner. The map can also be dragged in any direction using the provided stylus or your index finger.
Marker Identification
The markers on the screen are color-coded and consistent with the color scheme of markers throughout
the Diver6 software.
Blue Pin:
Represents a normal active diver.
Red Pin:
Represents a diver with an alarm condition.
White Pin:
Represents the craft (Ownship).
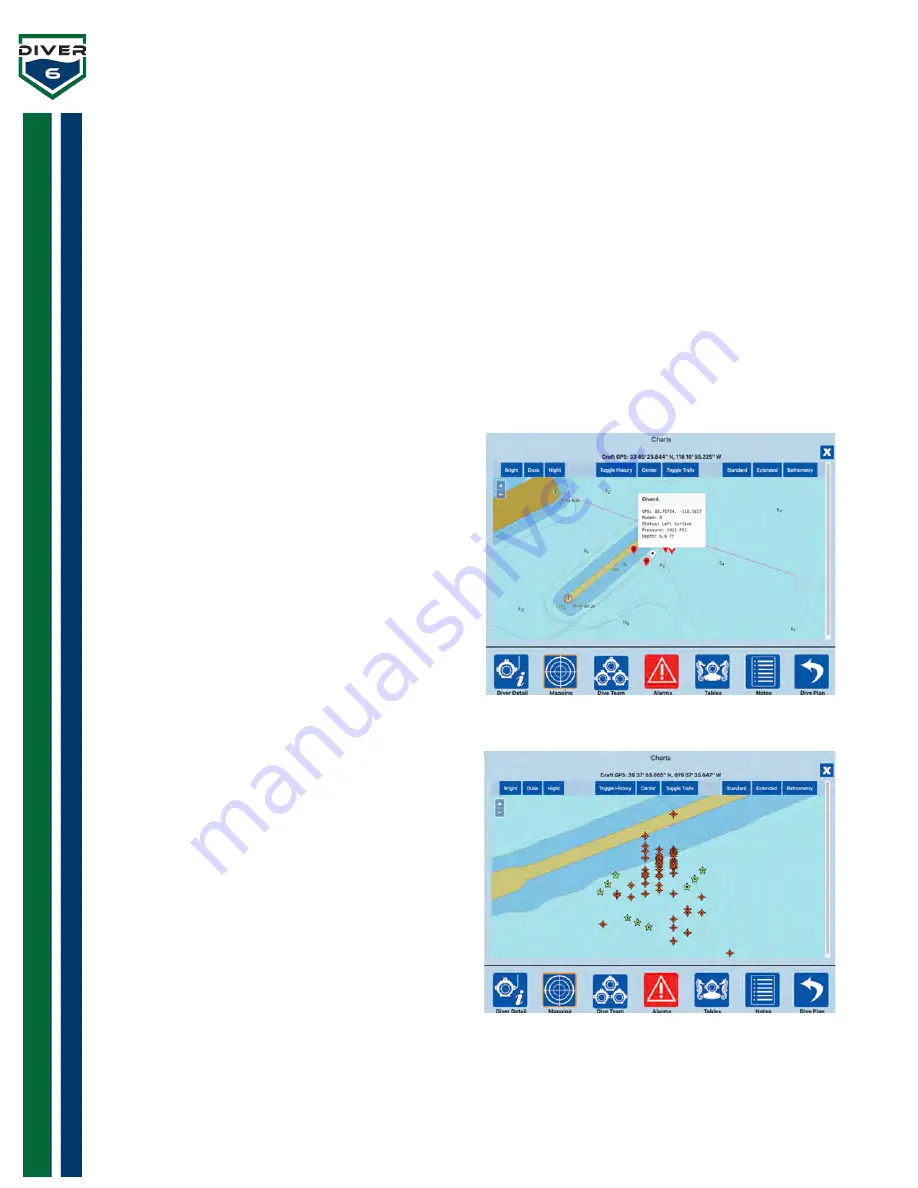
Diver Information
Each diver on the screen has metadata for the Dive
Master to view (Figure 78). By hovering the stylus
over the diver marker or selecting a diver marker, a
pop-up window will appear with information on that
diver. This is a quick way for the Dive Master to get
information on the diver in the water.
History and Trails
When the Dive Master loads historical data into the
system or turns on the current dive breadcrumb trails
for divers, that data can be viewed in real time on the
charts (Figure 79). The Toggle History and Toggle
Trails buttons will show the diver data as an overlay
on the charts. Historical data will appear as orange
diamonds. Current dive breadcrumb trails will appear
as green stars.
Figure 78: Chart Server Window
Figure 79: History and Trails


