


Diver6 User Manual
Section 5: Page 43 of 87
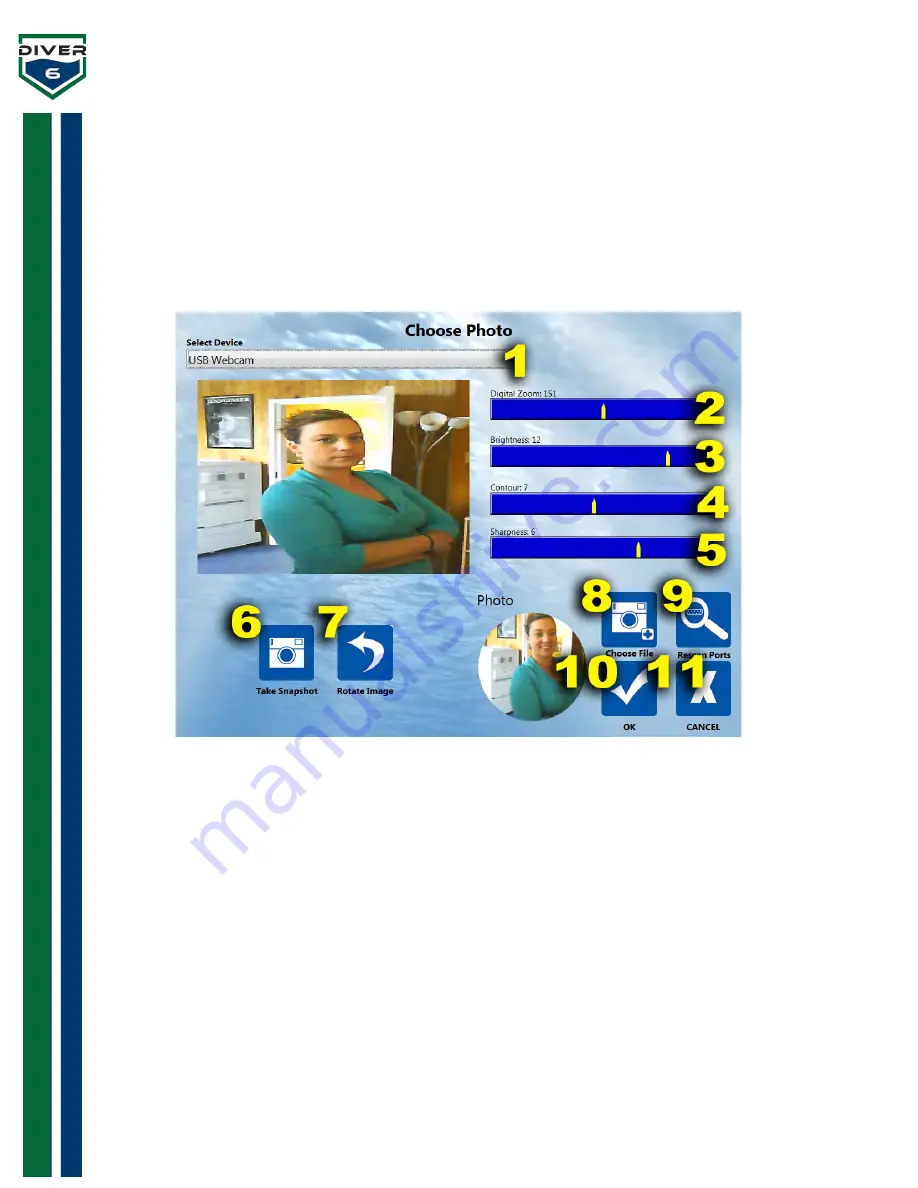
Choose Photo
Any onboard/attached camera can be used to take an image of the Dive Master, diver, or a destination.
The camera viewfinder in the upper left allows the user to focus on the subject and capture the image.
This image will appear in the Photo Profile in the lower right. Each time an image is taken, the Photo
Profile will update with the latest image.
The Choose Photo Screen provides the following operations (Figure 30, Figure 31): (controls will vary on
Windows and Apple products)
Figure 30: Windows Photo Screen
1.
Select Device
– onboard/attached camera devices appear in this box.
2.
Digital Zoom
– the ability to zoom the image in and out (Windows only).
3.
Brightness
– controls the brightness level of the image (Windows only).
4.
Contour
– controls the contour / contrast of the image (Windows only).
5.
Sharpness
– controls the sharpness of the image (Windows only).
6.
Take Snapshot
– this button captures the image and places it in the Photo Profile in the lower
right.
7.
Rotate Image
– rotates the image 90, 180, 270 degrees (Windows only).
8.
Choose File
– To use an existing image, choose this button and a file dialog box will appear.
9.
Rescan Ports
– This button will rescan the ports looking for addition cameras that may have
been connected.
10.
OK
- Returns to the previous screen and save the image in the Photo Profile in the respective
profile.
11.
Cancel
- Leaves the Choose Photos screen and makes no changes.


