© 2004 Directed Electronics, Inc. Vista, CA
1
19
9
screwing down the control module. We recommend mounting the control module to a large wiring loom.
N
NO
OTTEE:: When adjusting the sensor, it must be mounted in the same location where it will be
after the installation is completed. Adjusting the sensor and then relocating the module
requires readjustment.
bbyyppaassssiinngg sseennssoorr iinnppuuttss
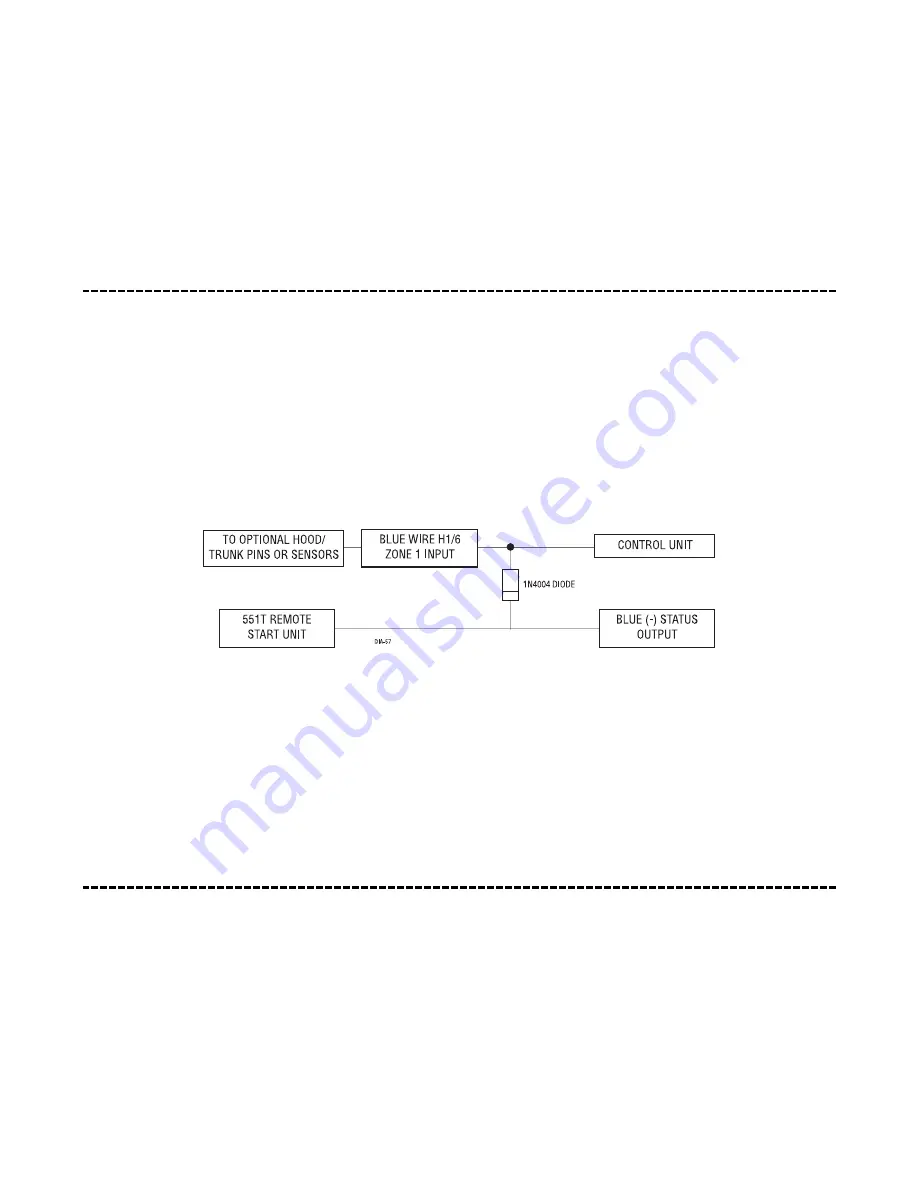
There are times when you need to temporarily bypass all sensor inputs to the unit, such as when remote start-
ing the vehicle. Anytime an auxiliary channel output is used, all inputs are bypassed for 5 seconds. During the
5 second bypass period, ground can be supplied to the H1/6 BLUE wire without triggering the unit. When the 5
second bypass period ends, if the unit detects ground on the H1/6 BLUE wire, all trigger inputs except the door
trigger input will remain bypassed until 5 seconds after ground is removed from the BLUE wire. This can be done
using the status output of a 551T or 561T remote start unit as shown below:
ttrraannssm
miitttteerr//rreecceeiivveerr rreem
moottee ccoonnttrrooll ccooddee lleeaarrnniinngg
The system comes with two transmitters that have been taught to the receiver. Use the following
transmitter/receiver remote control code learning to add transmitters to the system or to change button assign-
ments if desired.
The Valet®/Program button, plugged into the blue port, is used for programming. There is a basic sequence to
remember whenever programming this unit: Door, Key, Choose, Transmit and Release.
Содержание Hornet 740T
Страница 28: ...2 28 8 2004 Directed Electronics Inc Vista CA...


