


5-2
5. Using the Viewer
Digital Projection
MERCURY HD
NOTE:
• To use the Viewer, first you need to create presentation materials on
your PC using the Dynamic Image Utility 2.0 contained on the
supplied Projector User Supportware CD-ROM. For installation, see
“6-
5
Software Installation”. For creating presentation materials, see
the Slide show function on the on-line manual of the Dynamic Image
Utility 2.0.
• Selecting Viewer sets the audio input for DVI input.
1
Making the Most out of the Viewer
Function
Features
You can view presentation data, capture and play images on
the projector. A PC card is used to view presentation data pre-
pared on the computer and to capture and play images pro-
jected with the projector.
The Viewer feature allows you to view slides stored on a PC
memory card (referred to as PC card in this manual) on the pro-
jector. Even if no computer is available, presentations can be
conducted simply with the projector. This feature is convenient
for holding presentations at meetings and in offices, as well as
for playing images taken on digital cameras.
Easy to use
•
Presentations can be started immediately simply by inserting a
PC card (not supplied)
•
Easy slide switching
•
Remote control operation
•
Jumping to list of slides or any specific slide
High quality images
•
High resolution up to 1280 x 720 dots
•
24-bit full color playback
•
Viewing of digital camera images
Simple utility software (for computer)
•
Dynamic Image Utility 2.0 operable on Windows 98/Me/XP/2000
•
Slides can be created by capturing the currently displayed image
•
Control screen for displaying lists of slides and editing
*
Microsoft, Windows and PowerPoint are registered trademarks
of Microsoft Corporation.
Removing the PC Card
Press the eject button slowly. The eject button card pops
out a little. Press the eject button slowly again. Grasp the
edges of the PC card and pull it out. Push and insert the
eject button fully until it stops.
NOTE: Do not eject the PC card while its data is being accessed.
CAUTION: Make sure that the PC card or LAN card is removed
during Standby mode (NOT Idle mode)or with the main power
off.Failure to do so may cause damage to the data on your PC
card or LAN card,or may cause the projector to
malfunction.Should a malfunction occur, turn off the main power
and turn it back on.
Inserting and Removing a PC Card
NOTE:
• Do not try to force the PC card into the slot.
PC Card Type
The PC Card slot accepts PCMCIA Type II only.
NOTE: When using two PC cards, do not insert both PC cards into the
two PC card slots simultaneously. Doing so may cause projector
malfunction such as shutting down. Each PC card must be inserted
slowly one at a time.
NOTE: The PC card has a top and bottom and must be inserted into the
PC card slot in a specific direction. It cannot be inserted backwards or
upside-down. Attempting to force it into the slot in the wrong direction
may break the internal pin and damage the card slot. Refer to the PC
card's operating instructions for the proper direction of insertion.
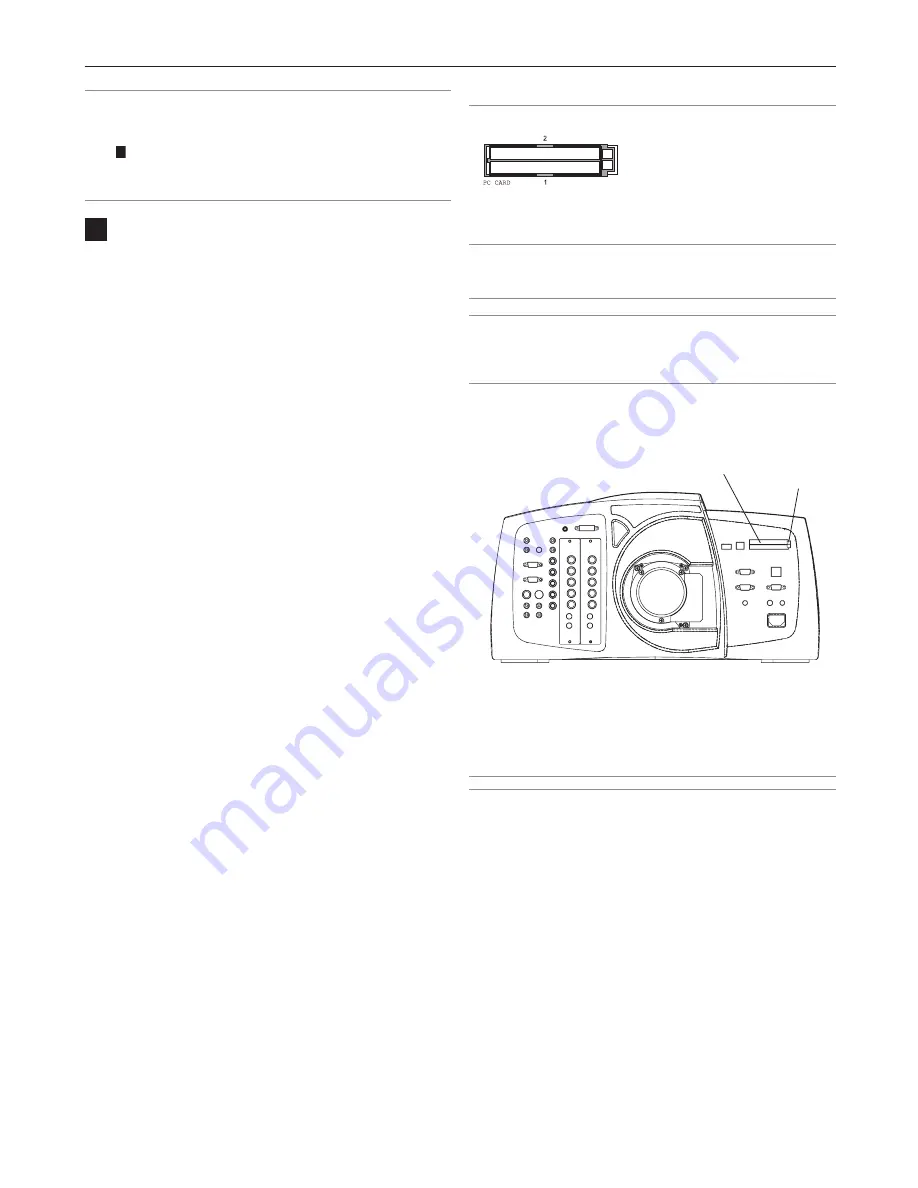
Inserting the PC Card
•
Hold the PC card horizontally and insert it slowly into PC card
slot 1 or 2 with its top facing up.
Eject button
PC card slot
Содержание Mercury HD
Страница 2: ...ii...
Страница 6: ...vi Digital Projection MERCURY HD...
Страница 8: ...viii Digital Projection MERCURY HD...
Страница 32: ...2 12 2 Installation Digital Projection MERCURY HD...
Страница 40: ...3 8 3 Projecting an Image Digital Projection MERCURY HD...
Страница 50: ...5 6 5 Using the Viewer Digital Projection MERCURY HD...
Страница 60: ...6 10 6 Using the Projector in a Network Digital Projection MERCURY HD...
Страница 98: ...9 4 9 Routine Maintenance Digital Projection MERCURY HD...


