166
Adding and Replacing Parts
Replacing the Hard Drive
1
Remove the new drive from its packaging.
Save the original packaging for storing or shipping the hard drive.
NOTICE:
Use firm and even pressure to slide the drive into place. If you use
excessive force, you may damage the connector.
2
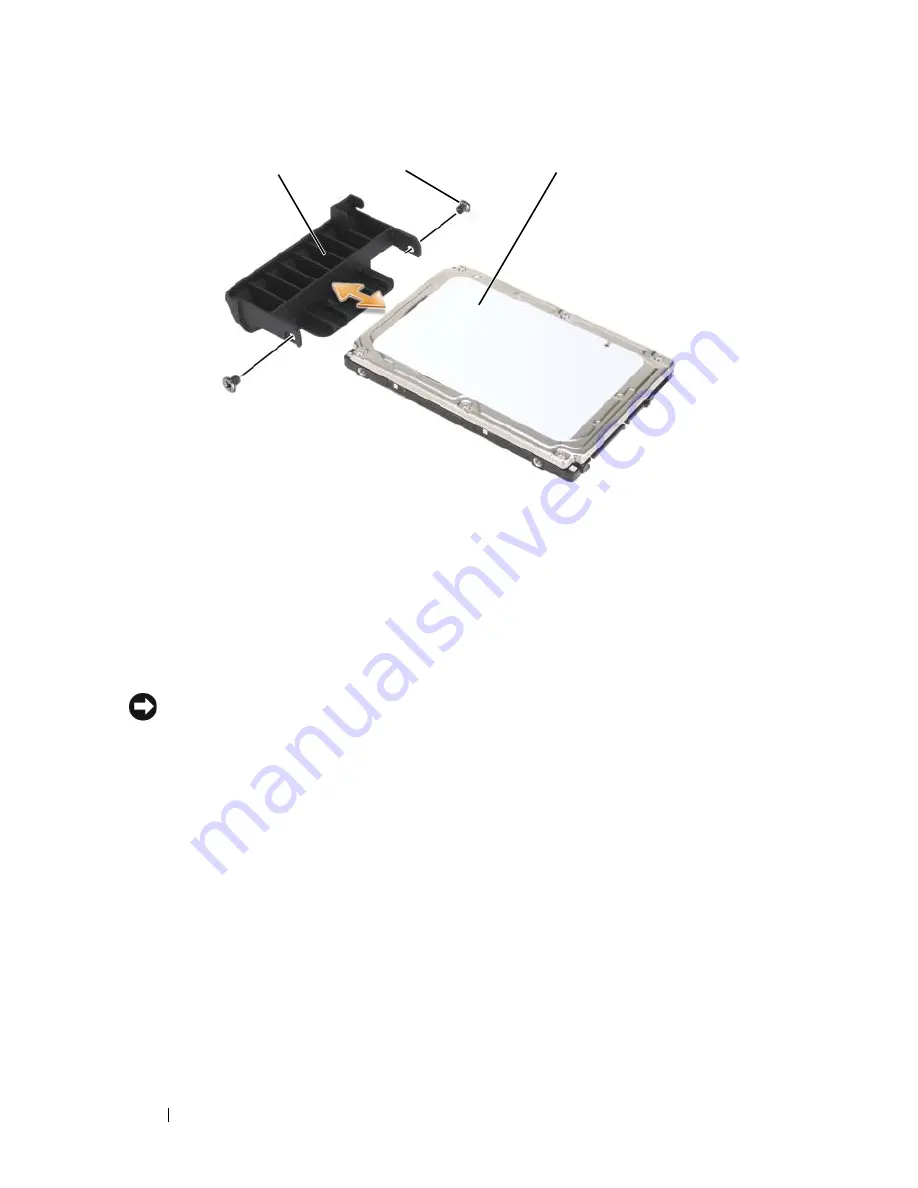
Slide the hard drive bezel that you took off the old hard drive onto the new
hard drive, and fasten the two hard-drive bezel screws.
3
Slide the hard drive into the hard drive bay until it is fully seated.
4
Replace and tighten the hard drive screws.
5
Install the operating system for your computer, as needed (see "Restoring
your Microsoft Windows Operating System" on page 150).
6
Install the drivers and utilities for your computer, as needed (see
"Reinstalling Drivers and Utilities" on page 146).
1
hard drive bezel
2
hard-drive bezel screws (2)
3
hard drive
3
1
2
Содержание Vostro 1500
Страница 1: ...w w w d e l l c o m s u p p o r t d e l l c o m Dell Vostro 1500 Owner s Manual Model PP22L ...
Страница 14: ...14 Contents ...
Страница 20: ...20 Finding Information ...
Страница 36: ...36 About Your Computer ...
Страница 52: ...52 Using the Display ...
Страница 58: ...58 Using the Keyboard and Touch Pad ...
Страница 94: ...94 Using ExpressCards ...
Страница 108: ...108 Setting Up and Using Networks ...
Страница 112: ...112 Securing Your Computer ...
Страница 183: ...Adding and Replacing Parts 183 1 captive screws 2 2 Mini Card cover 1 2 ...
Страница 192: ...192 Adding and Replacing Parts ...
Страница 194: ...194 Dell QuickSet Features ...
Страница 204: ...204 Getting Help ...
Страница 214: ...214 Specifications ...
Страница 224: ...224 Appendix ...
Страница 242: ...242 Glossary ...


