86
Installing System Components
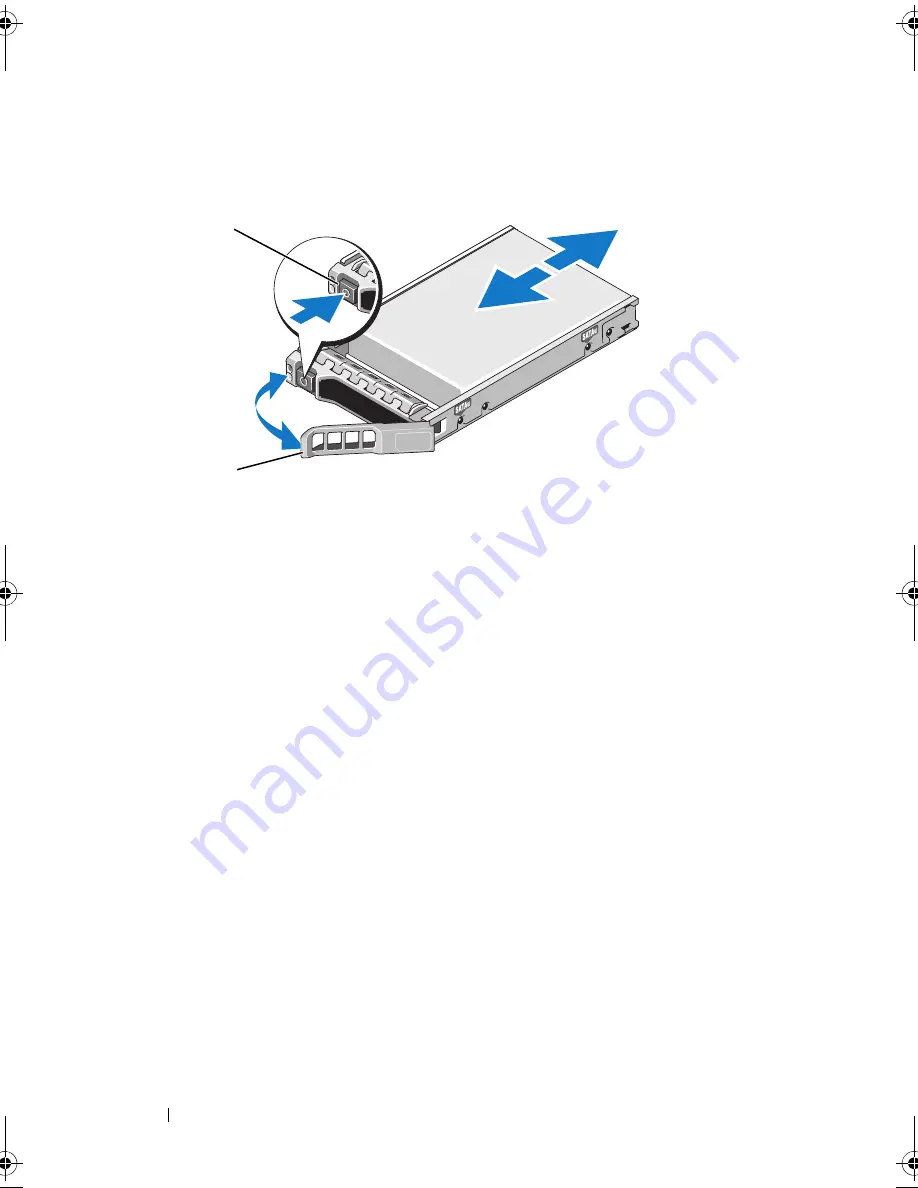
Figure 3-5.
Installing a Hot-Swap Hard Drive
3
Install the hot-swap hard drive.
a
Press the button on the front of the drive carrier and open the handle.
b
Insert the hard-drive carrier into the drive bay until the carrier
contacts the backplane.
c
Close the handle to lock the drive in place.
4
Replace the front bezel. See "
Installing the Front Bezel."
Removing a Hard Drive From a Hard-Drive Carrier
Remove the screws from the slide rails on the hard-drive carrier and separate
the hard drive from the carrier. See
Figure 3-6
.
Installing a Hard Drive Into a Hard-Drive Carrier
1
Insert the hard drive into the hard-drive carrier with the connector end
of the drive at the back. See
Figure 3-6
.
2
Align the screw holes on the hard drive with the back set of holes on the
hard-drive carrier.
1
release button
2
hard drive carrier handle
2
1
book.book Page 86 Tuesday, September 15, 2009 10:08 AM
Содержание PowerEdge T610
Страница 1: ...Dell PowerEdge T610 Systems Hardware Owner s Manual ...
Страница 23: ...About Your System 23 Figure 1 5 Power Supply Status Indicator 1 power supply status 1 ...
Страница 56: ...56 About Your System ...
Страница 154: ...154 Installing System Components ...
Страница 188: ...188 Jumpers and Connectors ...
Страница 190: ...190 Getting Help ...
Страница 205: ...Index 205 warranty 55 wet system troubleshooting 158 ...
Страница 206: ...206 Index ...


