Installing System Components
107
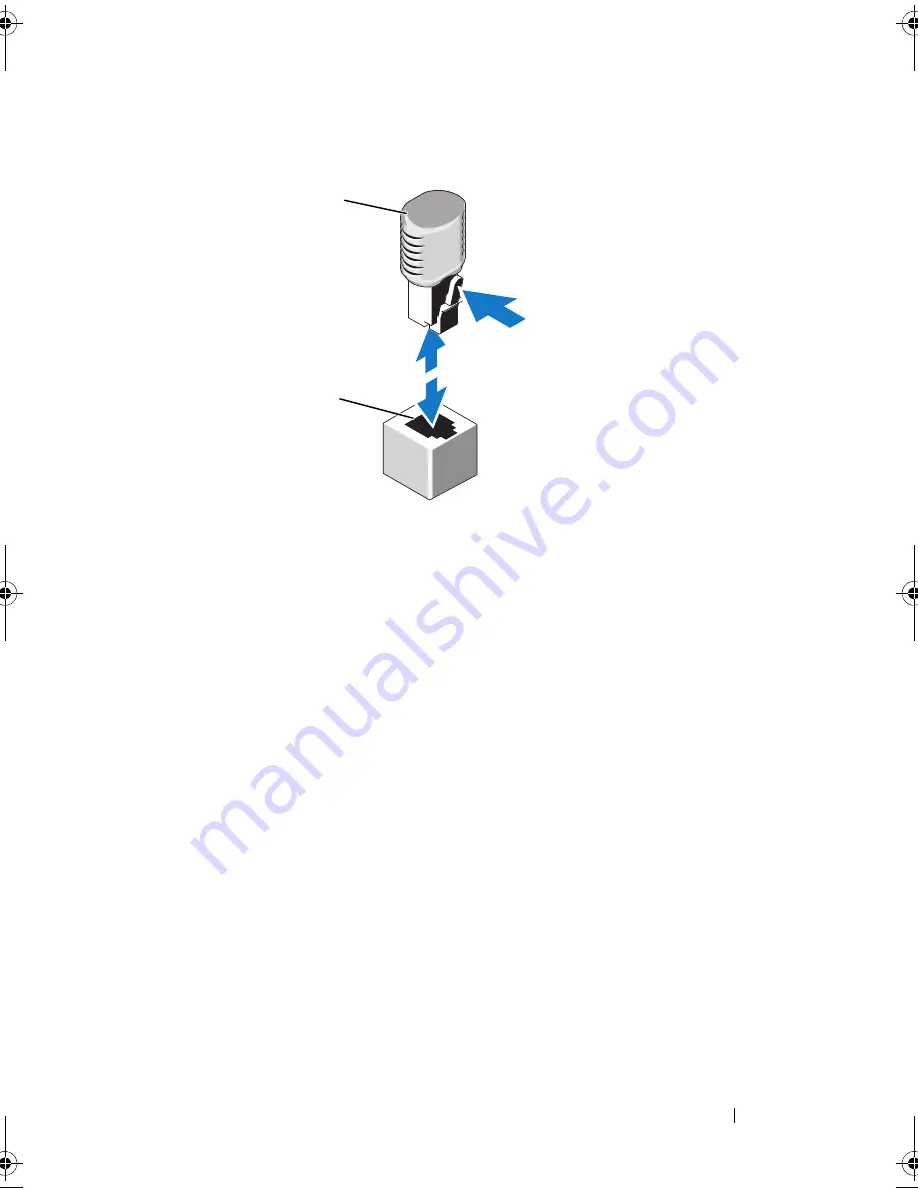
Figure 3-14.
Removing and Installing a NIC Hardware Key
5
Close the system. See "Closing the System."
6
Place the system upright and on its feet on a flat, stable surface.
7
Reattach any peripherals, then connect the system to the electrical outlet.
8
Turn on the system and attached peripherals.
Optical and Tape Drives
In your system’s two 5.25-inch drive bays, you can install one or two optical
drives, one half-height tape drive, or one full-height tape drive.
Removing an Optical or Tape Drive
1
Turn off the system and attached peripherals, and disconnect the system
from the electrical outlet and peripherals.
2
Open the system. See "Opening the System."
3
Remove the expansion card stabilizer. See "Removing the Expansion Card
Stabilizer."
4
Remove the cooling shroud. See "Removing the Cooling Shroud."
1
NIC hardware key
2
ISCSI_KEY connector
1
2
book.book Page 107 Tuesday, September 15, 2009 10:08 AM
Содержание PowerEdge T610
Страница 1: ...Dell PowerEdge T610 Systems Hardware Owner s Manual ...
Страница 23: ...About Your System 23 Figure 1 5 Power Supply Status Indicator 1 power supply status 1 ...
Страница 56: ...56 About Your System ...
Страница 154: ...154 Installing System Components ...
Страница 188: ...188 Jumpers and Connectors ...
Страница 190: ...190 Getting Help ...
Страница 205: ...Index 205 warranty 55 wet system troubleshooting 158 ...
Страница 206: ...206 Index ...


