


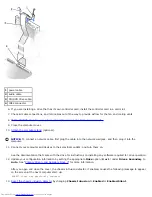


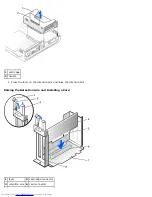


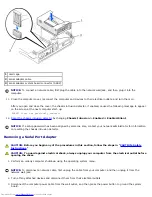


1
blower
4
retention base
2
screws (2)
5
heat sink
3
lever
9. Lift the heat sink/blower assembly away from the microprocessor.
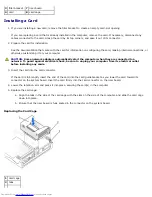
10. Remove the two screws on the blower to remove it from the heat sink.
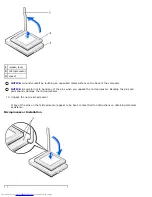
NOTICE:
Do not discard the blower. You will reuse it. If you are installing a microprocessor upgrade kit from Dell,
discard the original heat sink. If you are
not
installing a microprocessor upgrade kit from Dell, reuse the original heat
sink when you install your new microprocessor.
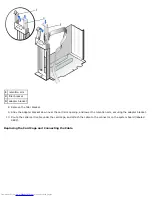
NOTICE:
Be careful not to bend any of the pins when you remove the microprocessor. Bending the pins can
permanently damage the microprocessor.
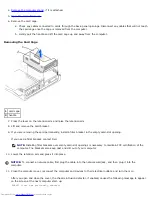
11. Pull the release lever straight up until the microprocessor is released, and then remove the microprocessor from the
socket.
Microprocessor Removal
Содержание GX260 - Optiplex Pentium 4 2.0GHz 512MB 40GB CD
Страница 6: ......
Страница 29: ......
Страница 37: ...Back to Contents Page ...
Страница 40: ...information on resetting the chassis intrusion detector Back to Contents Page ...
Страница 73: ......
Страница 76: ......
Страница 86: ...2 padlock ring 3 two release buttons one on each side Back to Contents Page ...
Страница 111: ......
Страница 128: ...1 release buttons 2 security cable slot 3 padlock ring Back to Contents Page ...
Страница 149: ...13 Verify that your computer works correctly by running the Dell Diagnostics Back to Contents Page ...
Страница 155: ...Back to Contents Page ...
Страница 186: ...Back to Contents Page ...
Страница 210: ...Back to Contents Page ...
Страница 232: ...BSMI Notice Taiwan Only ...


