Connecting Your Printer
31
WPS-PBC (Wi-Fi | WPS Button)
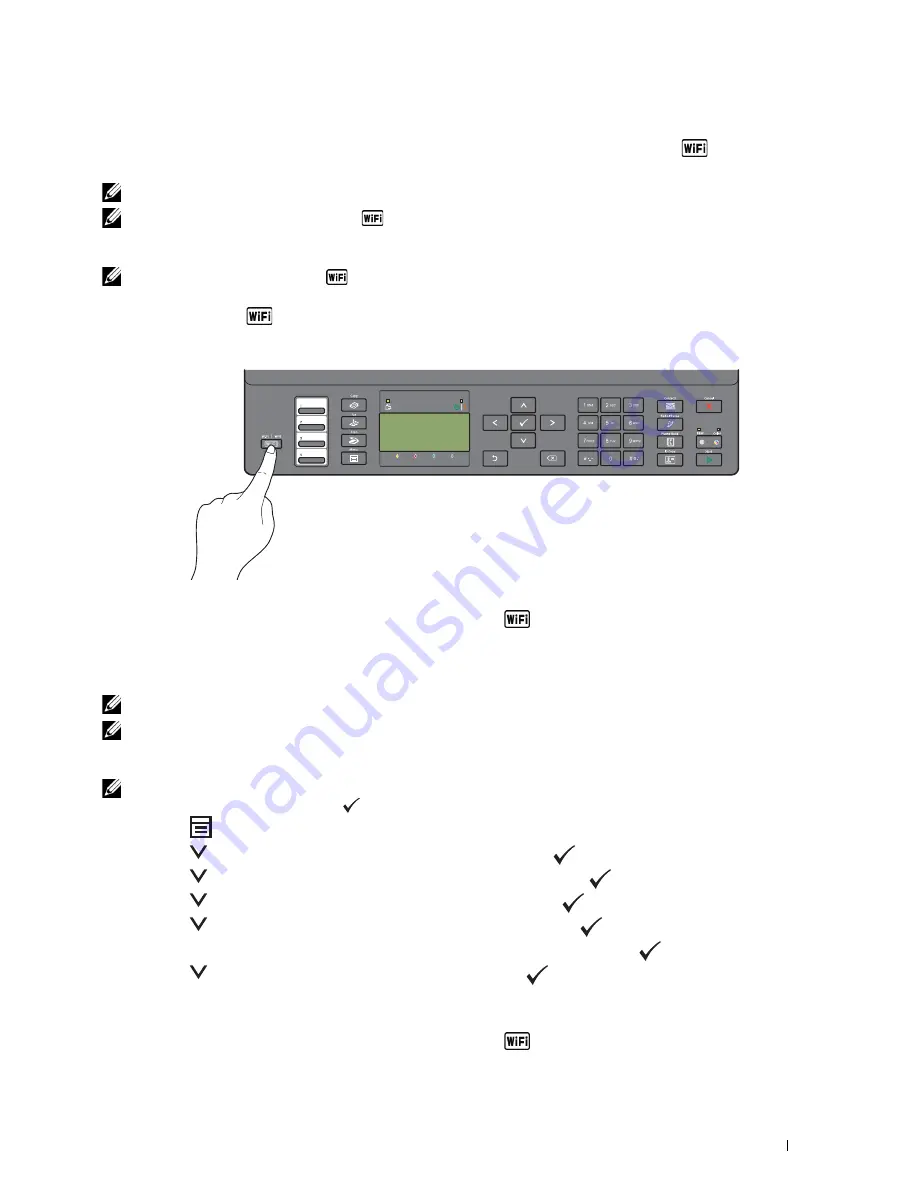
You can start WPS-PBC (Wi-Fi Protected Setup-Push Button Configuration) by pressing the
(
Wi-Fi | WPS
)
button.
NOTE:
WPS-PBC is available only when the wireless LAN access point (Registrar) or router supports WPS-PBC.
NOTE:
Before starting WPS-PBC with the
(Wi-Fi | WPS) button, confirm the position of the WPS button (button name may
vary) on the wireless LAN access point (Registrar) or router. For information about WPS operation on the wireless LAN access
point (Registrar) or router, refer to the manual supplied with the product.
NOTE:
For more information on the
(Wi-Fi | WPS) button, see
"Status of Wi-Fi | WPS Button Backlight" on page 72.
If a problem occurs or error messages are displayed on the operator panel, see "Wireless Problems" on page 306.
1
Press and hold the
(Wi-Fi | WPS
) button on the operator panel until the LCD panel shows
Press WPS
Button on WPS Router
.
2
Start the WPS operation on the wireless LAN access point (Registrar) or router within 2 minutes.
When the wireless LAN connection setting is completed, the
(Wi-Fi | WPS)
button lights up.
WPS-PBC (Operator Panel Menu)
You can start WPS-PBC (Wi-Fi Protected Setup-Push Button Configuration) from the operator panel.
NOTE:
WPS-PBC is available only when the wireless LAN access point (Registrar) or router supports WPS-PBC.
NOTE:
Before starting WPS-PBC, confirm the position of the WPS button (button name may vary) on the wireless LAN access
point (Registrar) or router. For information about WPS operation on the wireless LAN access point (Registrar) or router, refer to
the manual supplied with the product.
NOTE:
A password is required to enter
Admin Menu
when
Panel Lock Set
is set to
Enable
. In this case, enter the
password you specified, and press the
(Set) button.
1
Press the
(Menu)
button.
2
Press the
button until
System
is highlighted, and then press the
(Set)
button.
3
Press the
button until
Admin Menu
is highlighted, and then press the
(Set)
button.
4
Press the
button until
Network
is highlighted, and then press the
(Set)
button.
5
Press the
button until
WPS Setup
is highlighted, and then press the
(Set)
button.
6
Ensure that
Push Button Configuration
is highlighted, and then press the
(Set)
button.
7
Press the
button until
Yes
is highlighted, and then press the
(Set)
button.
Ensure that
Press WPS Button on WPS Router
is displayed, and start the WPS operation on the wireless
LAN access point (Registrar) or router within 2 minutes.
When the wireless LAN connection setting is completed, the
(Wi-Fi | WPS)
button lights up.
Содержание E525w
Страница 1: ...Dell Color Multifunction Printer E525w User s Guide Regulatory Model Dell E525w ...
Страница 2: ......
Страница 176: ...176 Printing Copying Scanning and Faxing 17 Printing 177 18 Copying 189 19 Scanning 200 20 Faxing 221 ...
Страница 260: ...260 Maintaining Your Printer 25 Maintaining Your Printer 261 26 Clearing Jams 276 ...
Страница 287: ...Clearing Jams 287 8 Close the rear cover ...
Страница 288: ...288 Troubleshooting 27 Troubleshooting 289 ...
Страница 308: ...308 Appendix Appendix 309 ...


