


PrintPAD CN3/4 & PrintPAD CN3e/4e USER'S GUIDE
5
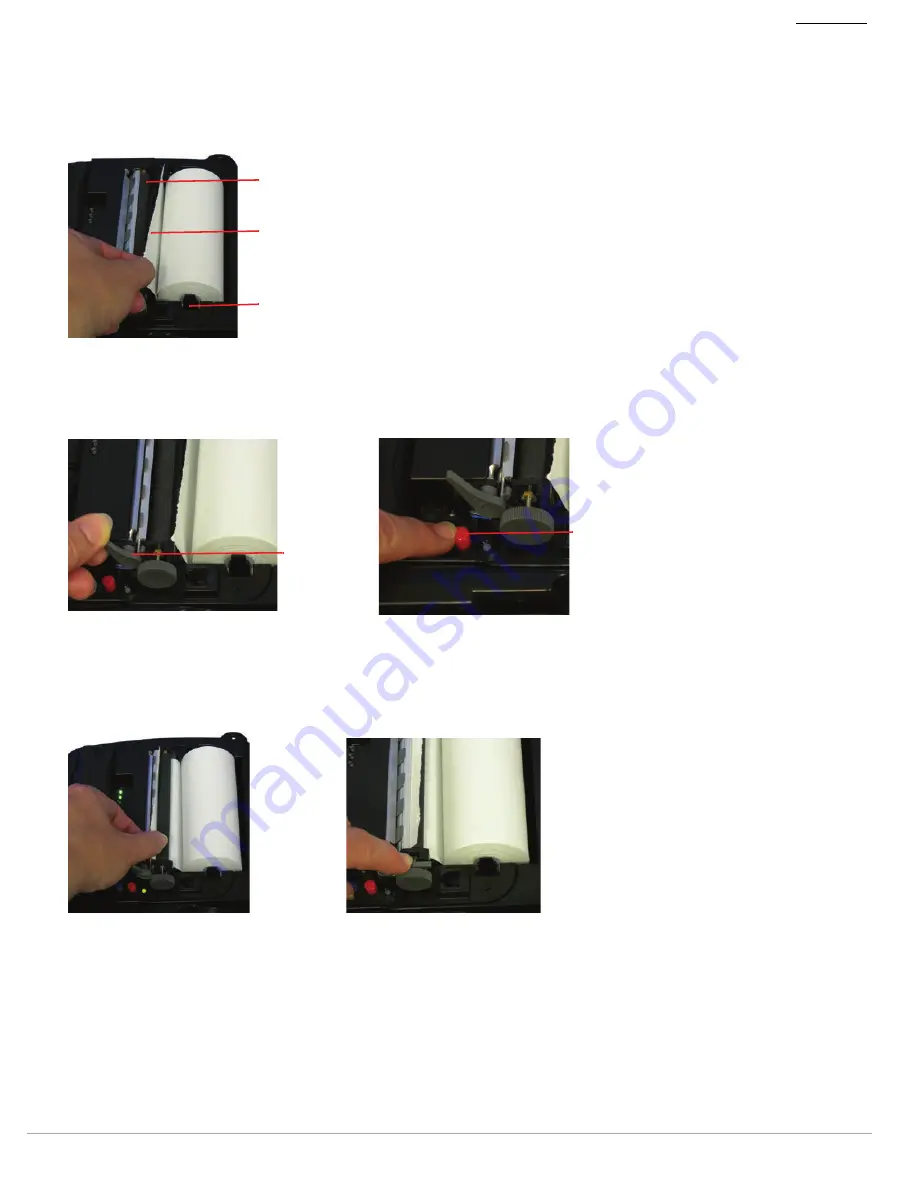
Loading Paper
1. Press a new roll of paper into the paper cavity. The end of the roll should exit from the bottom of the paper cavity
and face the printer's roller (Figure 8). When properly installed, the roll of paper “latches” into place.
2. Raise the printhead release lever until it is fully open. The lever clicks midway at the partially open position;
however, do not stop here, continue to raise the lever until it is fully open (Figure 9).
3. Wake up the printer by momentarily pressing the red self-test button (Figure 10).
4. Feed the end of the paper and center it under the roller until the paper exits from the top of the printhead (Figure
11). The printer has an auto advance feature that will aid moving the paper through the printer. Verify the paper
exits straight.
5. Lower the printhead release lever (Figure 12).
6. Remove any excess paper by grasping the top corner of the paper and pulling it up and away.
7. Close and latch the printer's cover.
Figure 8
Roller
End of paper roll
Paper latch
Figure 9
Figure 10
Printhead
release lever
Self-test
button
Figure 11
Figure 12
Содержание PrintPAD 1700
Страница 1: ...PrintPAD MC65 110288 000 User Guide ...
Страница 14: ...PRINTPAD MC70 110219 003 User Guide ...
Страница 37: ...PrintPAD CN3 4 3e 4e 110244 003 User Guide ...
Страница 51: ...PRINTPAD 7900 User Guide ...
Страница 69: ...PrintPAD Dolphin 99EX 110280 001 User Guide ...
Страница 83: ...PrintPAD CN70 70e 110287 001 User Guide ...
Страница 98: ...PrintPAD Series CN70 70e CN51 ...
Страница 101: ...1 1 Safety Information Please read the following safety information prior to setting up or operating your printer ...
Страница 112: ...13 3 Printer Configuration Use this chapter to configure your printer ...
Страница 124: ...25 A Printer Specifications ...
Страница 129: ...PRINTPAD SERIES OF PRINTERS User Guide ...


