


Removal and Replacement
4-21
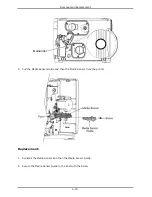
3.
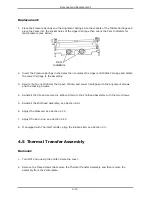
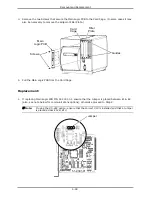
Raise the lock then reconnect the cable to the Media Sensor.
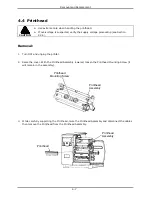
4.
Reinstall the Cover Assembly; see Section 4.1.
5. Perform calibration; see Section 2.1.2.
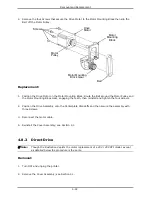
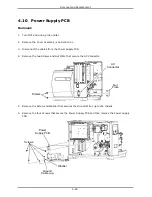
4.8 Drive Motor Assembly
Proceed with removal and replacement of the Drive Motor Assembly depending upon the type.
4.8.1
Belt Drive
Removal:
1. Turn OFF and unplug the printer.
2. Remove the Cover Assembly; see Section 4.1.
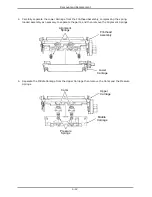
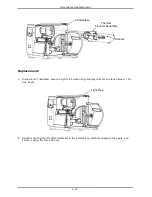
3.
Disconnect the motor cable then remove the three Screws that secure the Drive Assembly to the
Centerplate Standoffs.
Screws
Drive
Assembly
Centerplate
Standoffs
Содержание I-Class
Страница 1: ...I Maintenance Manual...
Страница 3: ...i Contents 1 Overview 2 Adjustments and Maintenance 3 Troubleshooting 4 Removal and Replacement...
Страница 4: ...ii...
Страница 5: ...i 1 Overview 1 0 Introduction 1 1 1 About the Printer 2...
Страница 6: ...ii...
Страница 38: ...ii...
Страница 56: ...ii 4 11 Main Logic PCB 27 4 12 Backplane PCB 29...